Complete WooCommerce Tutorial Step By Step
In this WooCommerce tutorial, we have decided to describe the most important settings and recommendations for launching your WooCommerce based online store. In addition to reviewing the features and basic settings, we will describe the best settings for optimizing your store SEO, fine-tuning performance, customizing your cache, and the settings for additional features that are not included in the basic WooCommerce plugin. Also you can see our Premmerce WooCommerce Plugins made to increase SEO rank of your store and get additional features for store management.
The first step in WooCommerce Tutorial: WordPress Installation
To install WordPress, you need to go to the WordPress official site at wordpress.org and download the latest version.
If your store already have WordPress installed, please update both WooCommerce & WordPress.
Then you need to install it on a local or remote hosting and go through quite an easy installation process.
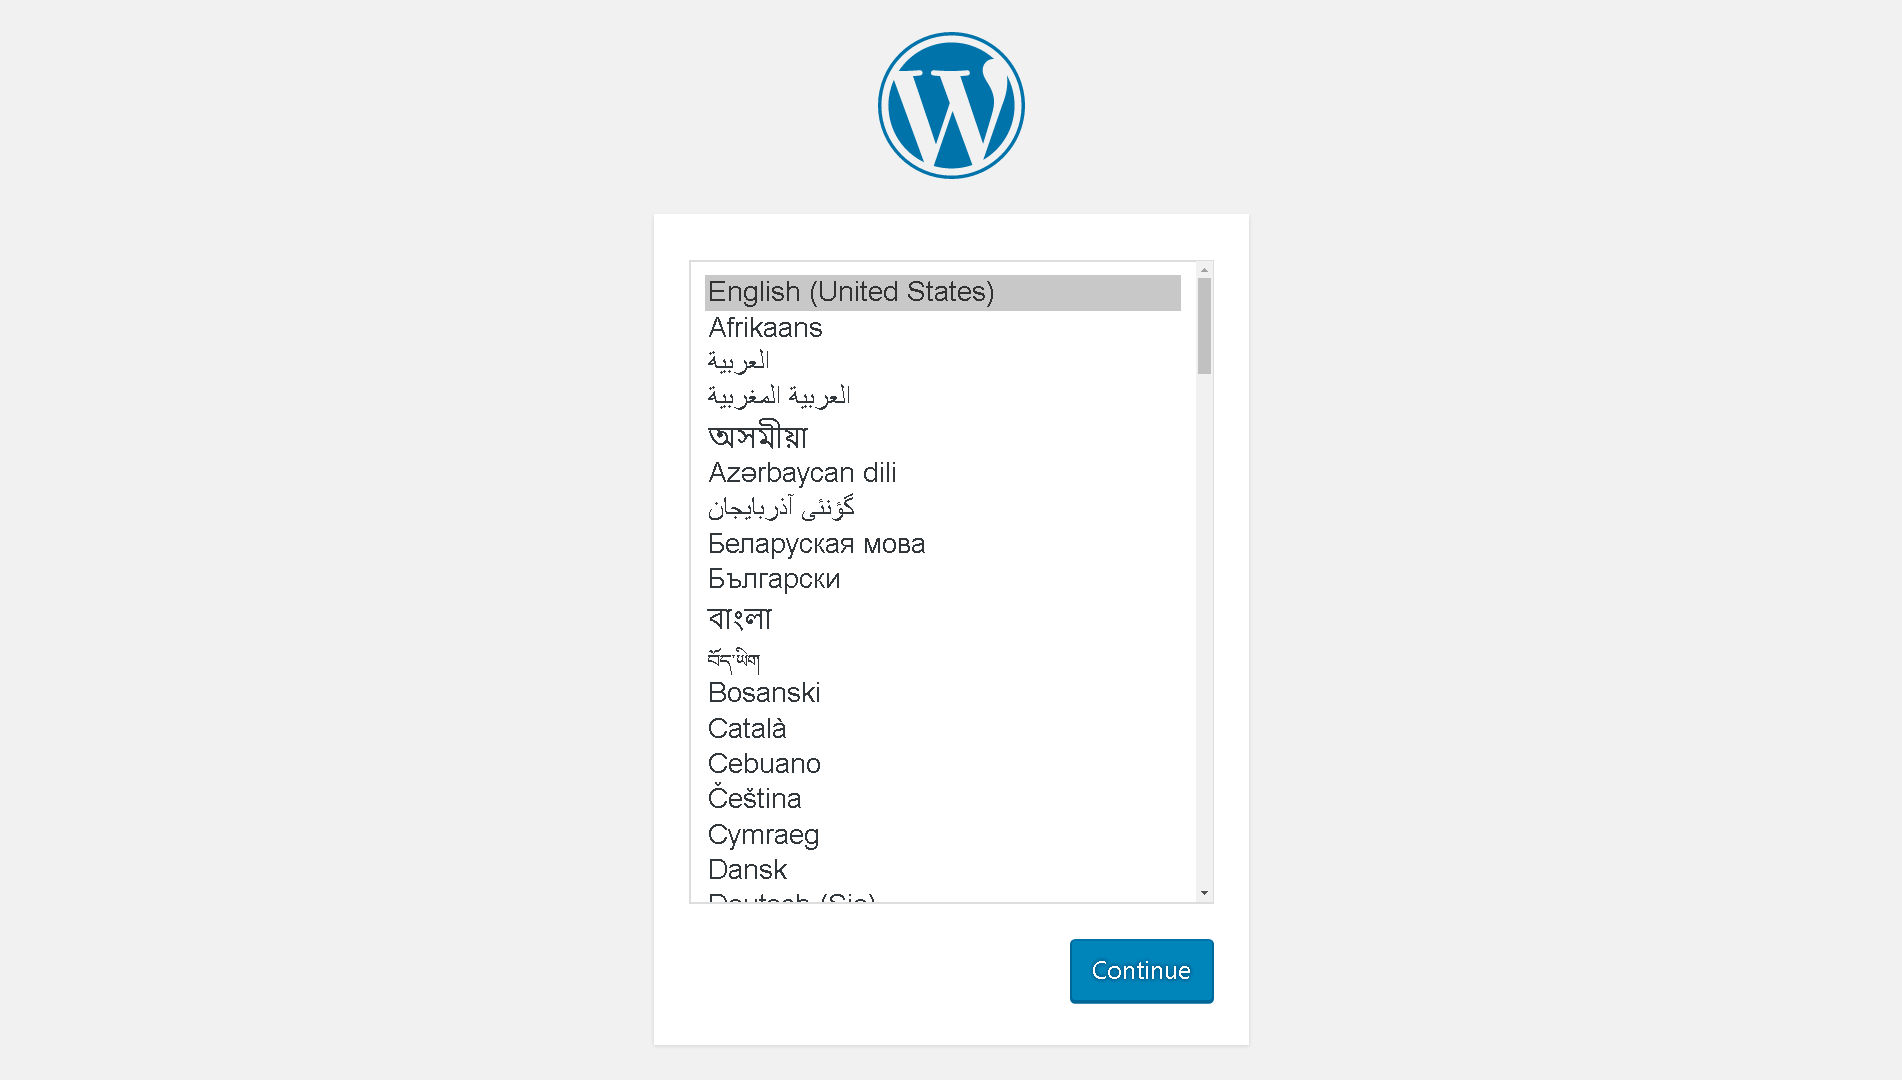
WordPress installation steps:
- Choosing language:
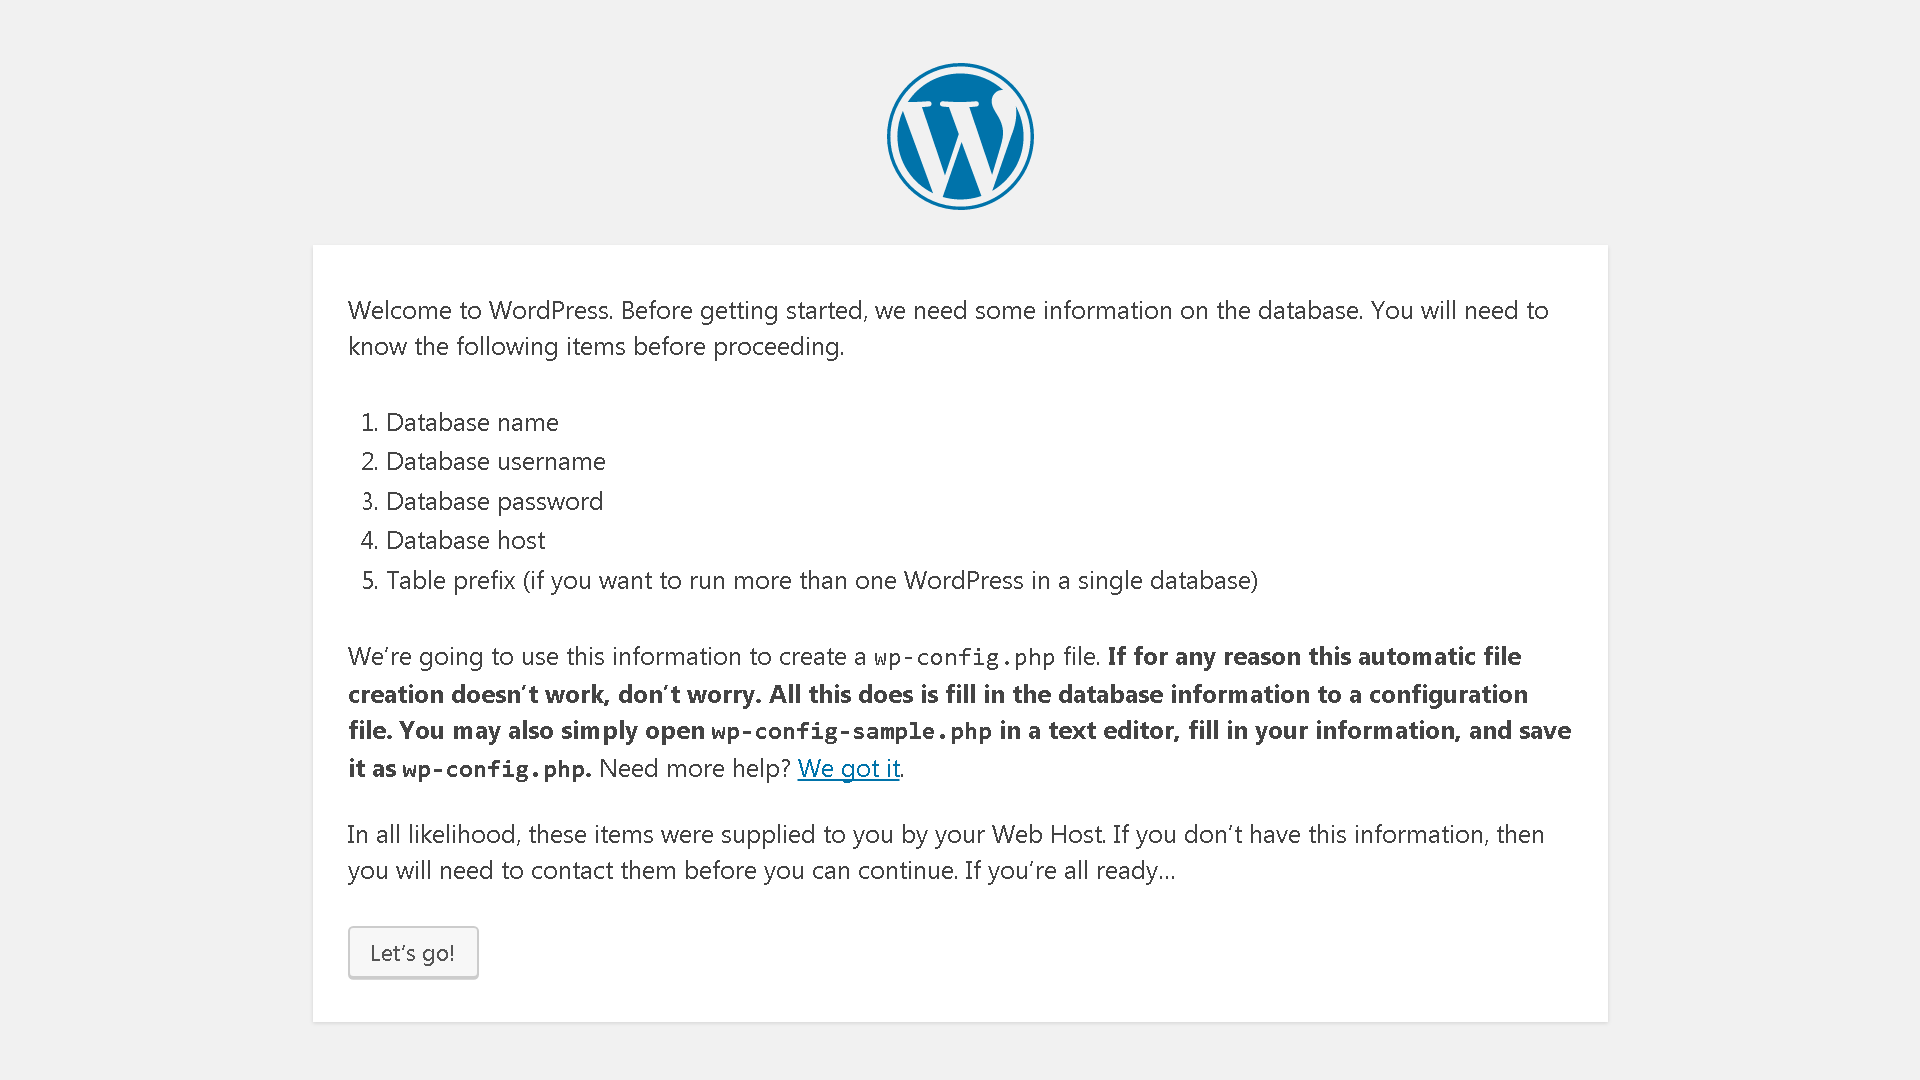
- Database information:
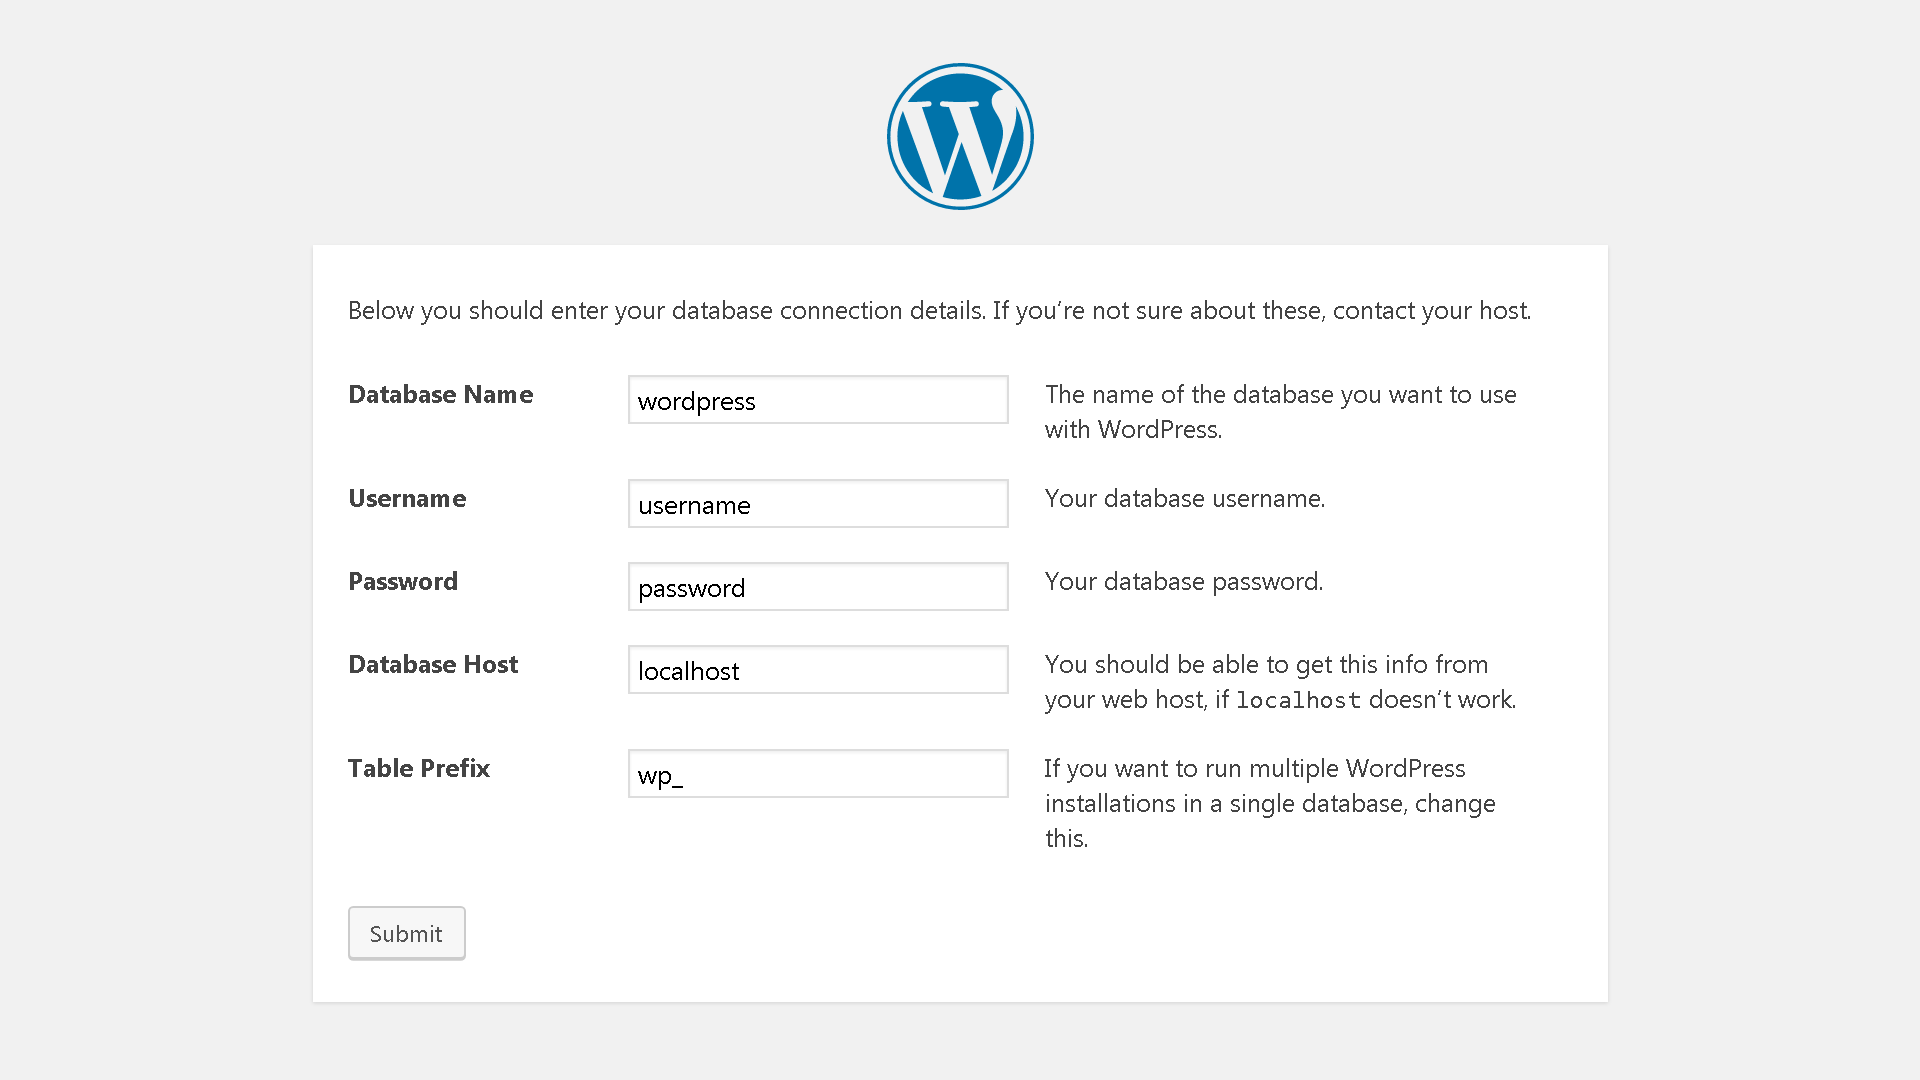
- Database settings:
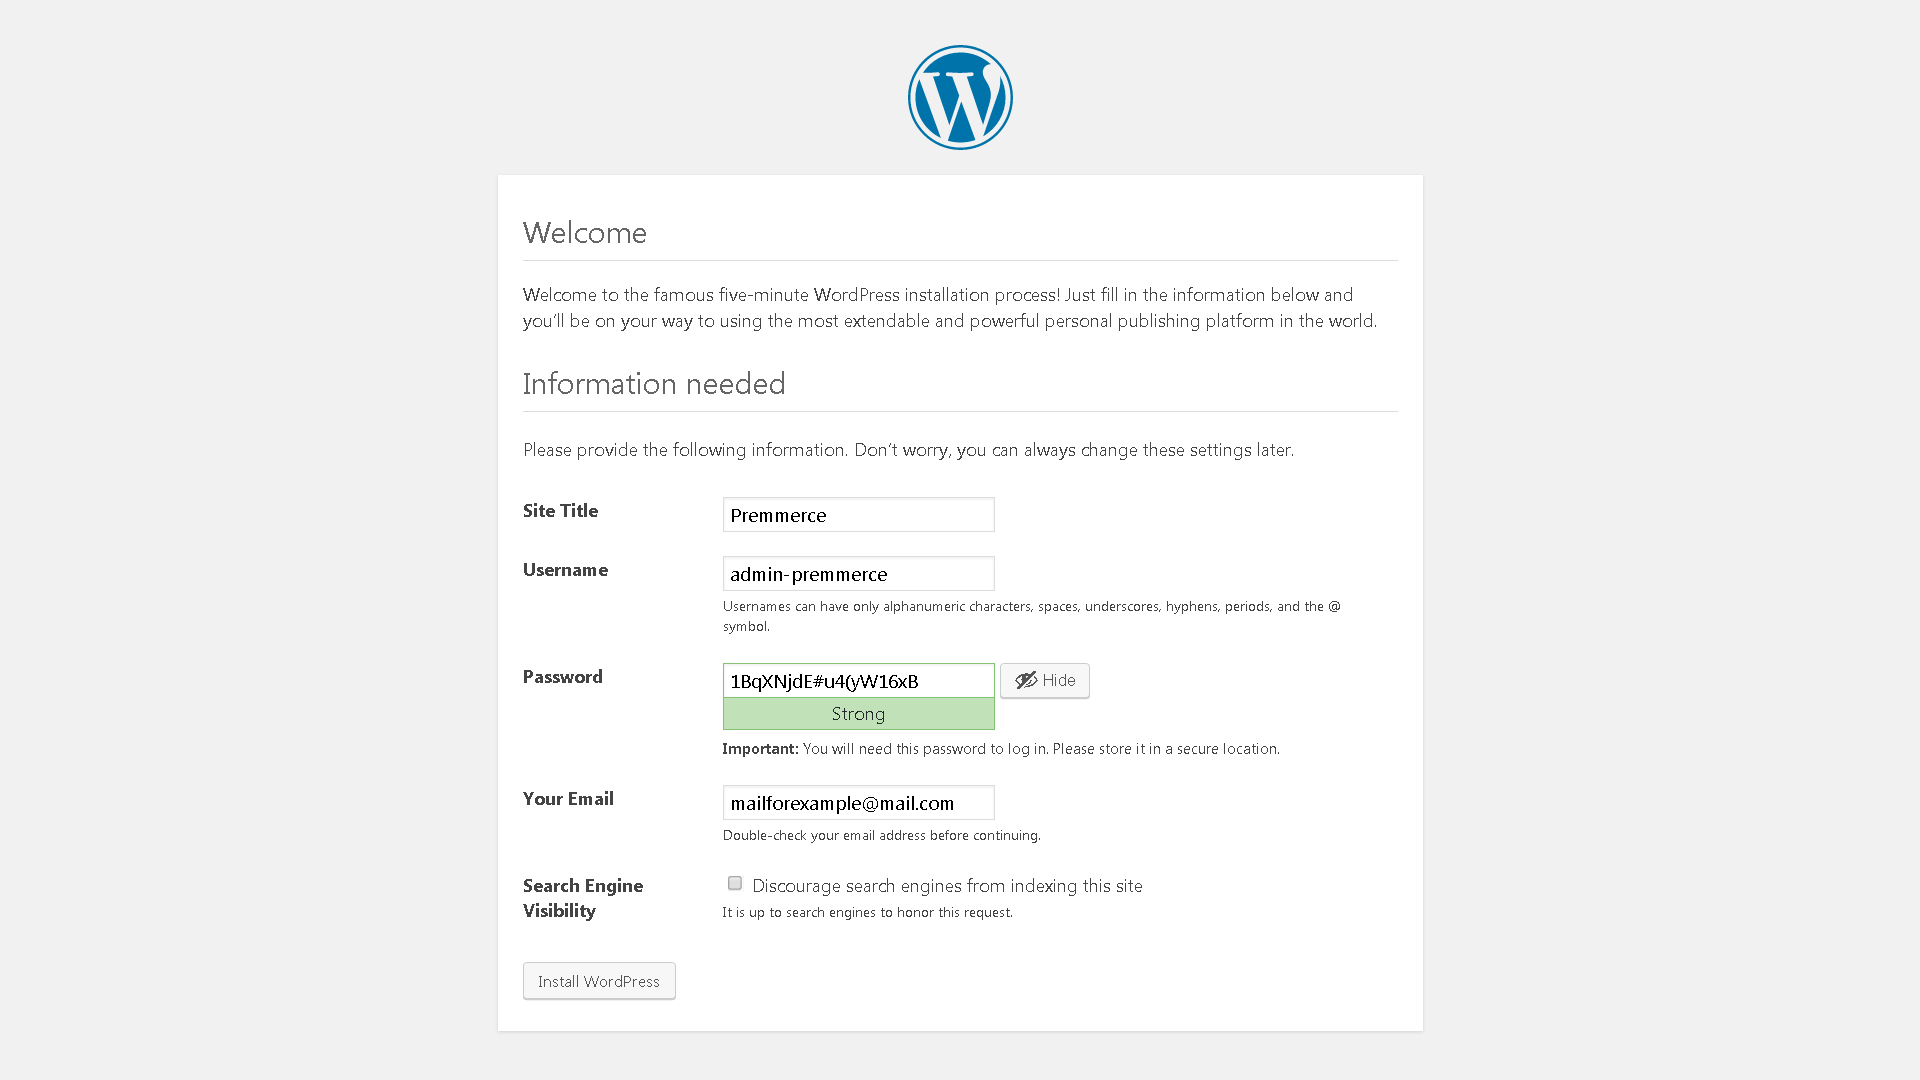
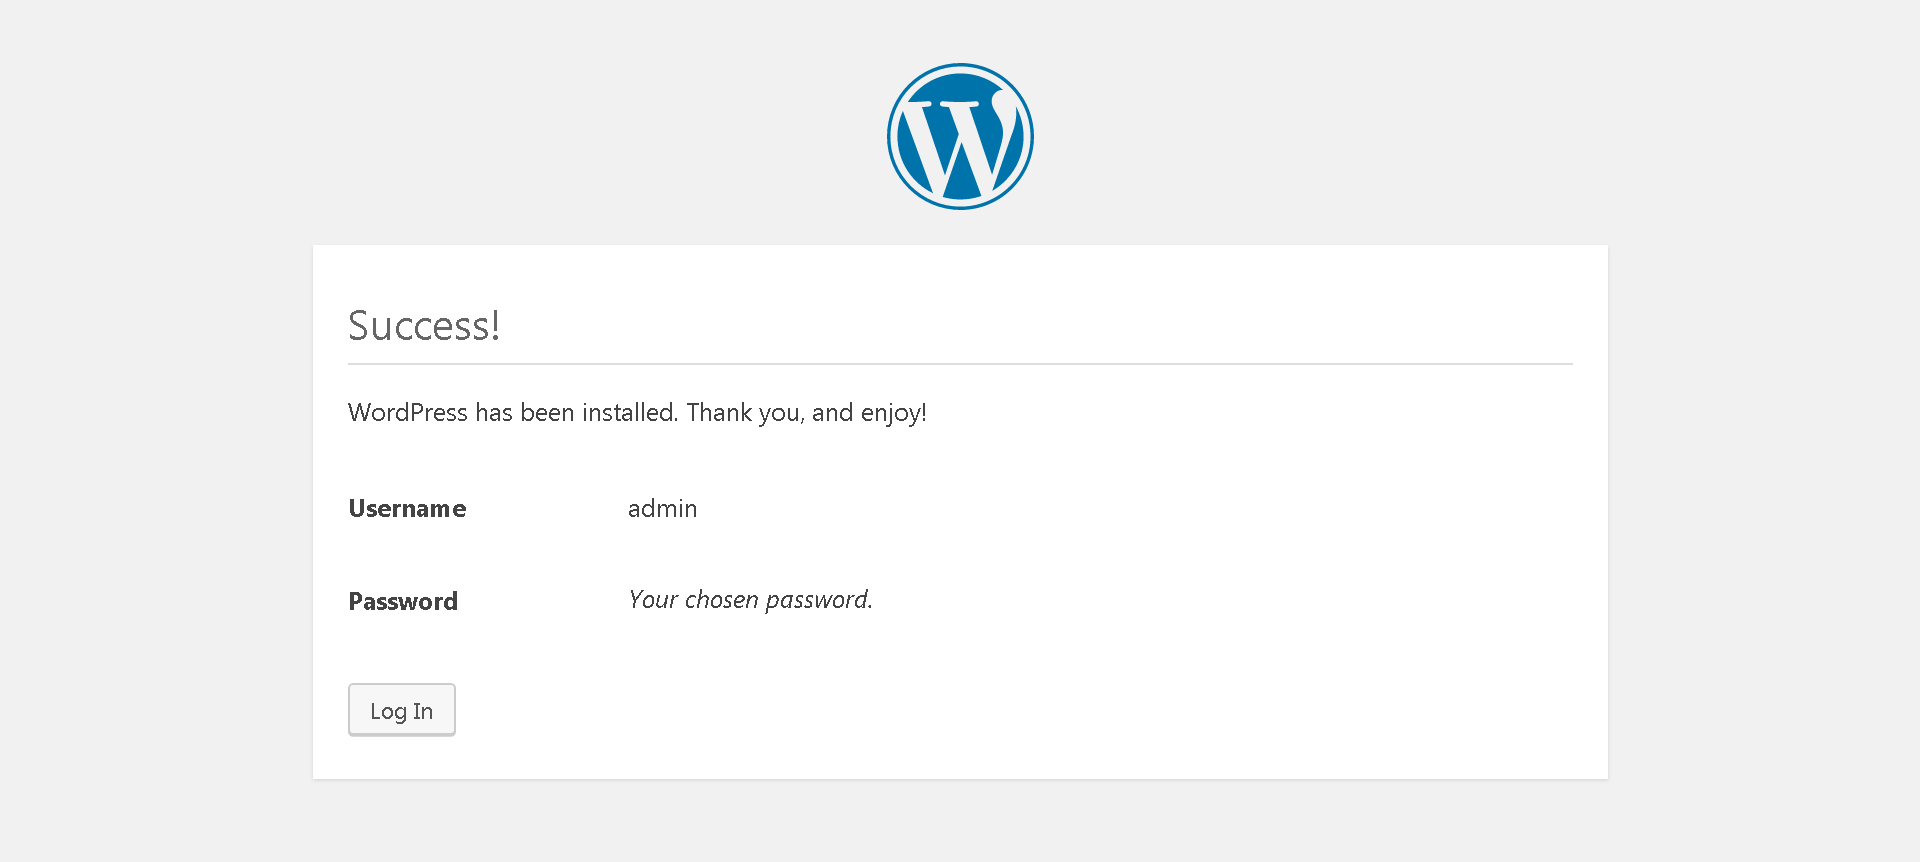
- General WordPress settings:
System requirements
Here are the optimal hosting settings for a site to work on WordPress:
- PHP 7 or greater;
- MySQL 5.6 or greater or MariaDB 10.0 or greater;
- The mod_rewrite Apache module;
- HTTPS support.
Note: If you are in a legacy environment where you only have older PHP or MySQL versions, WordPress also works with PHP 5.2.4+ and MySQL 5.0+, but these versions have reached official End Of Life and may expose your site to security vulnerabilities.
Find out more here: WordPress Requirements
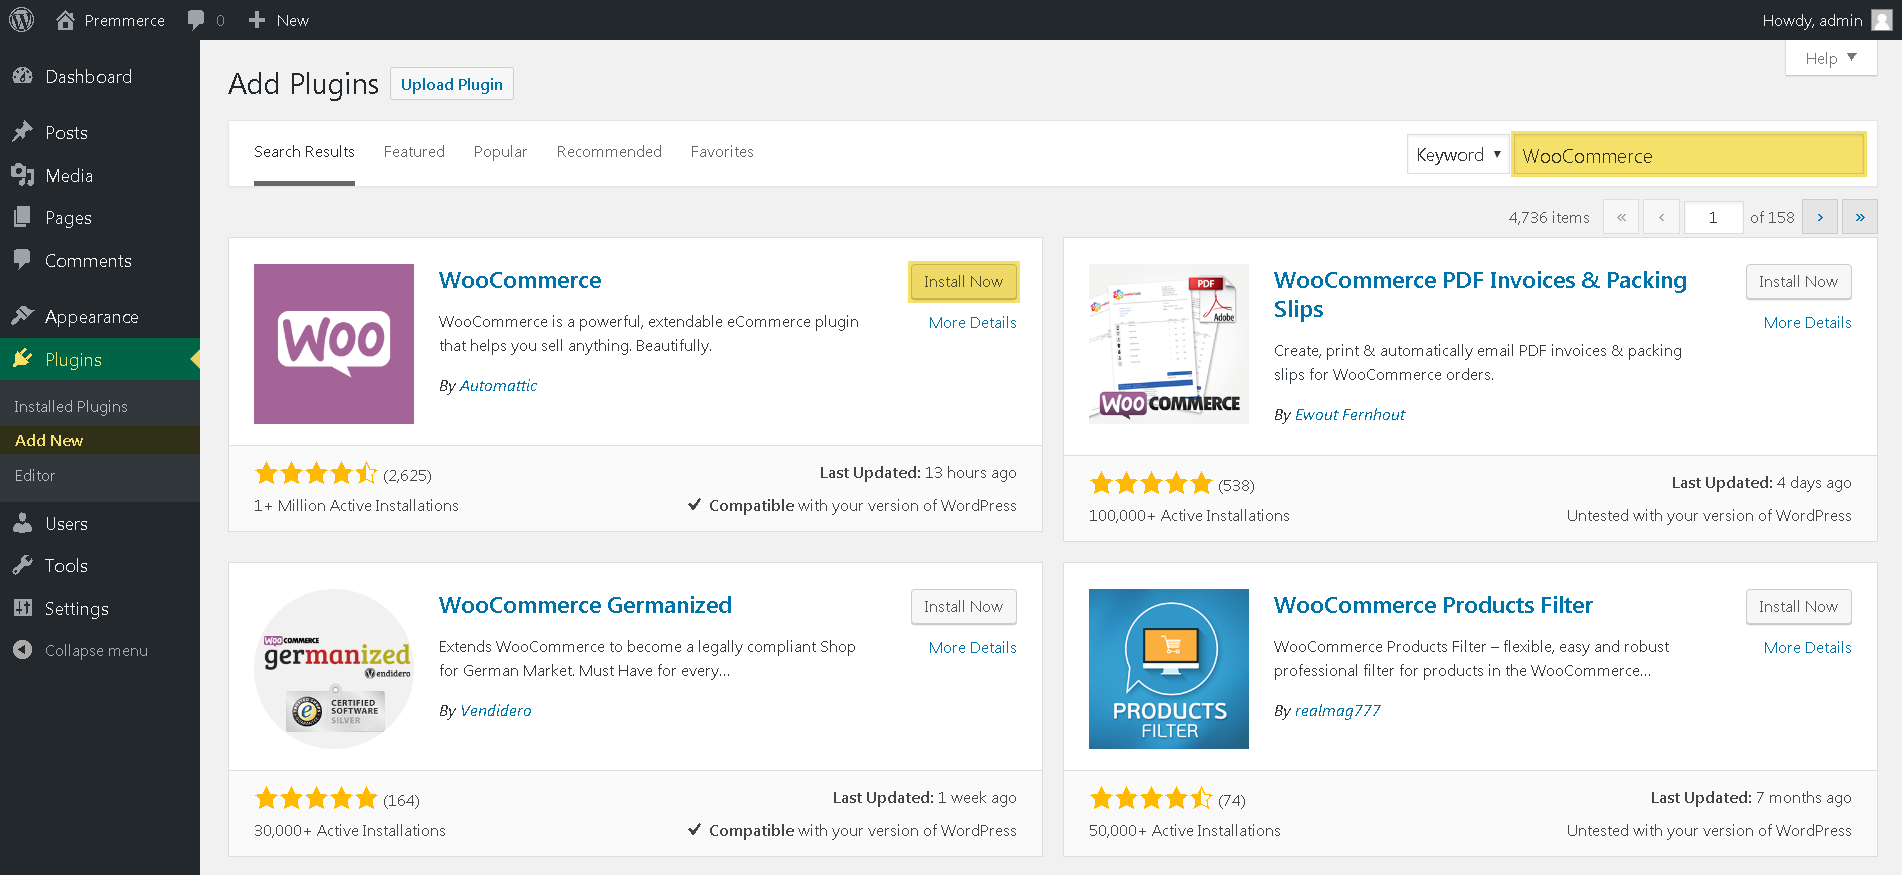
WooCommerce Installation
Go to the Plugins section and click on Add New. Enter WooCommerce in the search field and install it.
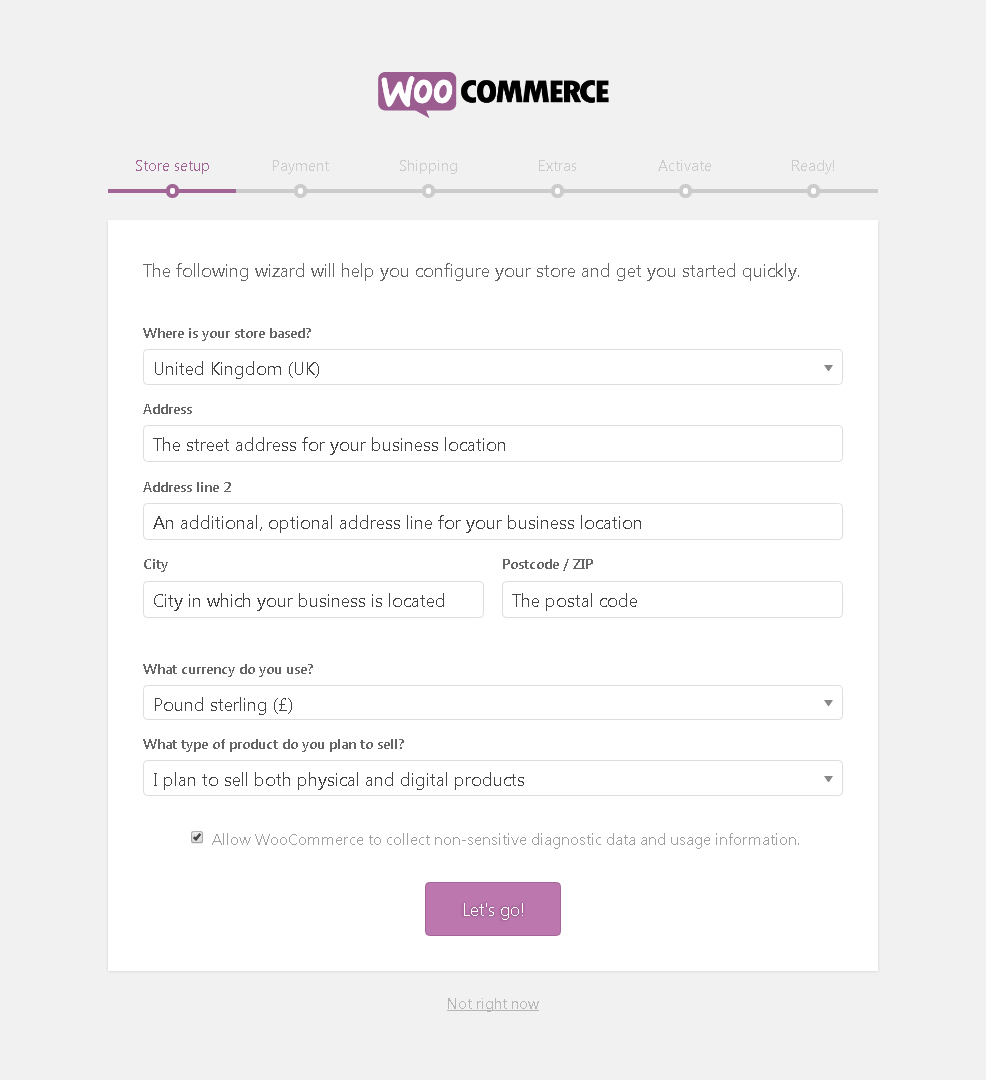
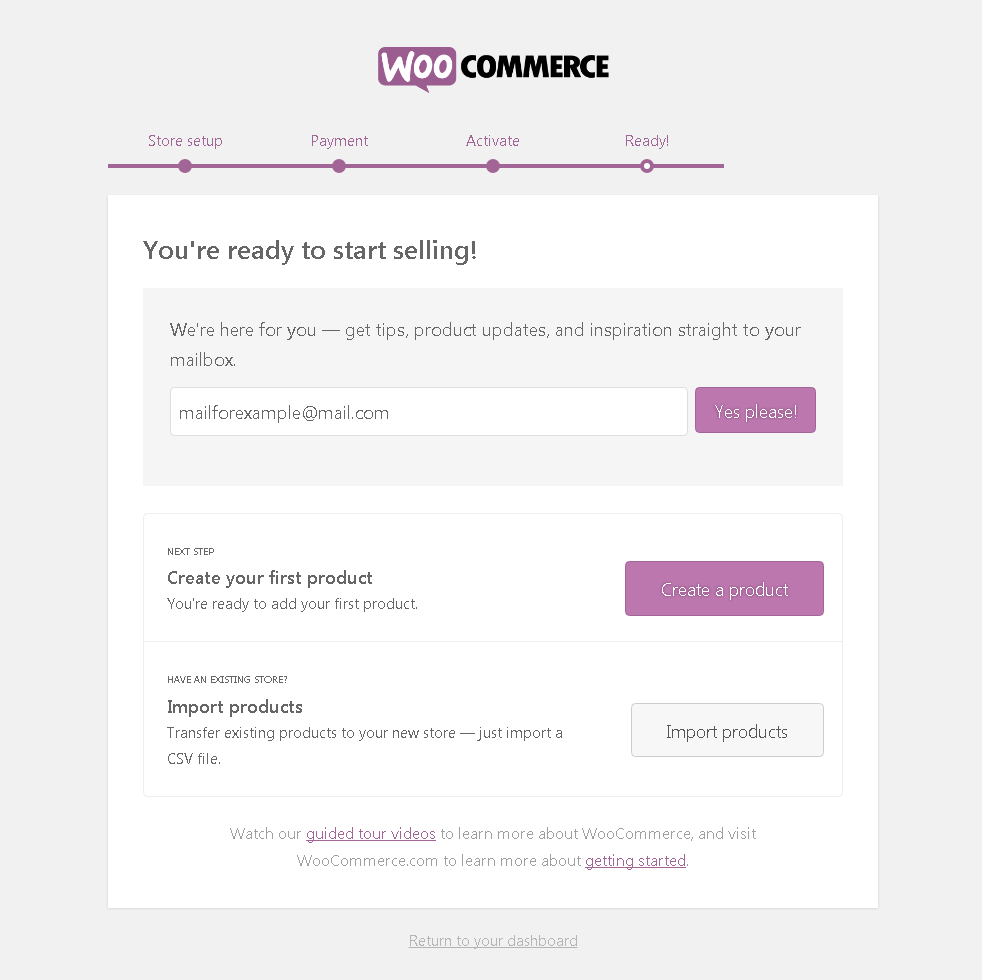
After activation, WooCommerce prompts you to go through the quick setup process. You can go through the four suggested steps at once, however, we recommend that you skip this installation at this point and edit the detailed settings later in the respective section.
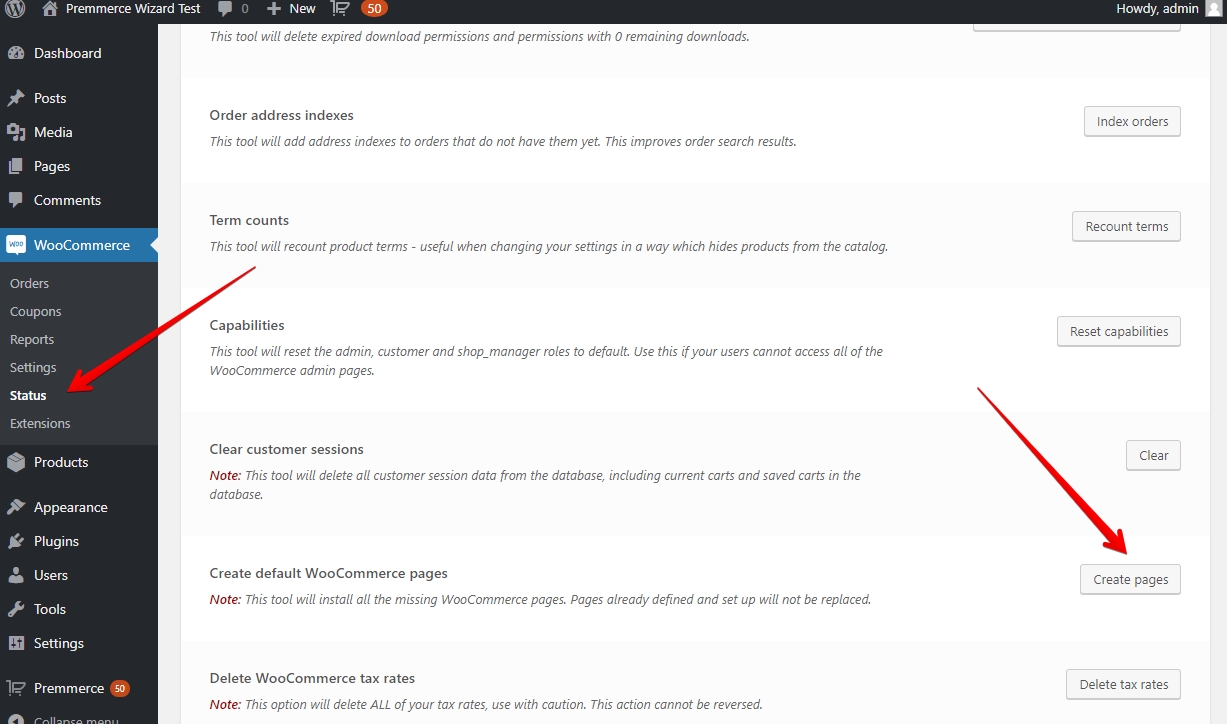
If you’ve skipped the Premmerce Wizard and the WooCommerce main pages haven’t been created
In this case, you must go to the WooCommerce->Status page and open the Tools tab. Afterward, click the Create default WooCommerce pages button.
Install demo-data
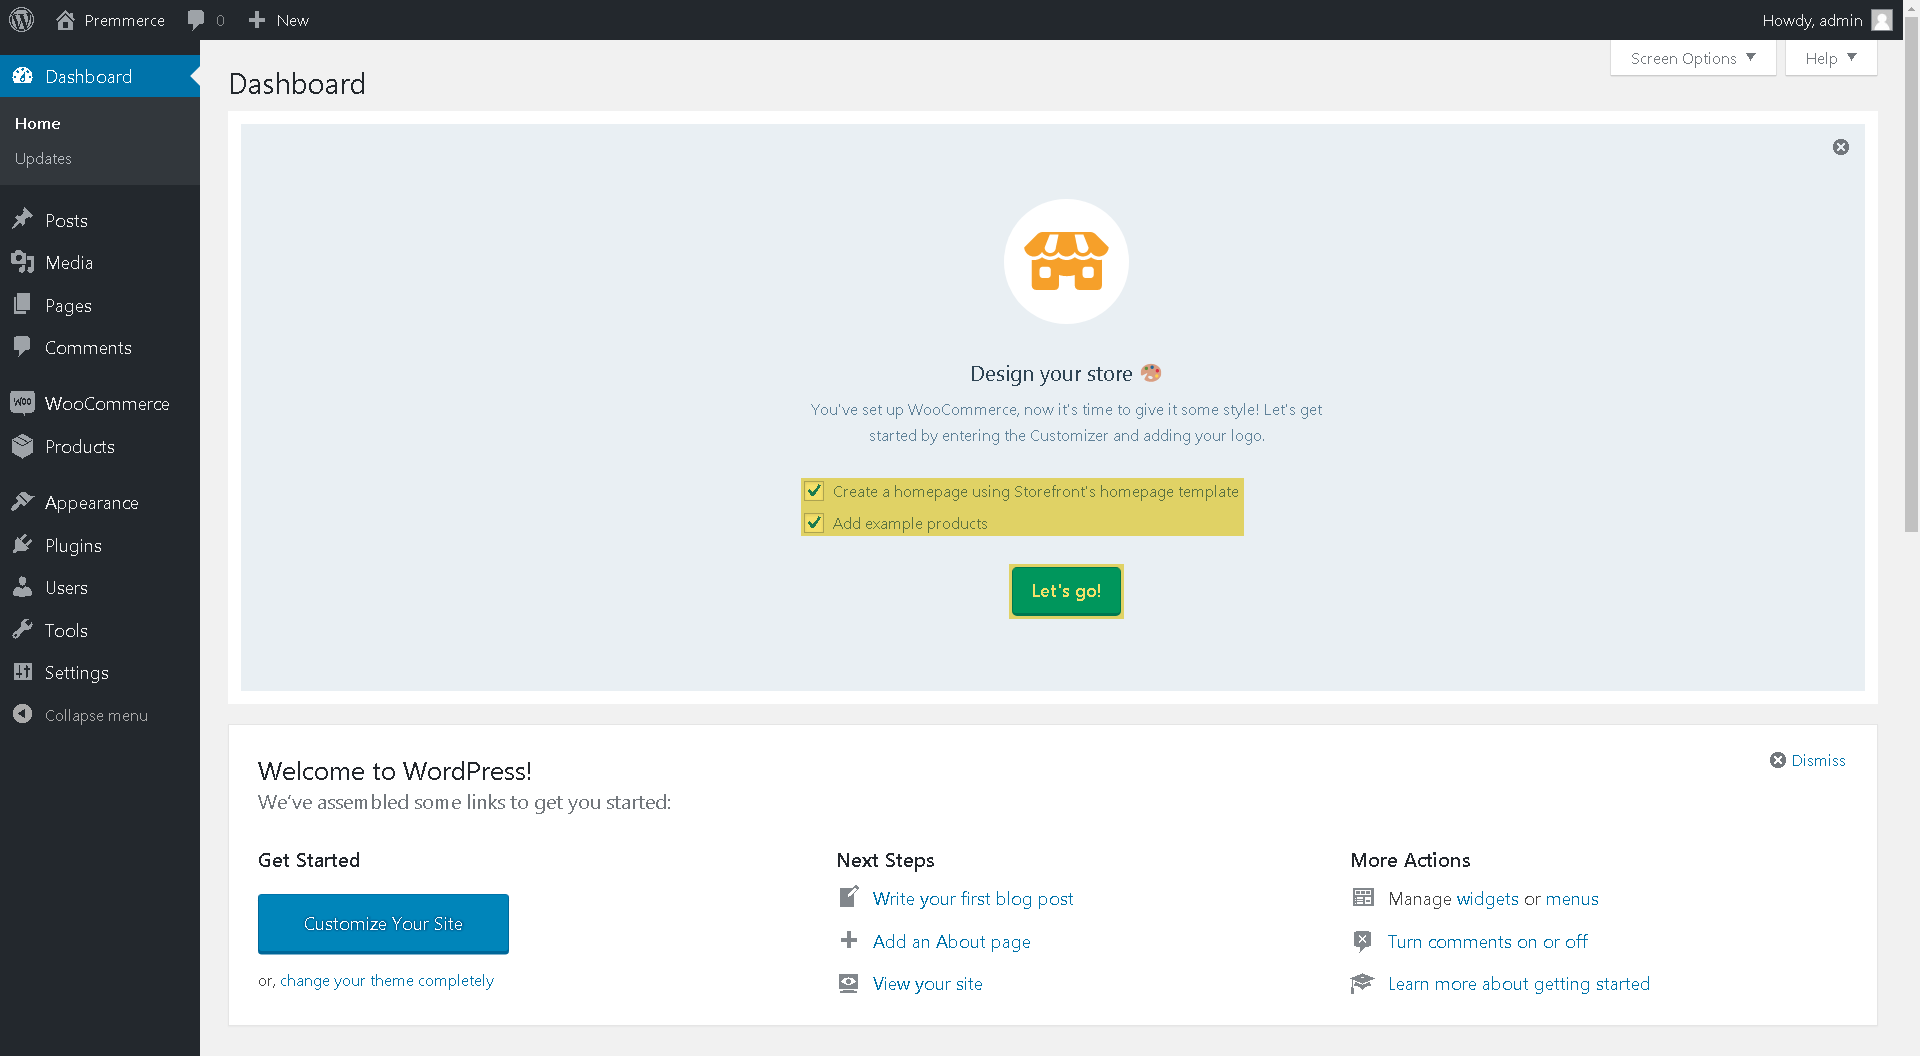
We recommend that you set up a Storefront theme and sample data for the test right away to ease all further settings. You can do this in your dashboard, after installing WooCommerce.After completing all the settings, this demo data can be deleted.
You can also use our free WooCommerce SalesZone Theme, that also provides you demo data installer and easy to use configuration manager.
The most important plugins installation
All plugins can be installed likewise WooCommerce from the Add plugin page, after typing the name of the plugin.
Yoast SEO
This is an obligatory plugin if you want your products to be easily found on the search engines.
You can read more about setting up your store for the best SEO optimization here:
Complete WooCommerce SEO Guide and Tips
WooCommerce SEO Addon
This plugin provides additional SEO capabilities that are not available in the basic Yoast SEO, such as:
- It displays basic online store information through the micro layout on the homepage.
- It displays price, stock availability and currency information in layout data on the product page.
- It displays price, stock availability and currency information in Open Graph data on the product page.
- It automatically generates alt text for all product images.
- It displays the brand information in the micro layout data on the product page.
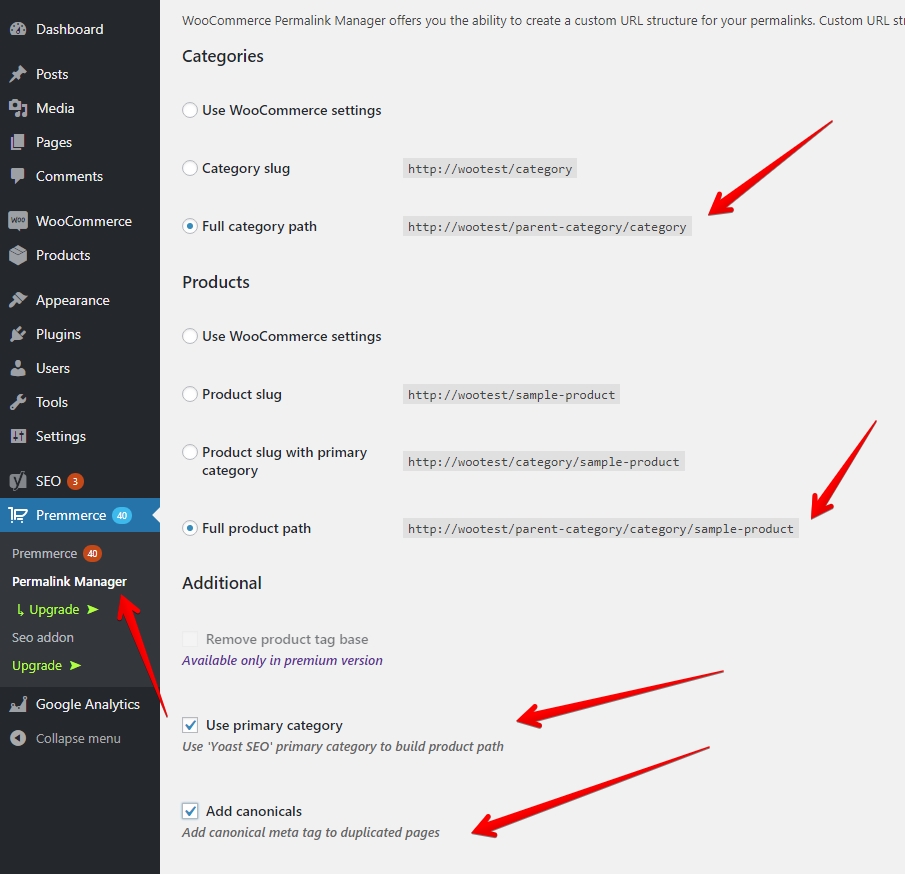
WooCommerce Permalink Manager
Premmerce Permalink Manager Plugin for WooCommerce is an obligatory plugin if you move from another platform and want to save the URL structure and remove the unnecessary slag from your store’s URL making it more concise, readable and helps to increase your store SEO ranking.
Google Analytics
These are the obligatory plugins for analyzing your online store and collecting comprehensive statistics:
- Google Analytics Dashboard for WP (GADWP);
- WooCommerce Google Analytics Integration.
For finding more details about the settings, please check out our tutorial:
Woocommerce Google Analytics Integration and Plugins
Basic settings to be made before starting work
All the above plugins usually have the recommended settings and they are suitable for most users. In this section, we will describe only those settings that you definitely need to pay attention to, and will give a brief description of the spots where you can do some other settings.
SSL certificate
First of all, we highly recommend that you buy and install an SSL certificate for your online store so that your site’s address begins with “https”.
This greatly affects your site’s promotion in the search engines, as well as user’s trust and, accordingly, conversion.
You can buy the SSL certificate and set it with the help of practically any hosting provider.
Basic WordPress settings
Be sure to change the following on the General settings page:
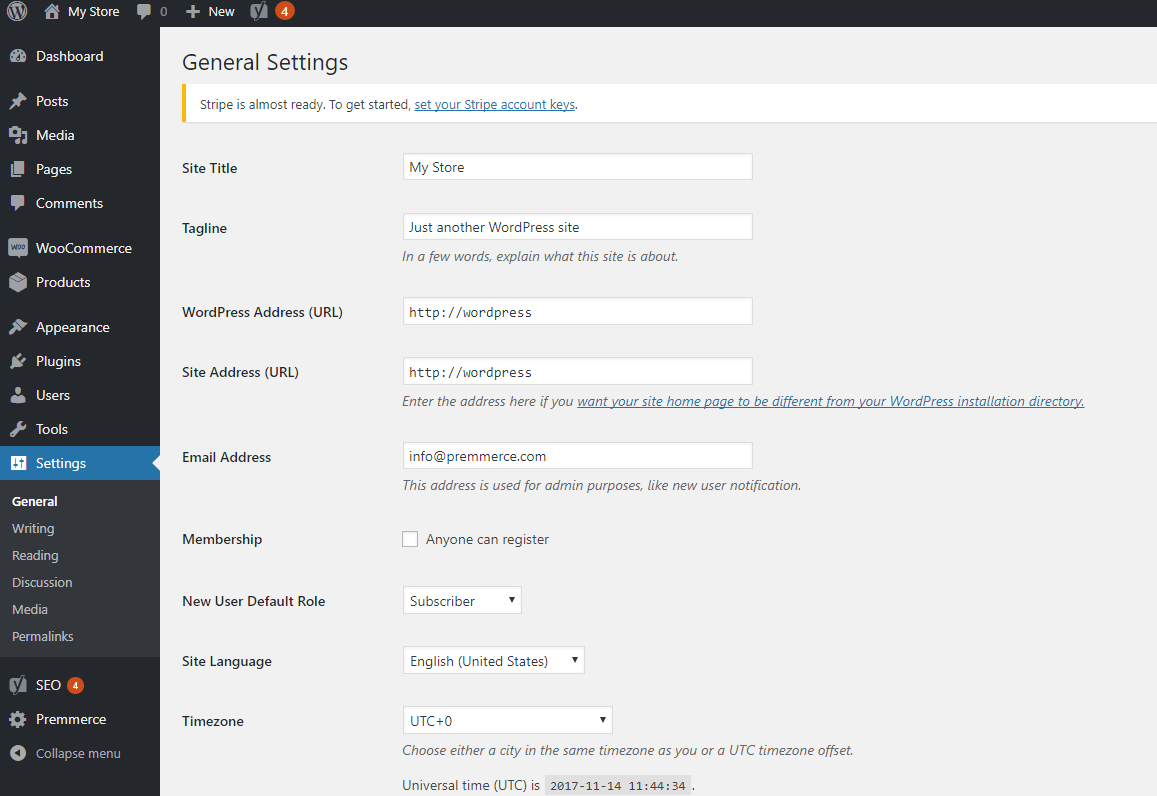
- Site Title is responsible for the name of your site, including the Meta Title name building. It is important to enter the short name of the store here.
- A tagline is a short description of the store, which is usually displayed under the logo.
- WordPress Address (URL) is the main store address. If you have an SSL certificate, write the address with https.
- Site Address (URL) – duplicate the same address above.
- Email Address – it is very important to have a valid email here since all system messages will be sent to it.
- Site Language – make sure that the correct site language is selected here.
- Timezone – make sure the correct time zone for your store is selected here.
Нomepage Settings
After WordPress has been installed the homepage is displayed as a list of the latest blog posts by default. However, for most e-commerce projects it’s better to make the homepage static as it’ll add more flexibility to further homepage interface settings.
Here are the steps for the homepage setup.
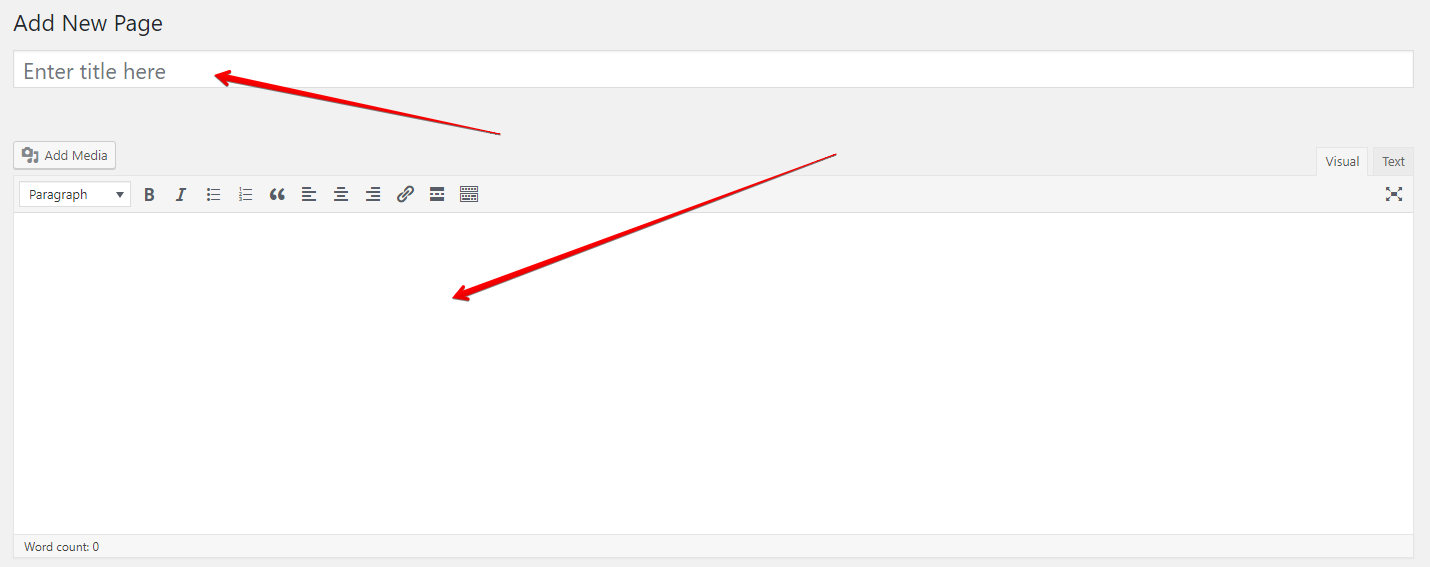
1. Create a static page which will serve as a homepage in the future. For this go to Pages section and click Add New.
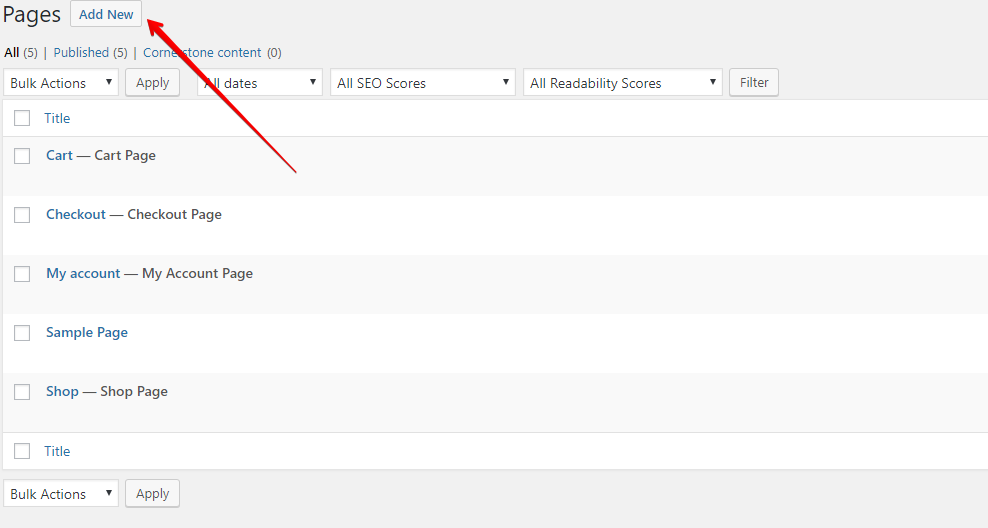
Afterward add the title to the next page, for example Front Page and description, which will later be displayed on the homepage. The description section can be left temporarily empty.
2. Create additional pages.
We recommend that you create some additional pages for contacts and blog posts straight away, and they can be named Blog and Contact. These titles could be changed at any time later.
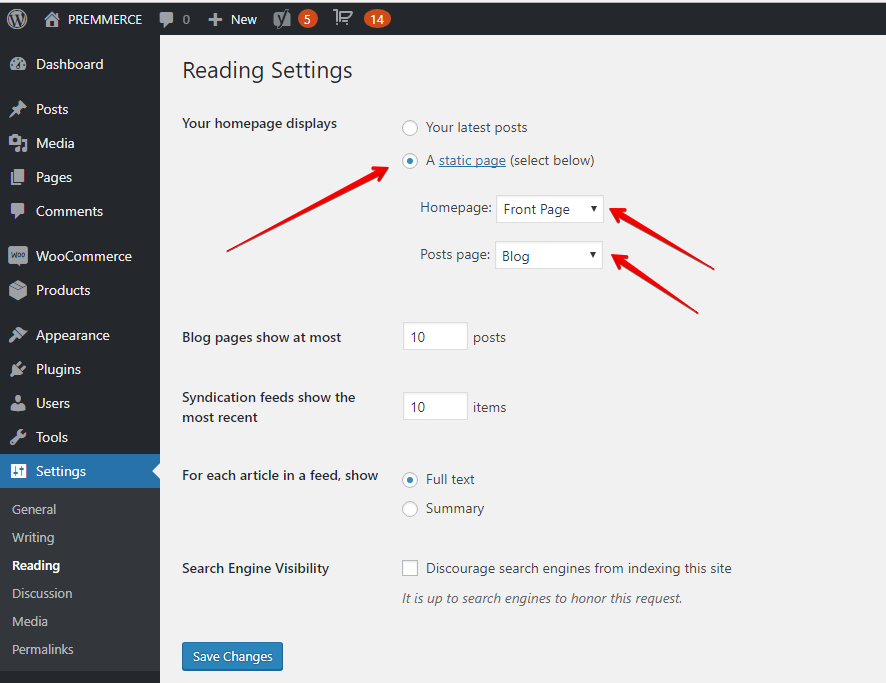
3. Assign the newly created page “Front Page” as Homepage and assign the page for posts.
For this go to Settings-Reading in WordPress and assign the recently created pages for Homepage and Posts page.
Permalinks settings
In the Common Setting section, we recommend that you check a Post name. This will make your URLs for posts and static pages more concise, with no extra data.
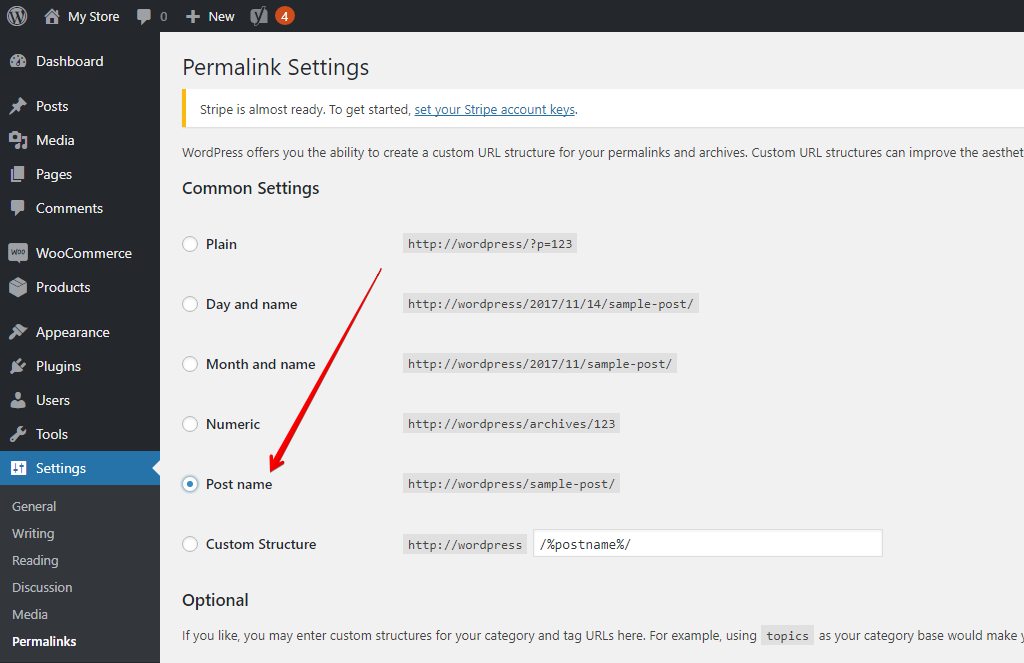
We recommend that you do not change anything in the Optional and Product permalinks sections, but you can add the slag to the URL you consider necessary.
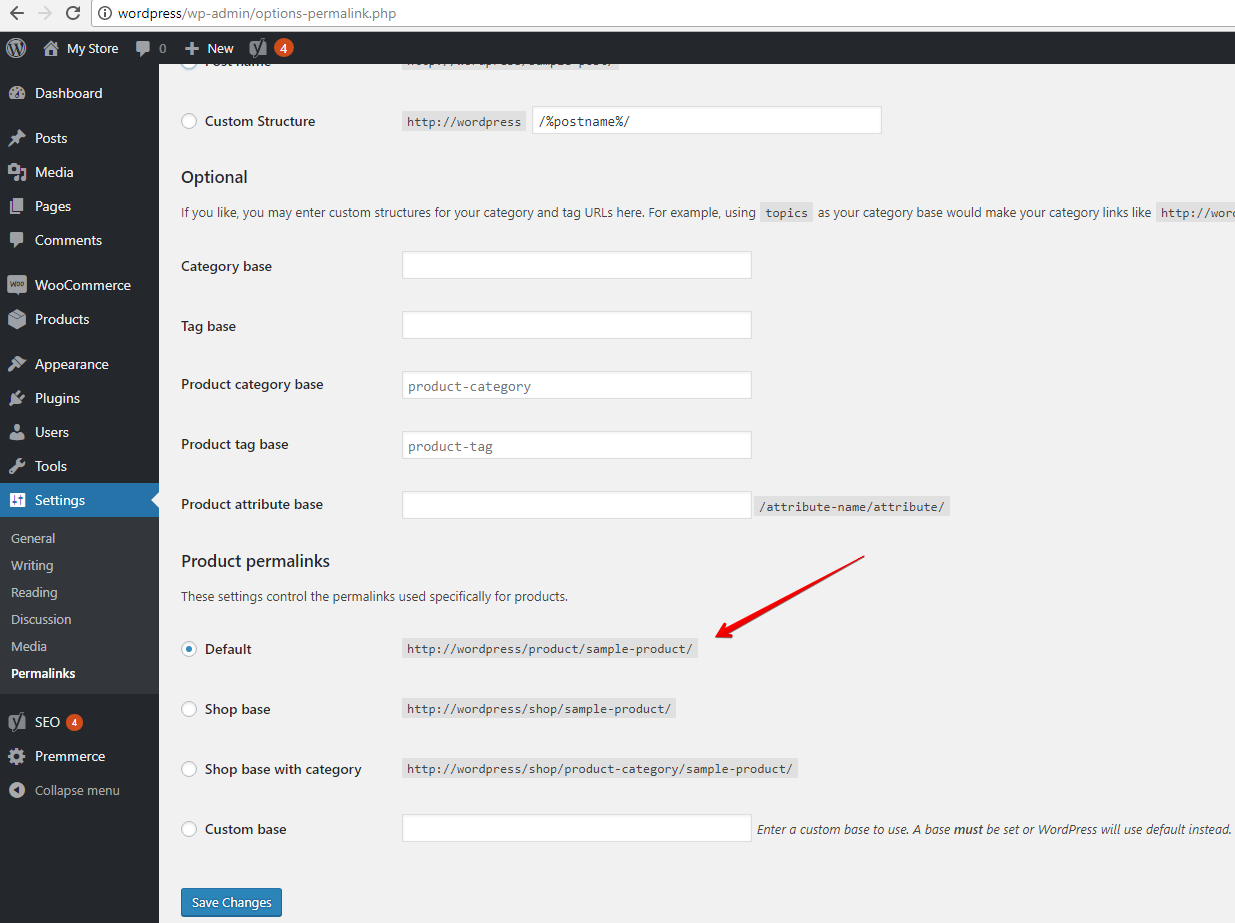
If you want the URLs of your online store to be free from the default prefixes provided by WooCommerce, use the WooCommerce Permalink Manager.
To ensure that the URLs of products and product categories are as convenient as possible, we suggest that you use the following settings:
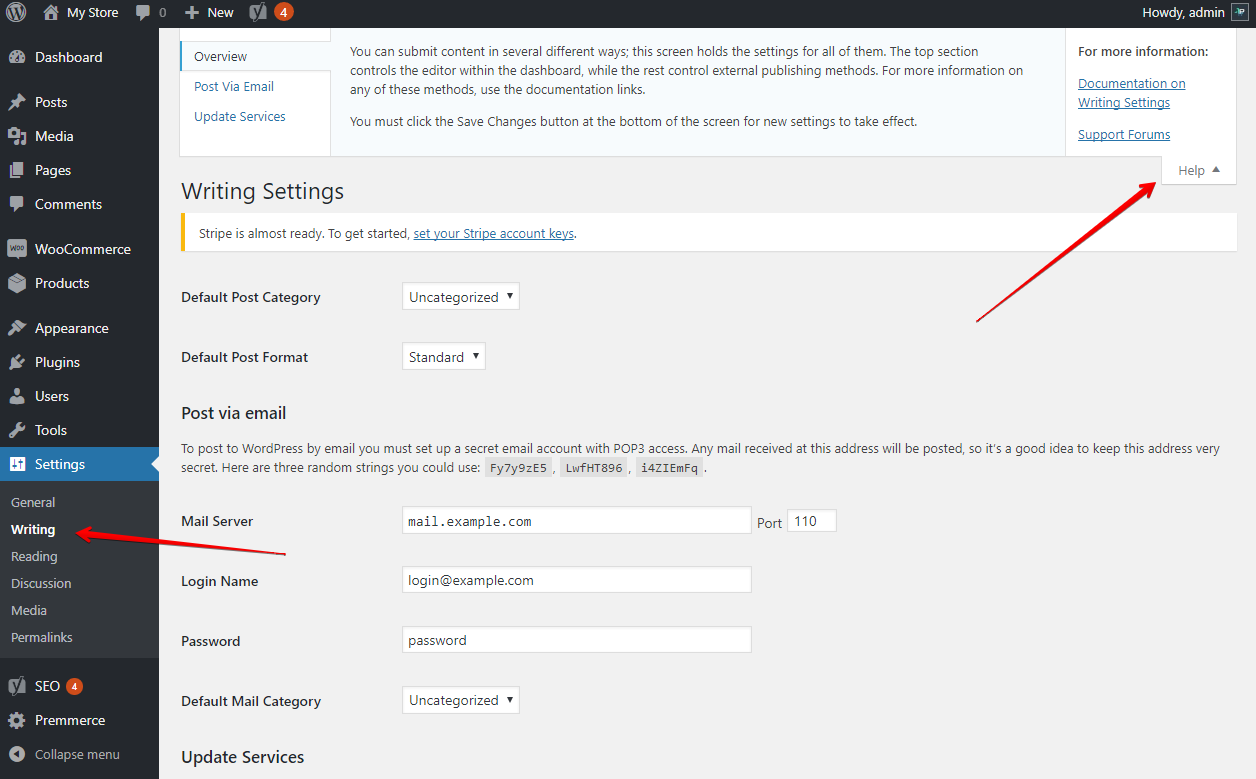
Other WordPress settings
All other settings from the General, Writing, Reading, Discussion, Media pages have the correct settings by default. Accordingly, they need to be changed only if you need to somehow modify the logic of your store’s performance.
You can read more about these settings using the Help section in the WordPress interface:
Basic WooCommerce Settings
Be sure to fill in the following on the General tab:
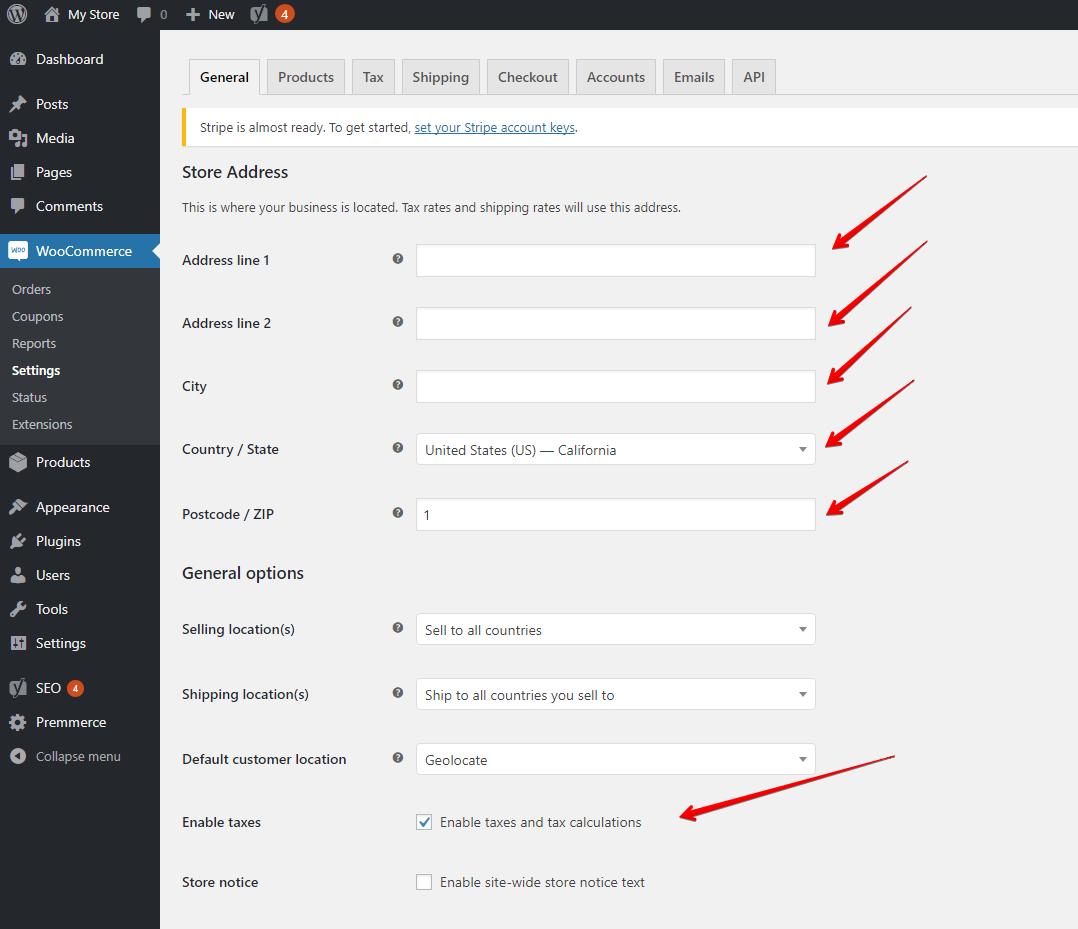
- Address line 1 – the address of your online store, which is used in many places and affects the regional promotion of the online store. We highly recommend that you fill in this field unless your store is virtual.
- Address line 2 – in case your store has two physical addresses.
- City – the city in which your store is located.
- Country/State – the country and state in which store is located.
- Postcode/ZIP – Postcode/ZIP of your store location.
- Enable taxes – in case your country charges different rates for different regions, you need to set up the tax rates to be available.
- Currency – the main currency of your online store.
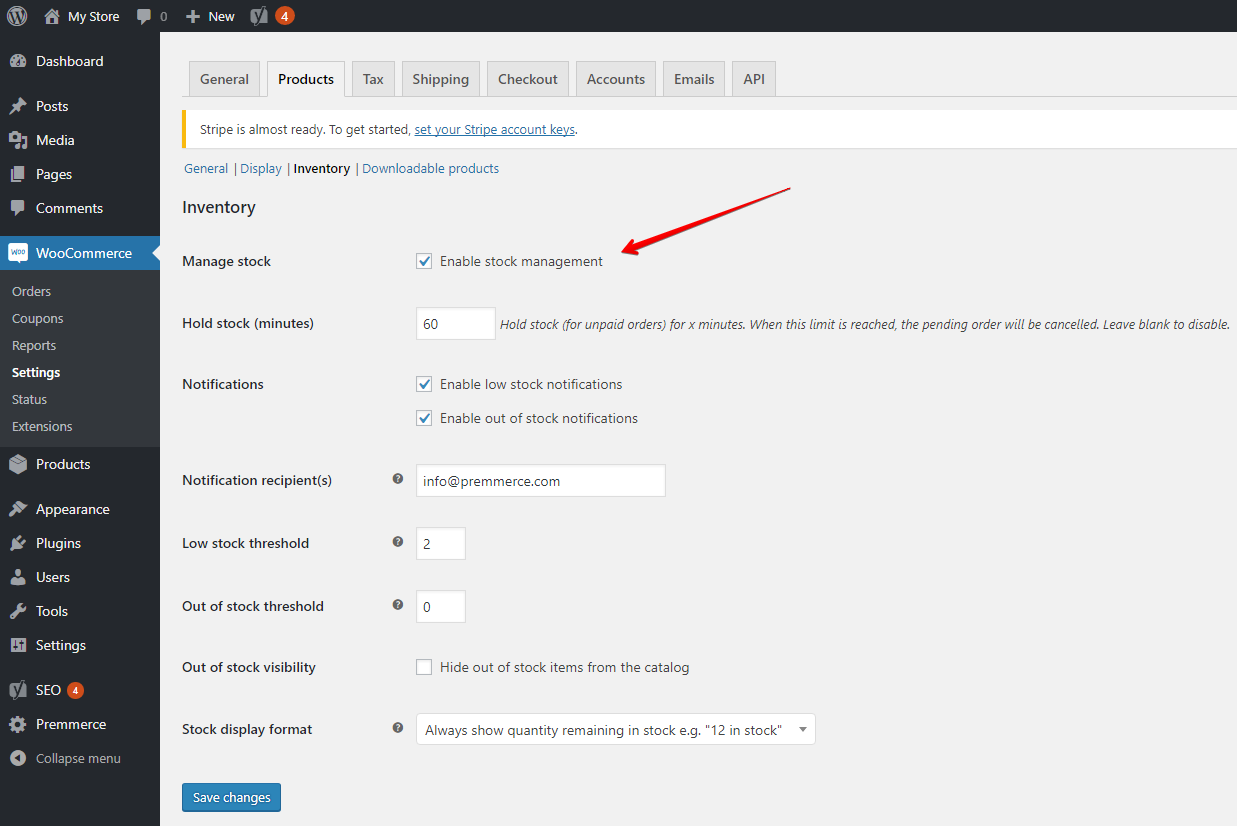
Products tab
This tab contains the main display settings for products. The default settings are generally suitable for most stores. The only thing you need to pay attention to is the Manage stock option on the Product/Inventory tab.
It is checked by default, but if your store sells virtual products or does not have a warehouse, you can uncheck it to not indicate the stock availability.
Read more about the Product tab in the official documentation
The Tax tab
If your store considers taxes at checkout, this tab will help you to make all the necessary settings for tax calculations. Get more instructions for managing this tab
The Shipping tab
On this tab, you can make shipping options and shipping zones settings. Find out more about the Shipping tab options
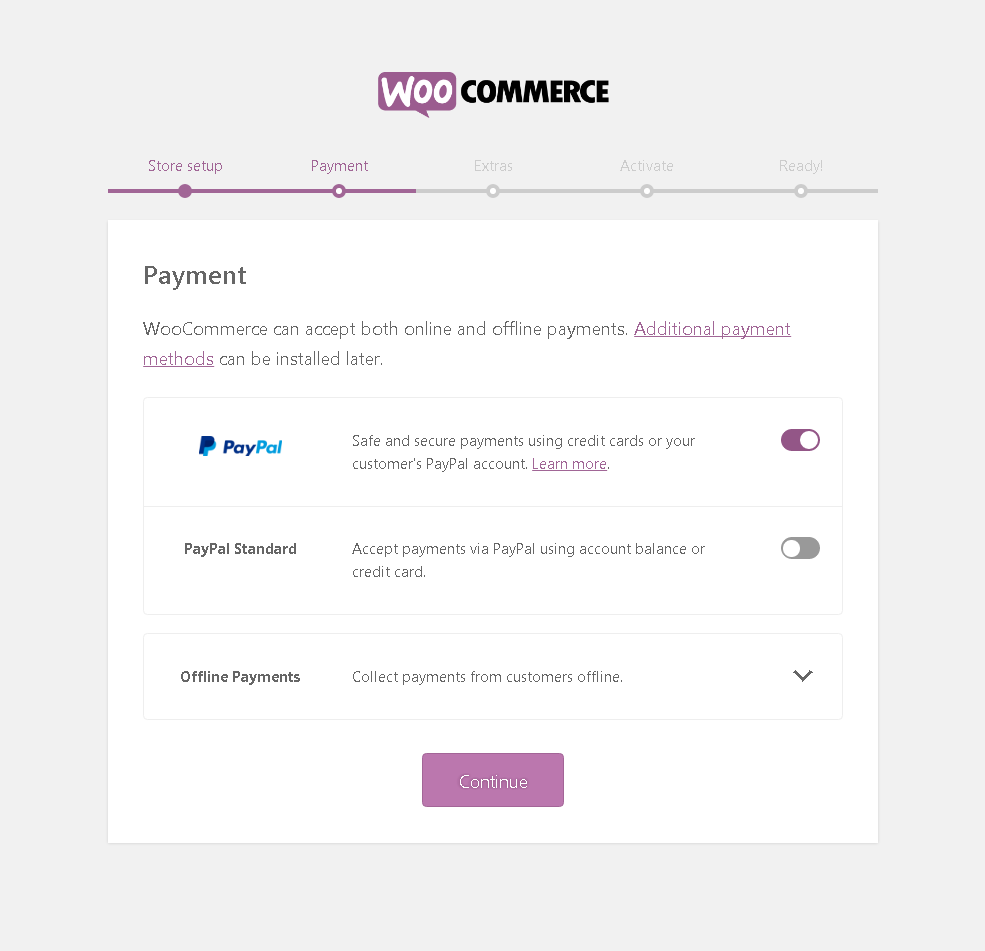
The Checkout tab
On this tab, you can change the general checkout and payment options available in your store.
Get more instructions for managing core payment options
The Accounts tab
This tab provides the registration settings for the new users of your store. By default, all settings are made accurately here and it does not need any changes. More details
The Emails tab
On this tab, you can view the templates for all automatic notifications sent to your store users and also the design of notification messages.
Make sure you completed the following fields accurately:
- “From” name
- “From” address
- Header image
- Footer text
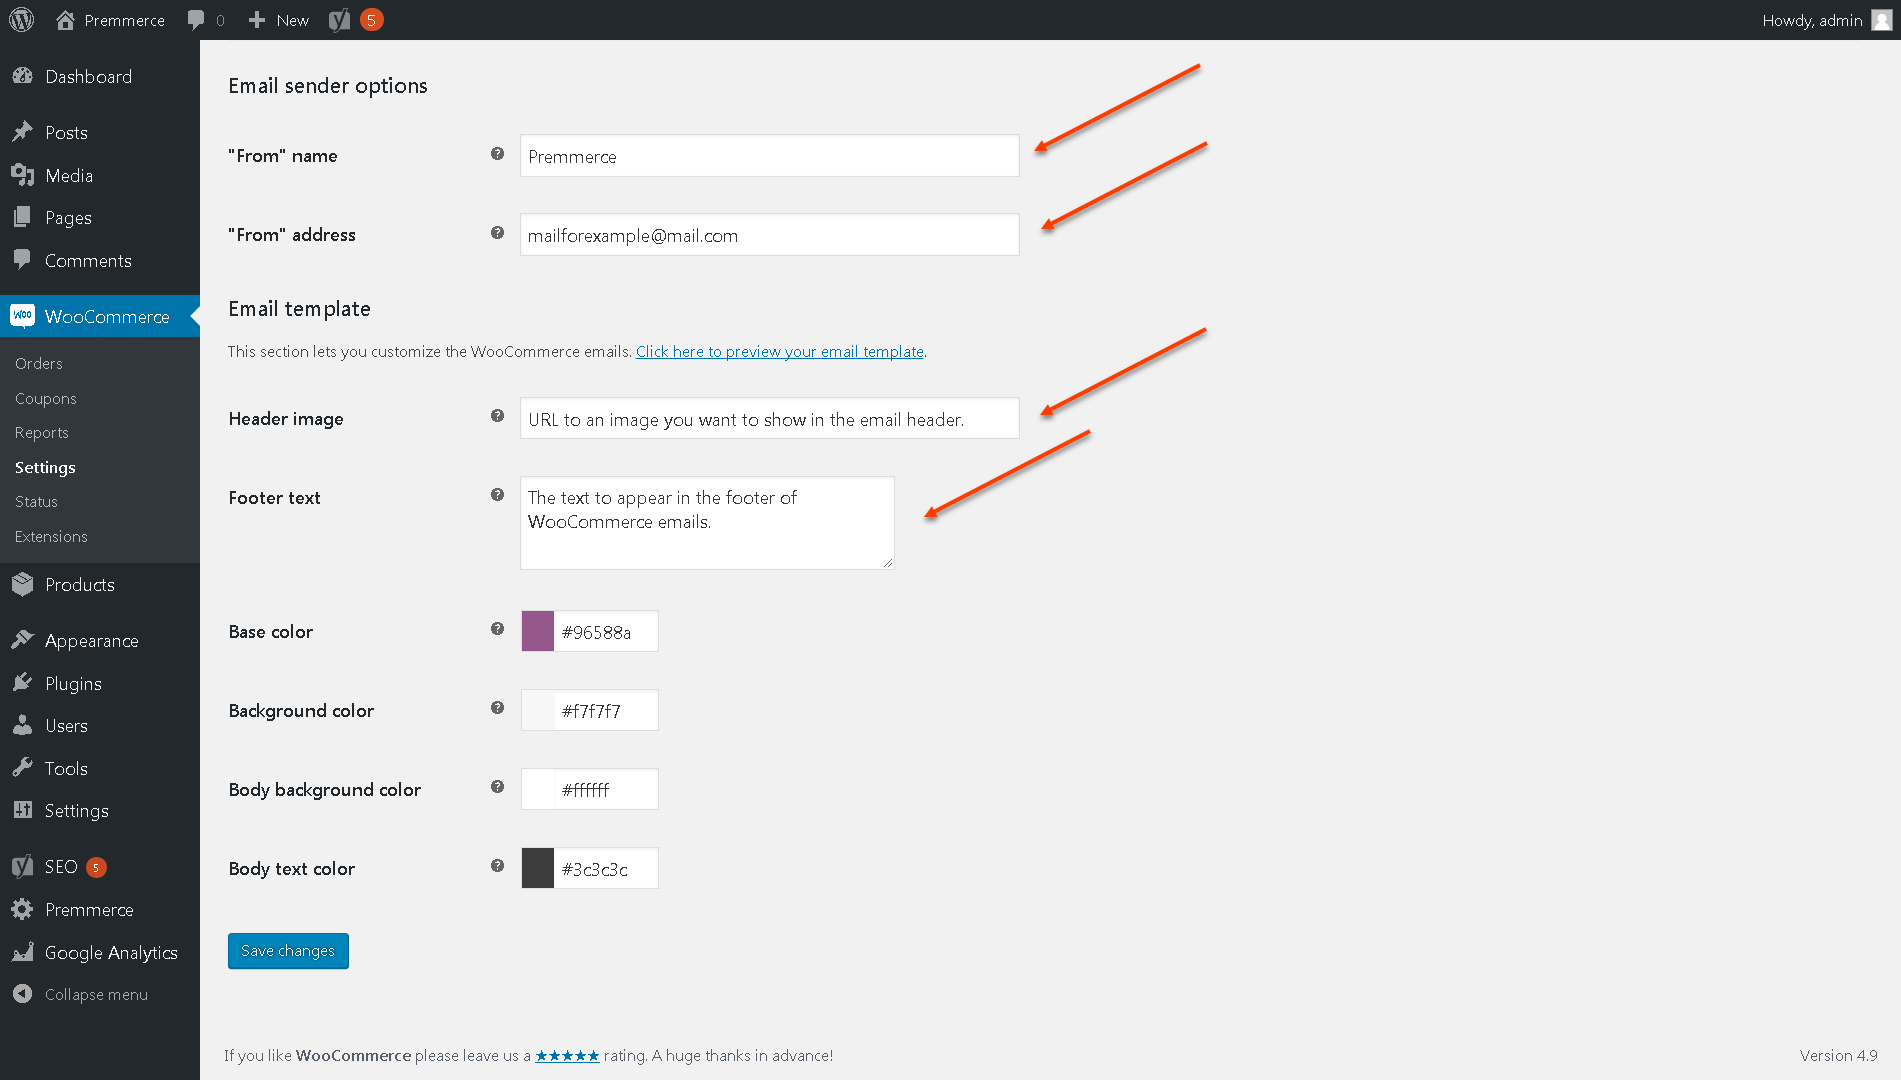
These fields will be displayed to your users when receiving emails from you.
The API tab
This tab allows you to get keys to access Rest API for the third-party applications, such as iOS or Android Application. There is no need to make any changes here.
Yoast SEO settings for WooCommerce
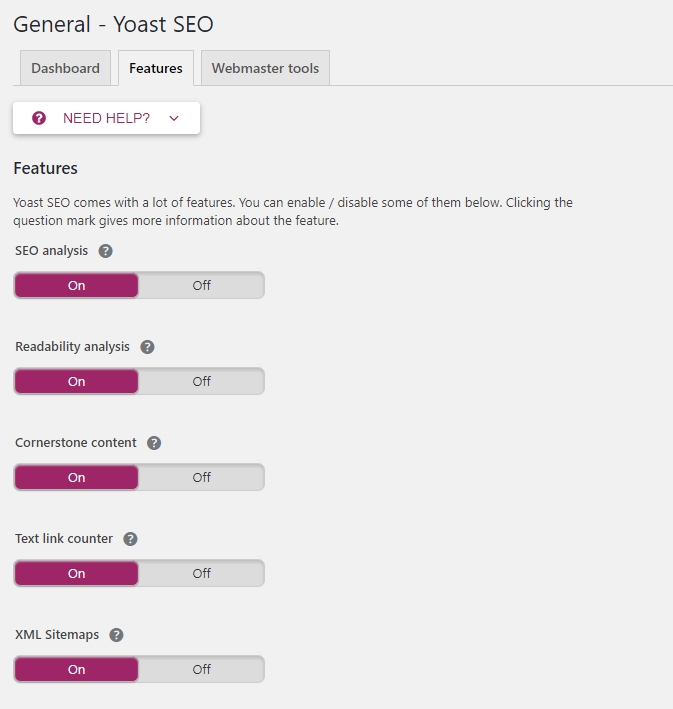
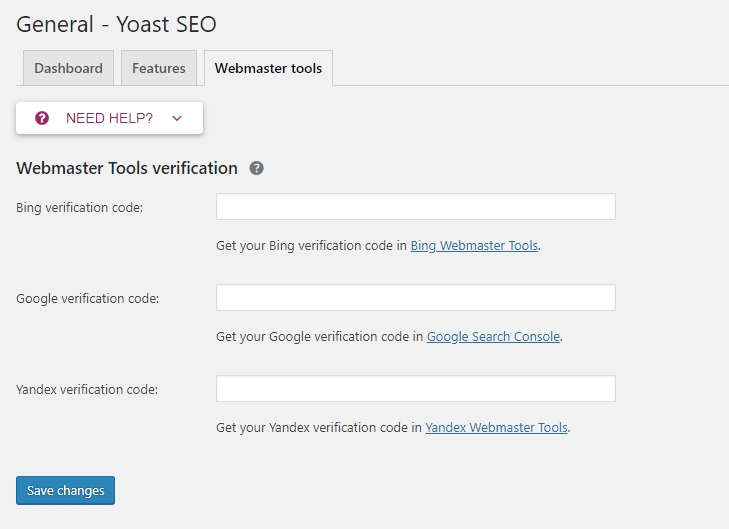
The General page
On the Features tab, you can enable/disable some of Yoast features. But by default, there are already the correct settings.
Connect and write, respectively, Webmaster Tools from all the necessary search engines in which you want to promote your online store.
The Search Appearance page
In the Company or person field select “Company” and fill all the fields below.
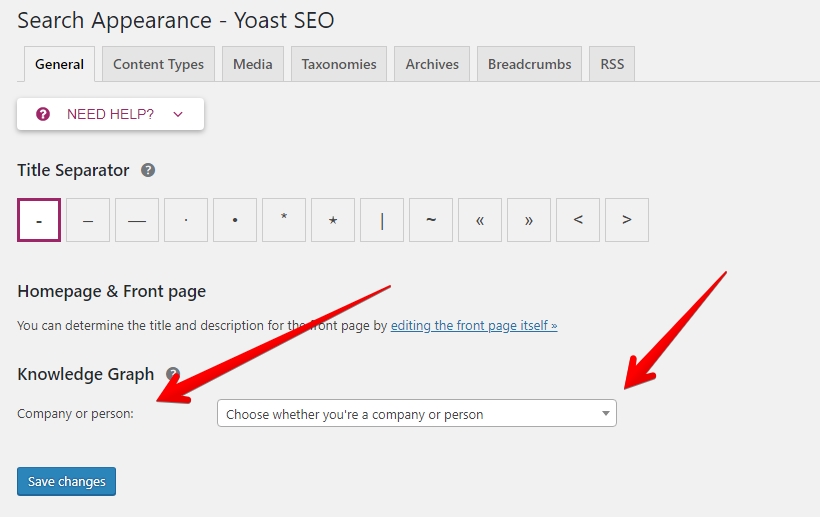
On other tabs, you can customize templates to create meta tags on all pages of your site. By default, there are already the correct settings that will allow you to generate meta tags effectively for the search engines.
We recommend that you make changes only if it’s essential.
The Social page
On this page, you can set up information sharing in social networks and the online store optimization for the social media.
The following data must be filled in:
- Accounts tab – insert all your social media pages that are in use;
- Facebook Tab – you can leave the default data;
- Twitter Tab – you can leave the default data;
- Pinterest tab – if used, it’s worth confirming your site; there is a link to the instruction how to do it in this tab;
- Google+ Tab – if you have a Google+ business page, copy its address to this tab.
Search Console
This page gives an option to authorize Yoast SEO and your Google Webmaster Console, after which it will display information about all 404 pages on your site. We strongly recommend authorizing.
Premium and Yoast WooCommerce
Yoast also has a premium version for working with WooCommerce, which allows you to extend the use of Schema.org and OpenGraph layouts.
However, you can also use the free WooCommerce SEO Addon plugin, which does the same, plus contains some additional options.
WooCommerce SEO Addon settings
For proper operation, it is necessary to add, if possible, the data in all the fields specified in the settings of the plugin.
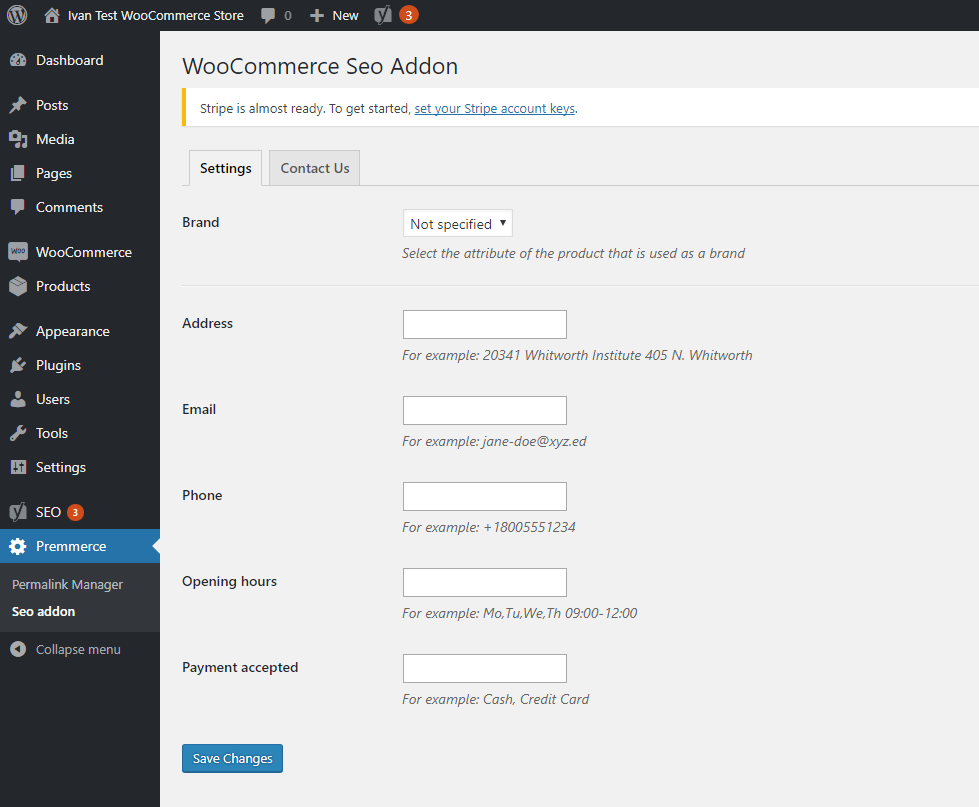
Find out more about the working principle of the plugin here: WooCommerce SEO Addon
Google Analytics settings
We created a separate detailed tutorial on Google Analytics. You can find it here: Woocommerce Google Analytics Integration and Plugins
Store’s appearance customization
Choose and install a theme
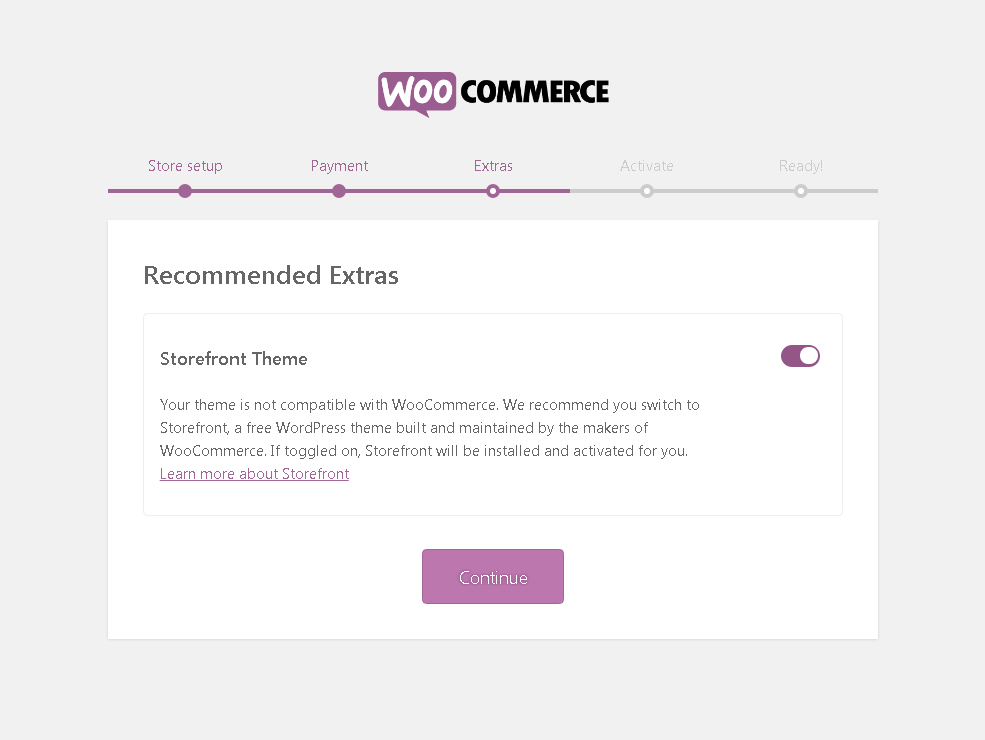
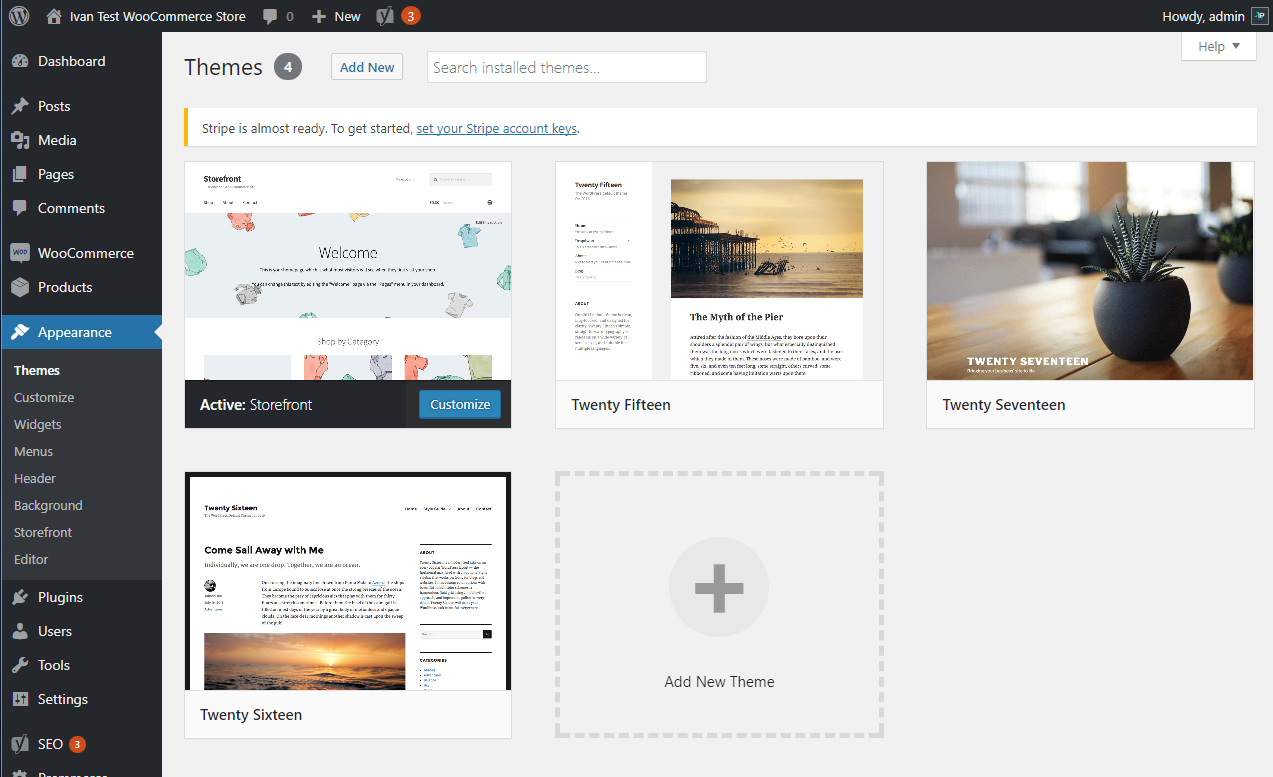
After installing WooCommerce, it offers you to install its main free theme – Storefront.
The Storefront is an easy-to-use theme with not a lot of customizations, however, it supports all the existing WooCommerce functionality and works well with the third-party plugins and WooCommerce Extensions.
The theme management can be done through the section Appearance -> Themes:
Also, we encourage you to look at our new free WooCommerce Theme SalesZone, that have a demo-data installer and easy to use configuration wizard:
Working with customizer
In this section, we will look at the main points that should be addressed when customizing your theme. We will demonstrate customization of StoreFront as an example.
All customizations are made in the Appearance -> Customize section. After opening it, you will see the following interface:
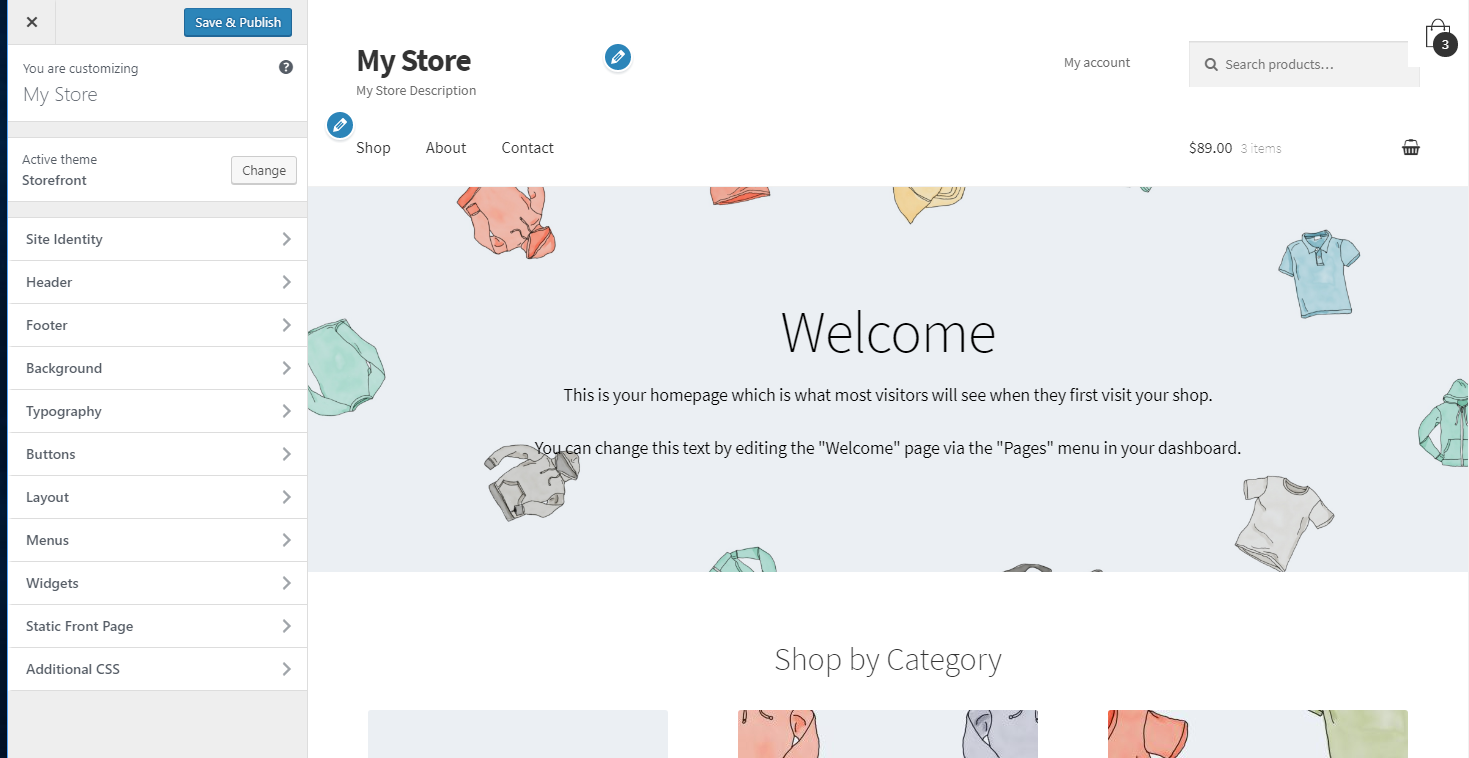
The most important here are the settings in the following sections:
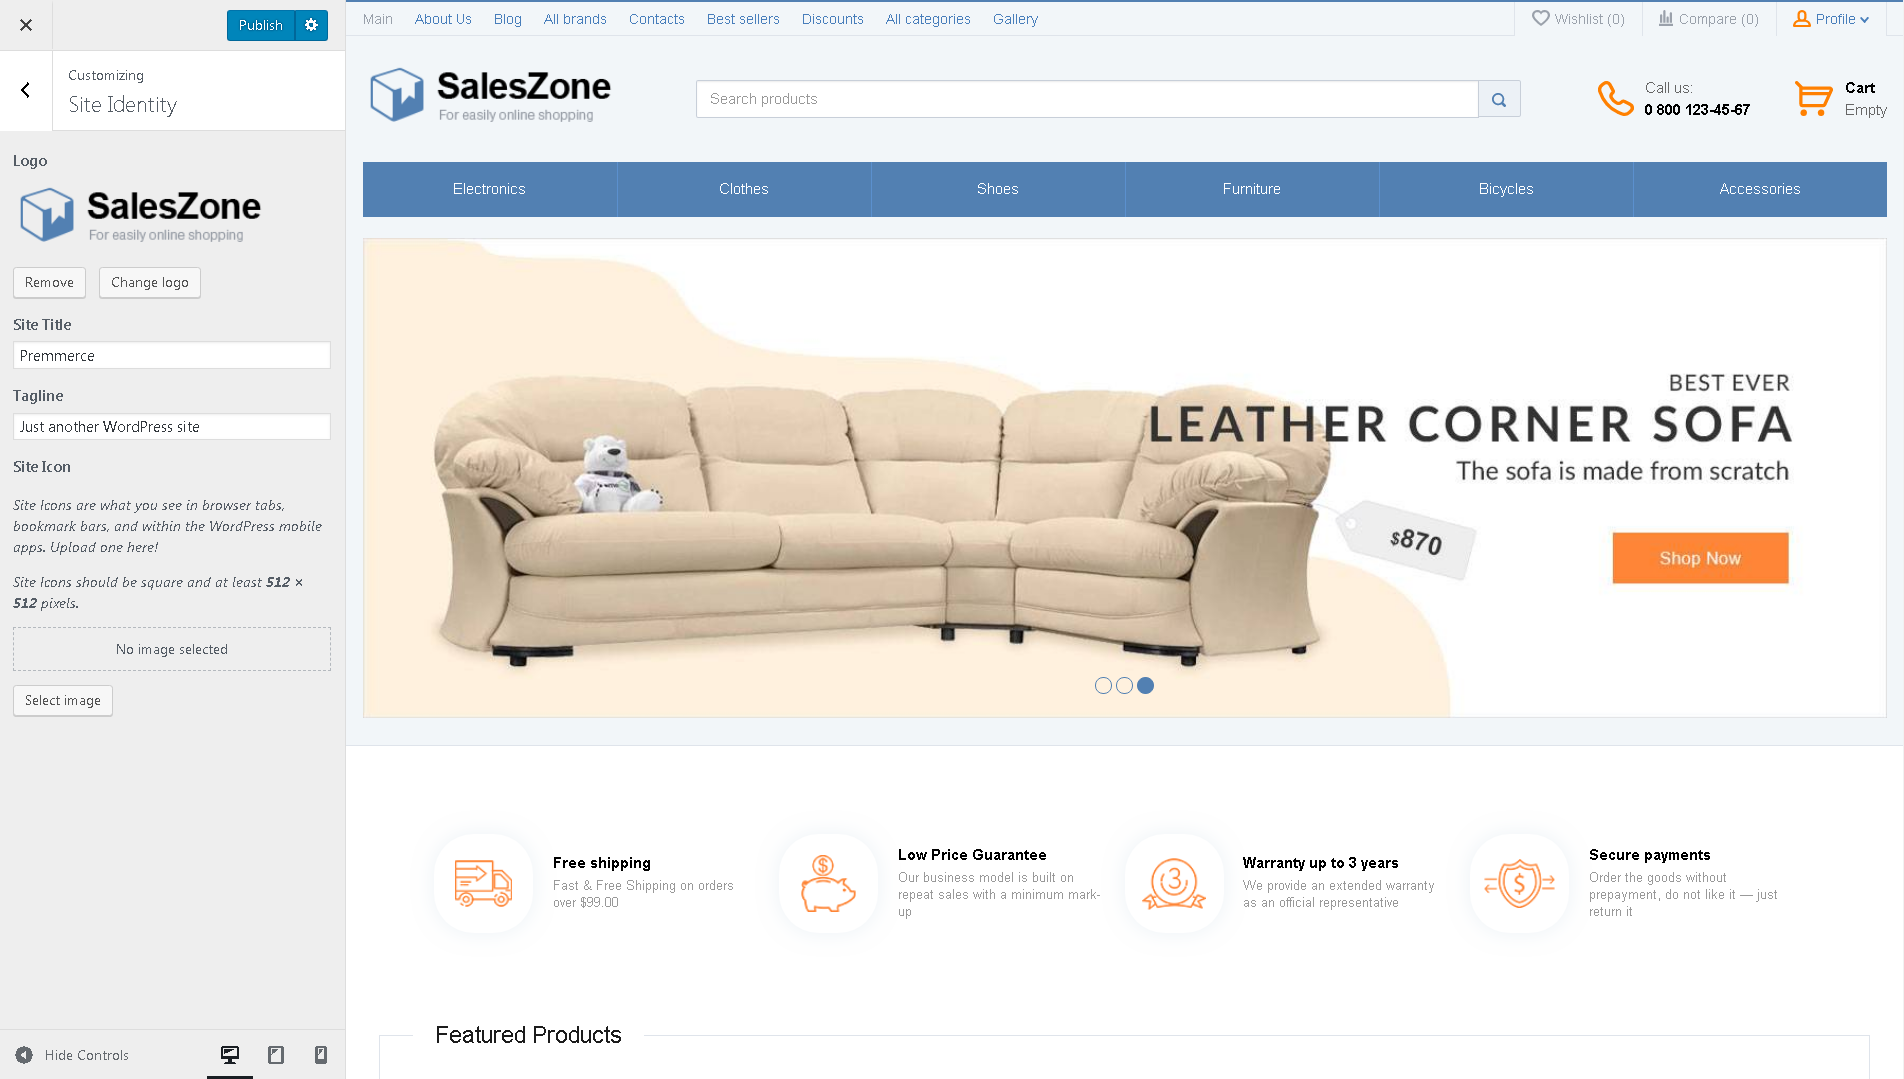
Site Identity
In this section, it is important to choose a logo for your site, as well as an icon that will be displayed in a browser and differentiate your site among the others.
Menus
Here you can set the menu items for all menus in the header and footer.
Widgets
Here you can set the main widgets for your online store. It is very important to set them up in all necessary areas for the proper operation and convenience of an online store.
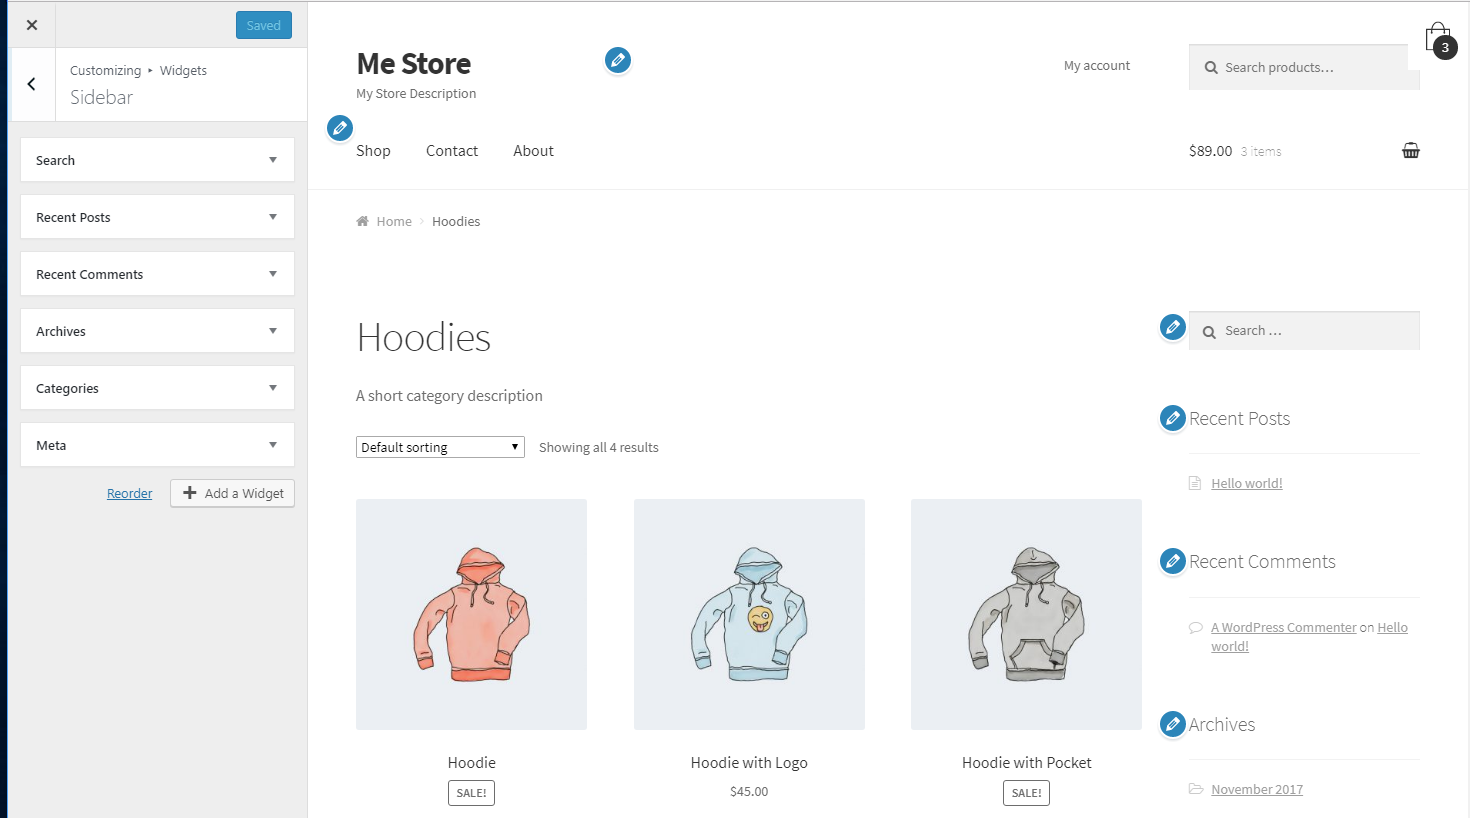
The main WooCommerce widgets you can use:
- Active Product Filters – Display a list of active filters.
- Filter Products by Attribute – Display a list of attributes to filter products in your store.
- Filter Products by Price – Display a slider to filter products in your store by price.
- Filter Products by Rating – Display a list of star ratings to filter products in your store.
- Product Categories – A list or dropdown of product categories.
- Products – A list of your store’s products.
- Products by Rating – A list of your store’s top-rated products.
- Product Search – A search form for your store.
- Product Tag Cloud – A cloud of your most used product tags.
- Recent Product Reviews – Display a list of recent reviews from your store.
- Recent Viewed Products – Display a list of a customer’s recently viewed products.
The standard WordPress widgets are also available.
Various themes and plugins also add their widgets, which can then be used when customizing your online store.
Other settings
Depending on the theme you choose, the following settings are often available. They can be applied for better customization of your online store:
- Header;
- Footer;
- Background;
- Typography;
- Buttons;
- Layout;
- and others.
Setting up the main content pages
The Pages section contains all the main content pages.
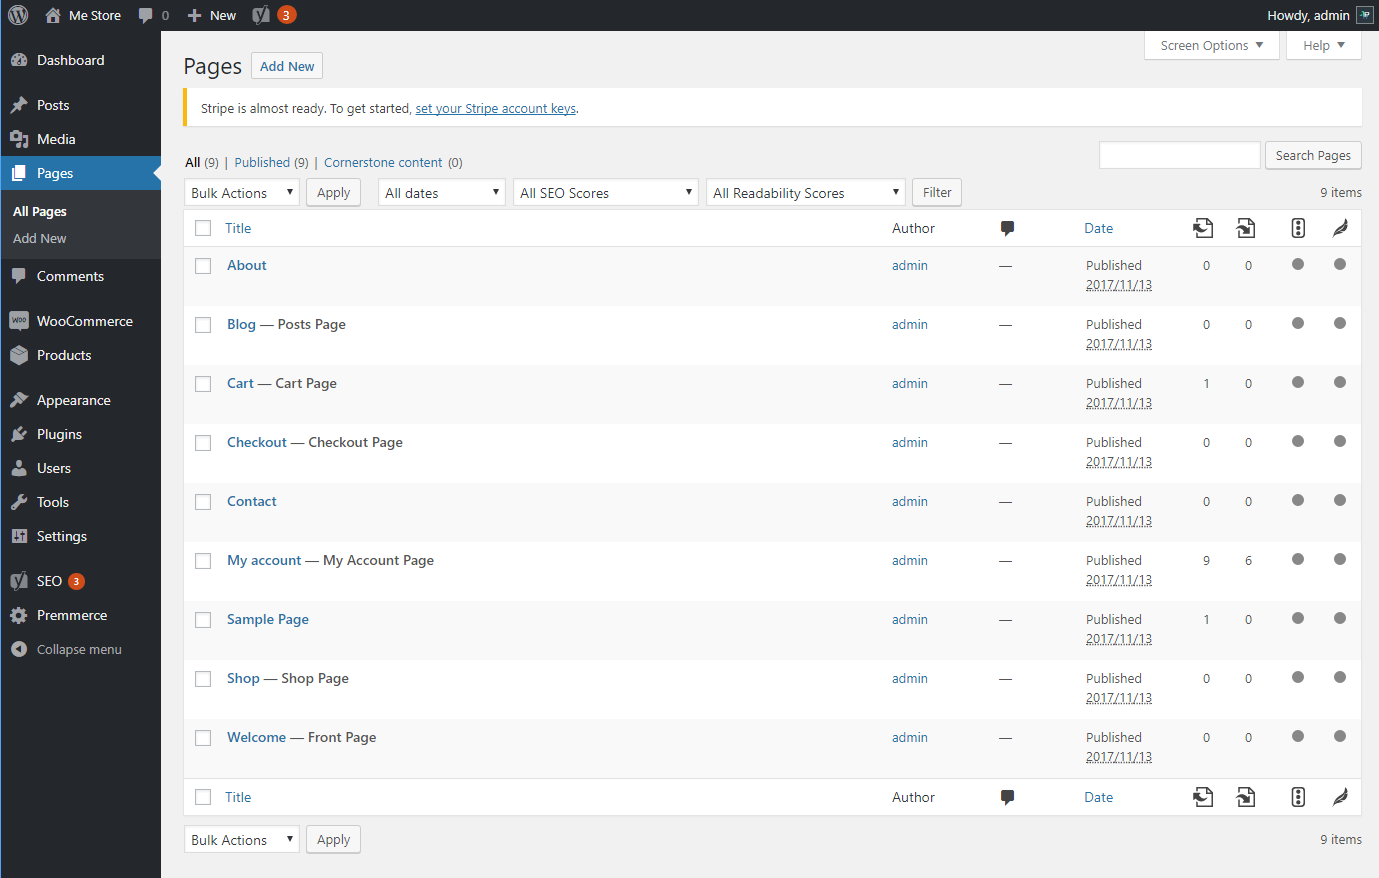
There are many service pages in this list, which can not be deleted, as it can affect the stable operation of your online store. But it’s very important to change some pages in order to personalize your site.
Welcome — Front Page
This is the main page of your online store. It is first and foremost important to set up the correct Meta Tags here with the help of the Yoast SEO section:
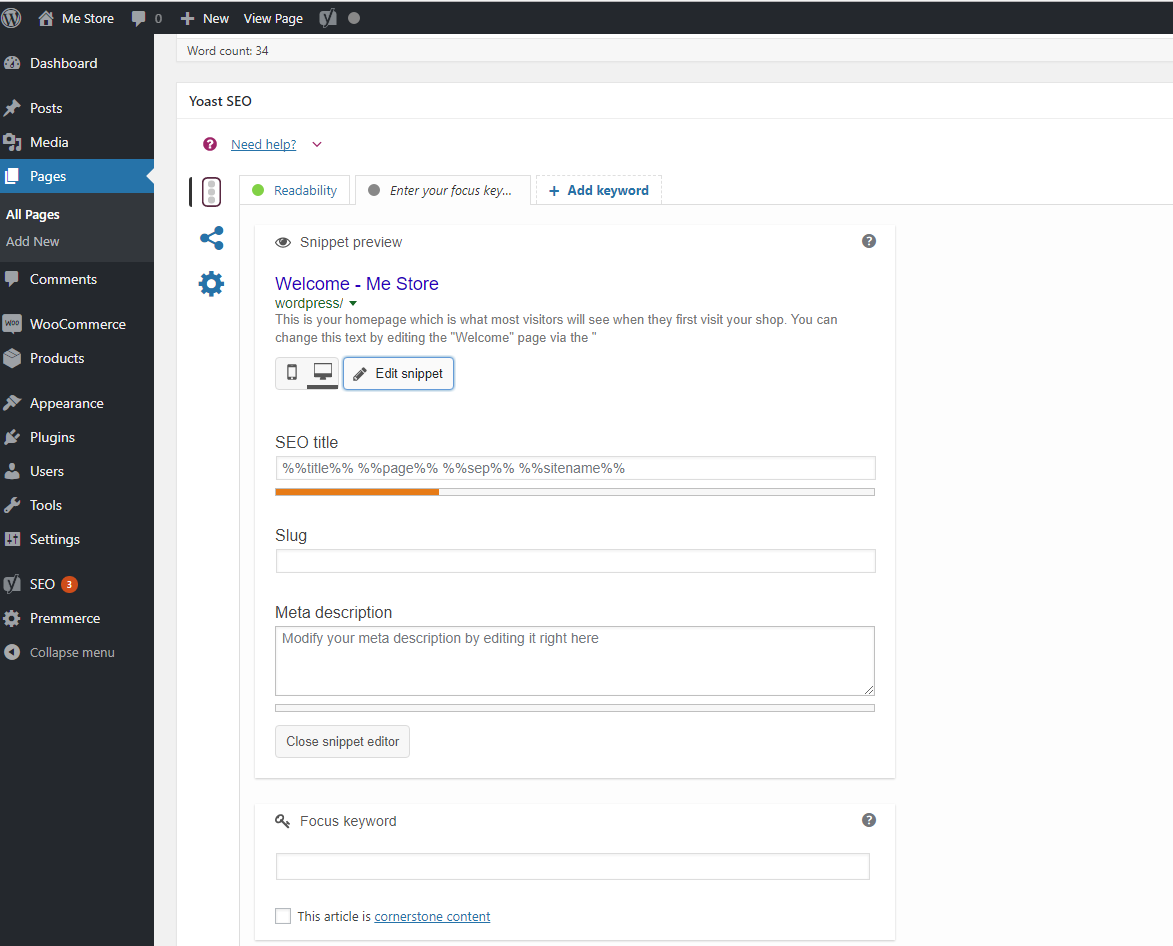
Be sure to enter the correct name of your online store and its short description.
Shop — Shop Page
This is the main catalog page of your online store, which displays all the added items.
Online stores often leave this page more as a service one, not displaying it to the users. In this case, to avoid duplicate content for search engines, it’s worthwhile to write a canonical to the main page with the help of the Yoast section.
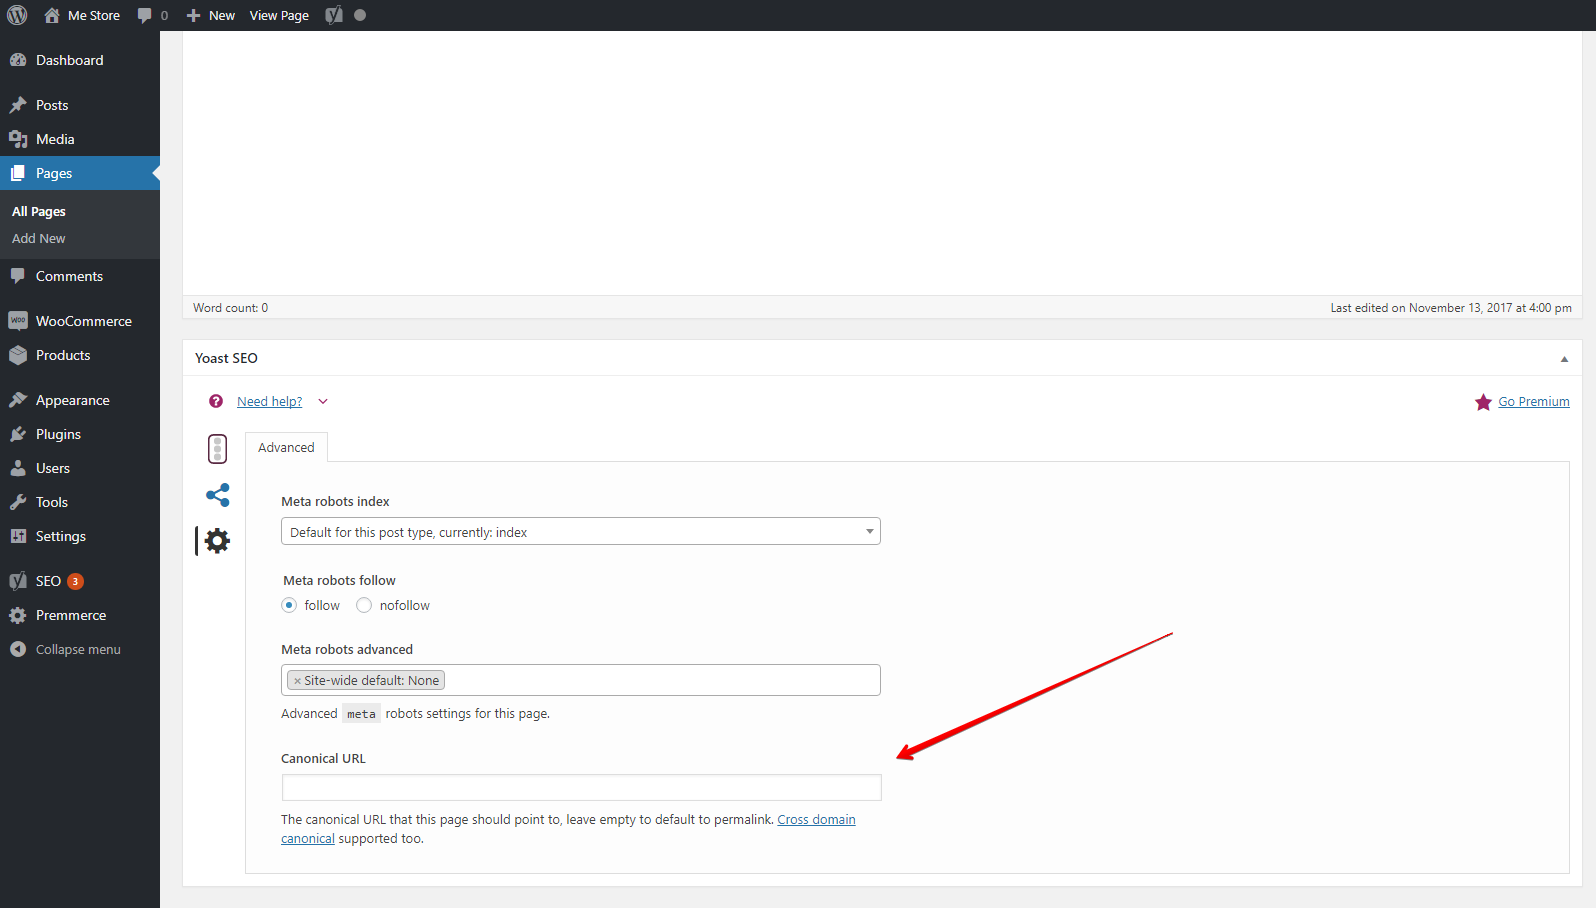
Otherwise, you should change its name and add unique Meta Tags.
Contact
This page contains your store ’s contact information, which can be changed at your discretion. Do not forget to add Meta Tags.
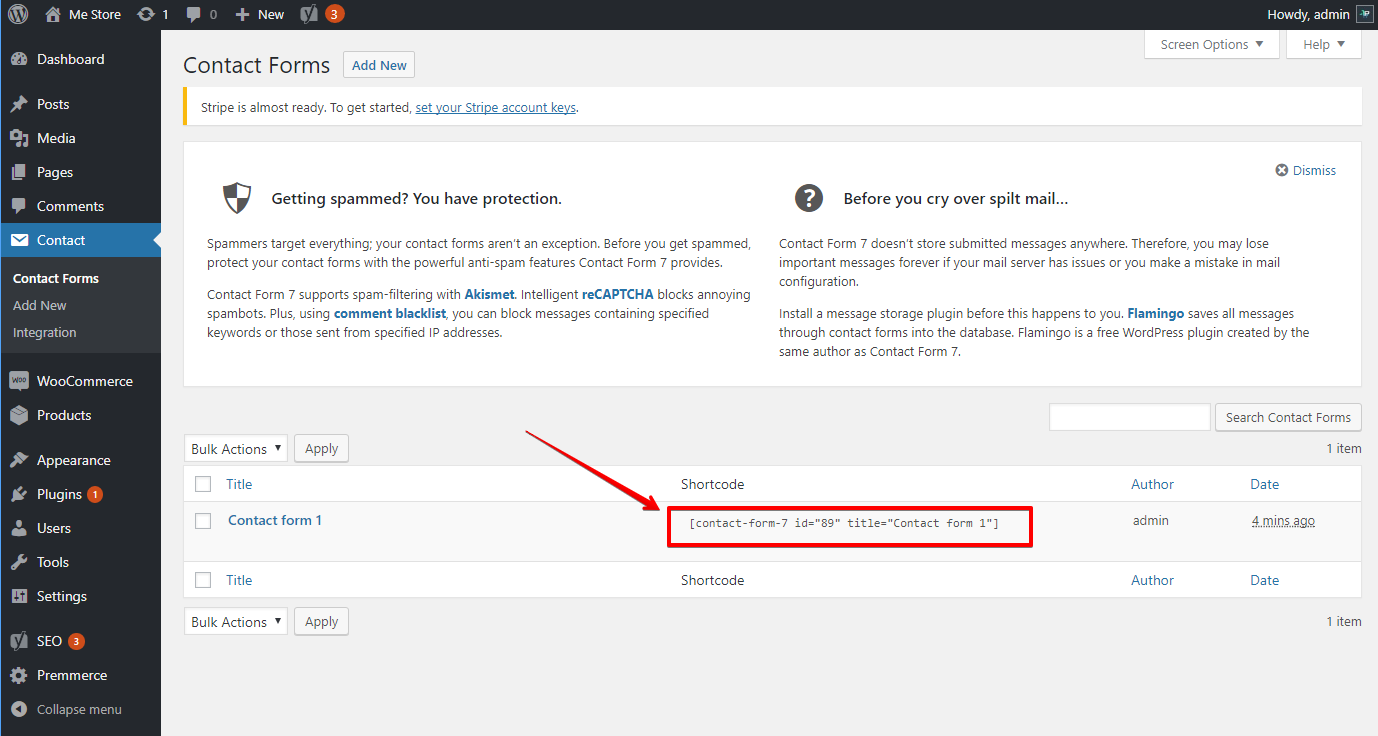
Optionally, we suggest installing a Contact Form 7 plugin that will allow you to display a feedback form on this page and collect information from your customers.
Once installed, you need to go to the page with all forms and copy the Shortcode:
After that, you need to move on to the editing of your Contact page and put it below the content:
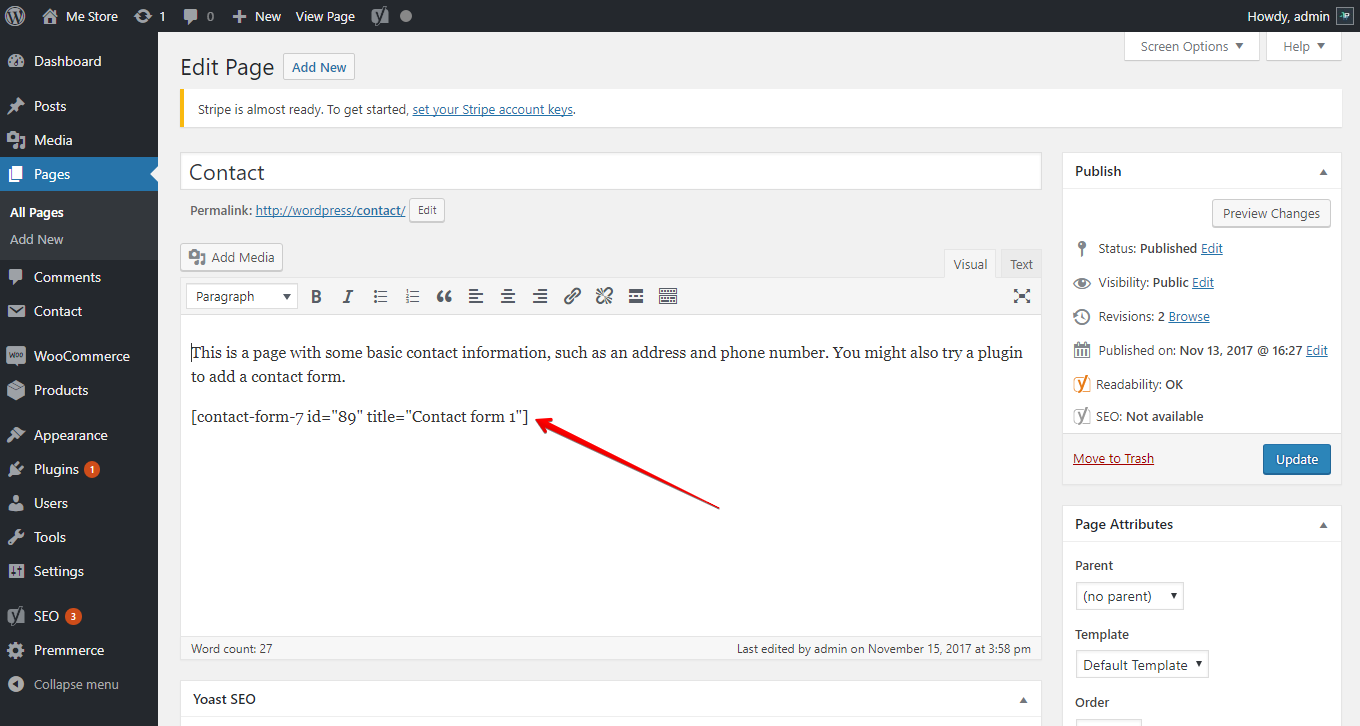
The following form will appear on your contact page:
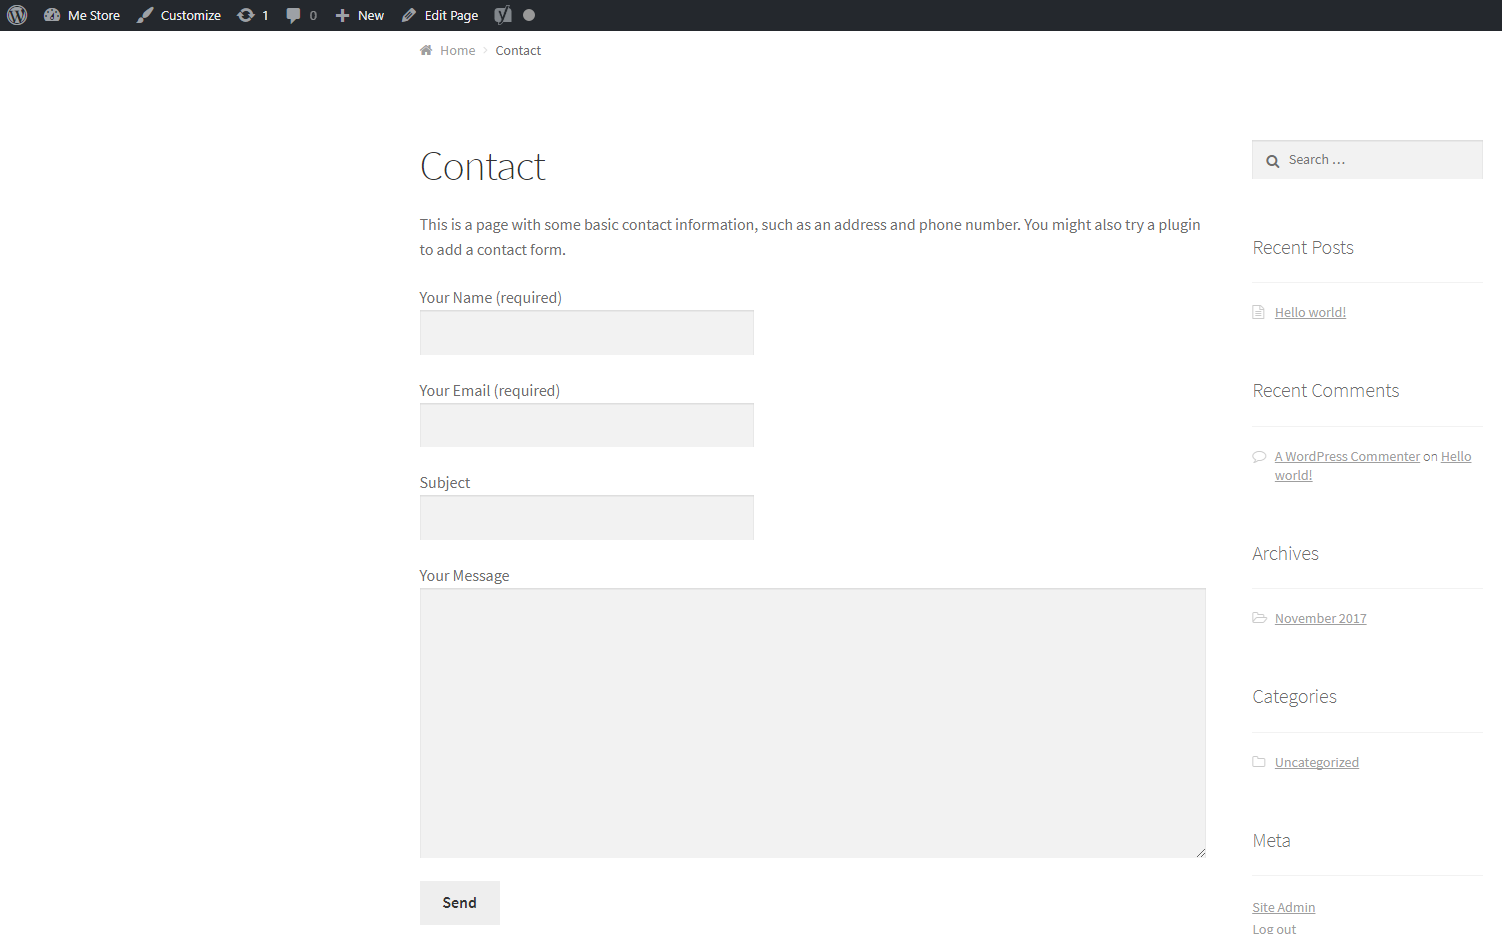
By default, this form will send all messages to the email you specified in the general settings of the site. However, you can go to the form editing and change this address; you can also change or rename the fields for filling and make the additional settings if needed.
You can find out more about the configuration of the forms in the official documentation of the plugin: Admin Screen
Other important pages worth attention
- Cart
- Checkout
- My account
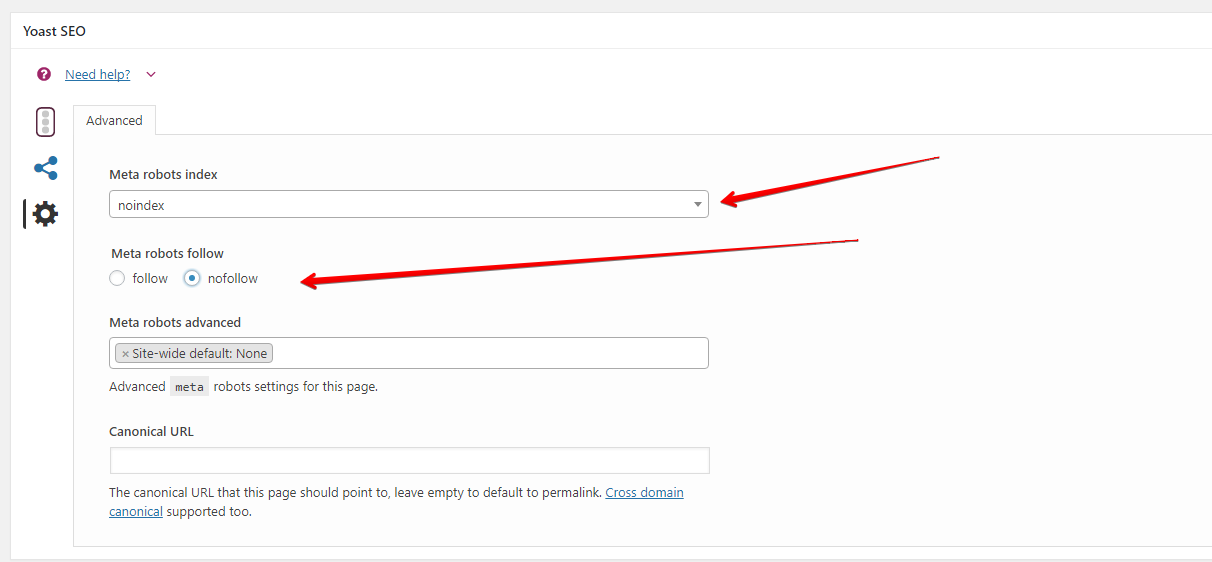
On these pages, you need to put the No Index through Yoast SEO, since they are service pages and will only clog the search engine index.
After all the basic settings for your store are made, you can move on to filling it with the products and working with the orders.
Working with the products and categories
In this section, we will briefly look through the aspects of working with the product catalog of your online store.
Creating product categories
First of all, for better catalog navigation, add all the necessary categories you will add your products to.
You can do it in the following simple interface:
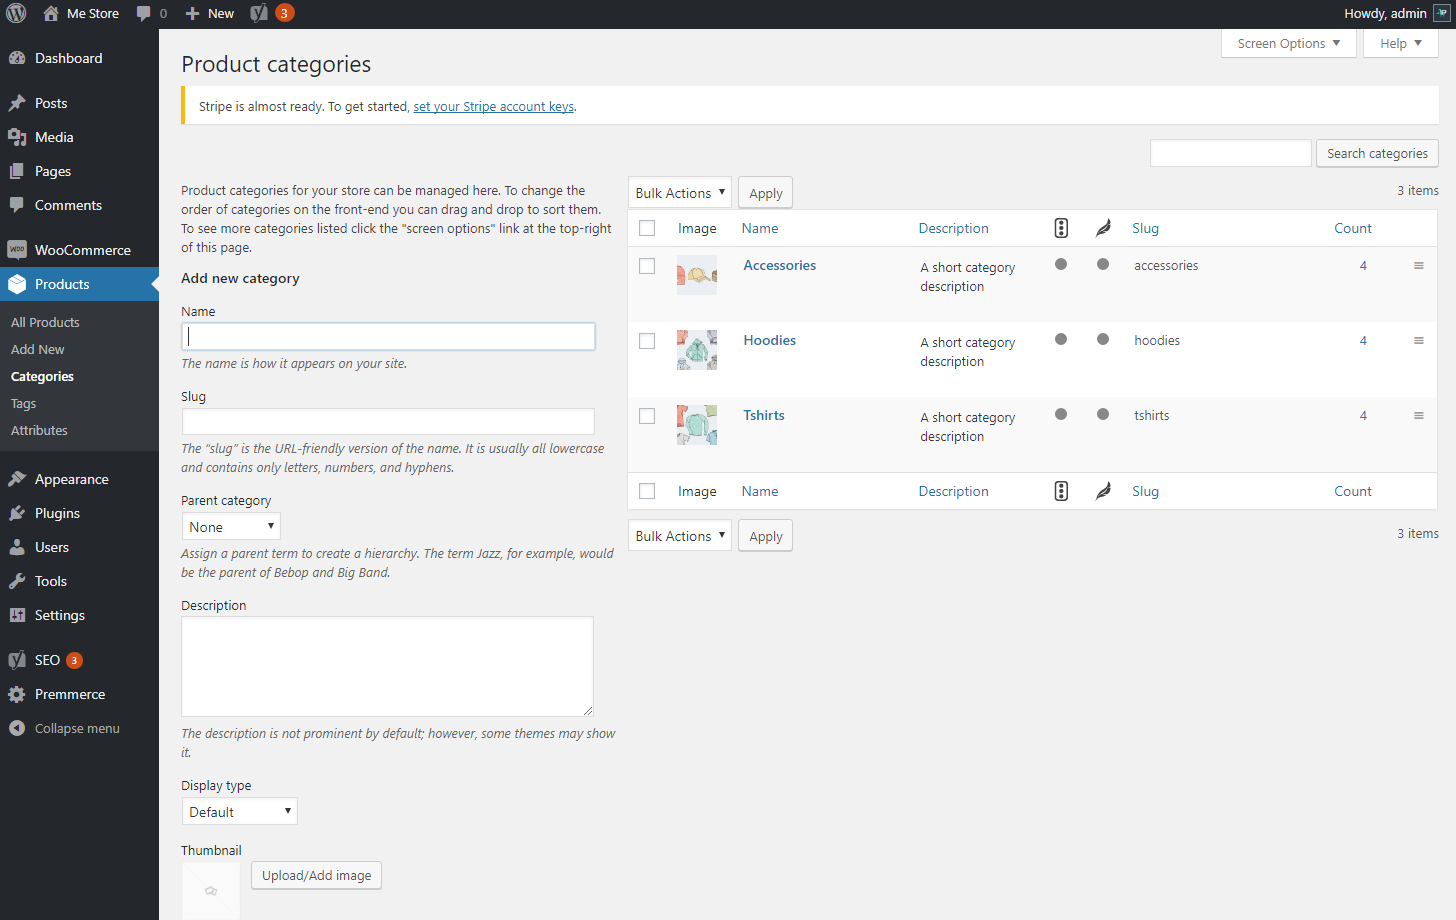
You can read more about working with the categories on this documentation page: Managing Product Categories, Tags and Attributes
Creating product attributes
Product attributes are needed first and foremost to use flexible filtering and product search by these attributes. Product attributes are also used to create a Variable Product, a product that contains several price options, for example, different colors or sizes.
Product attribute management can be done in the following interface:
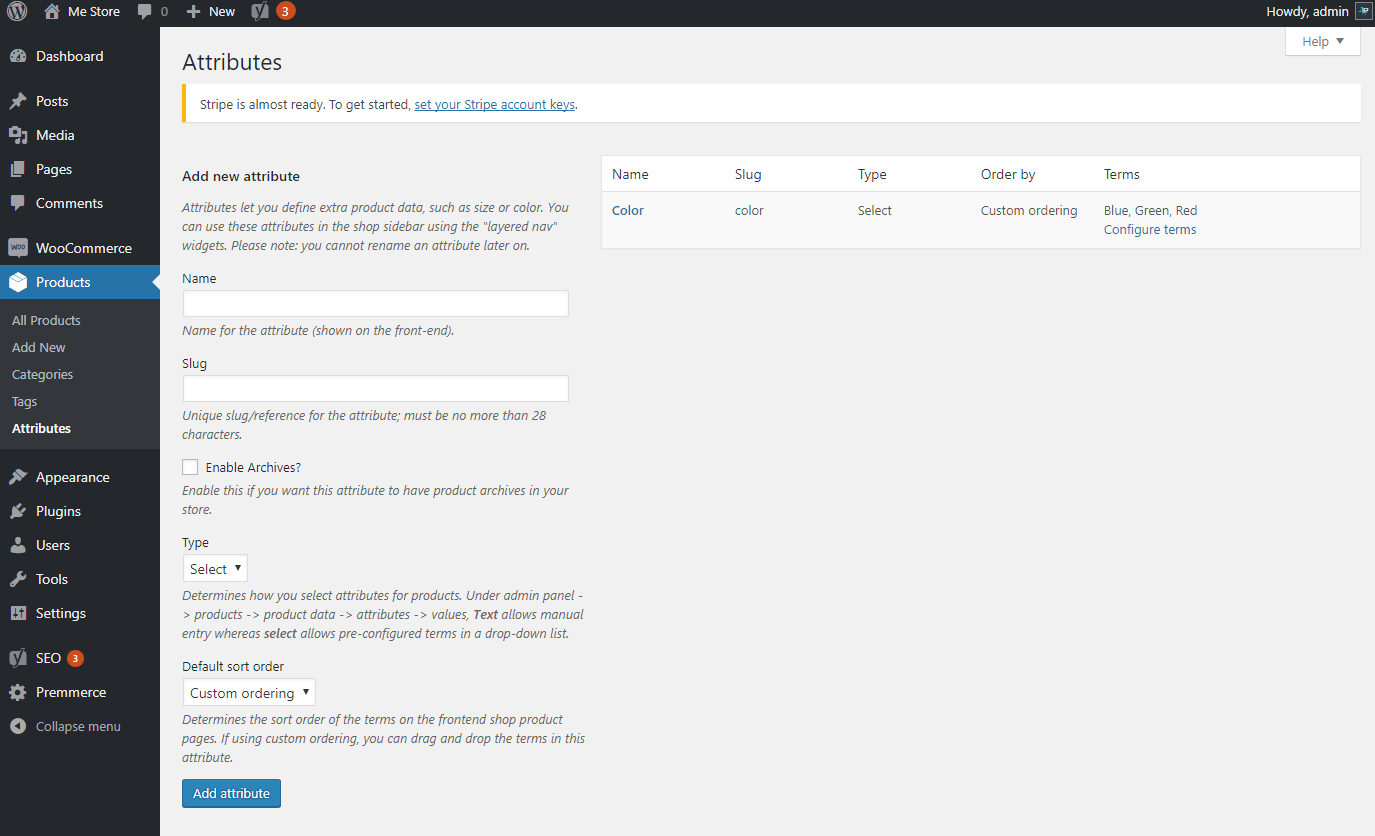
You can read more about working with attributes on this documentation page: Managing Product Categories, Tags and Attributes
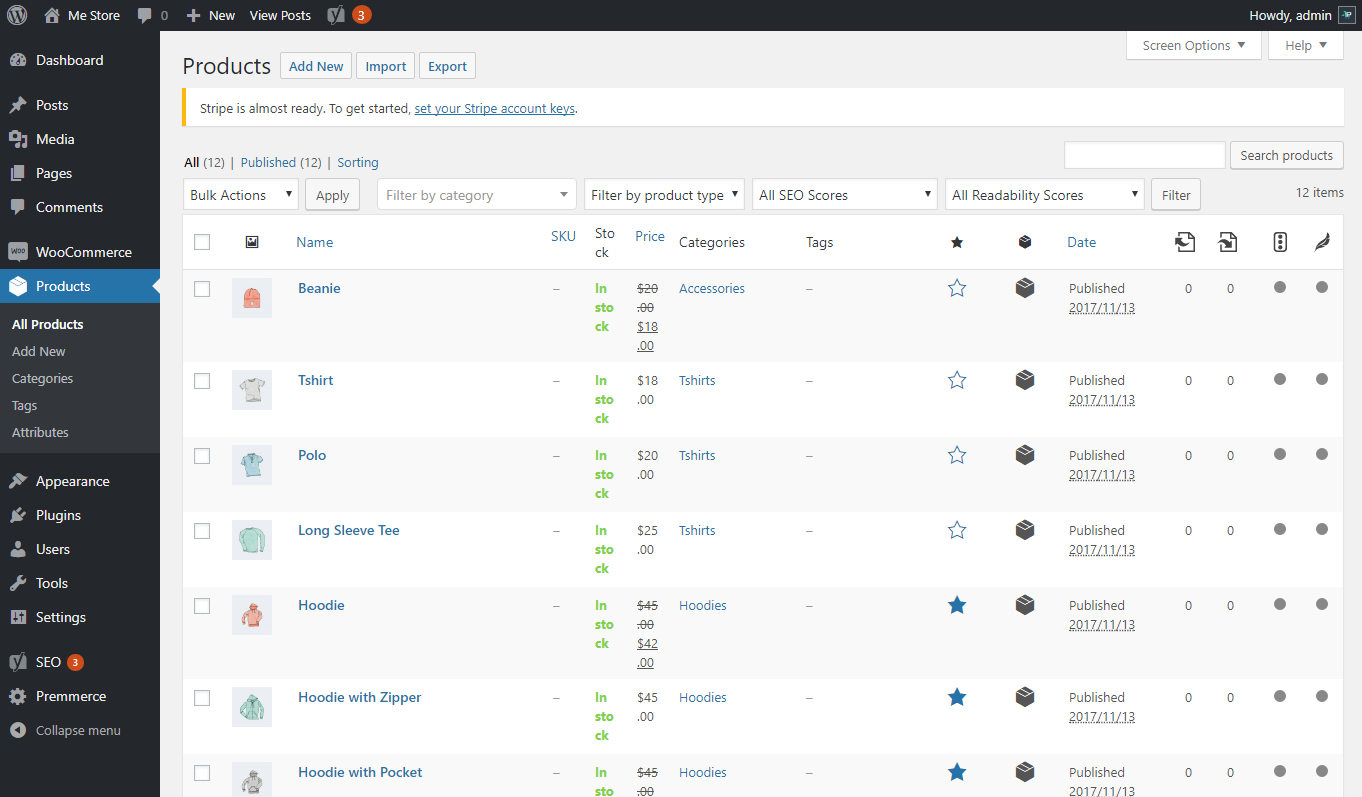
Managing the product catalog
The entire product catalog is placed on one page in a handy table. You can right away take a few quick steps in the list of products:
- Do a quick search for products using a filter;
- Apply massive editing of products (e.g., change category or price for all the selected products) or massively remove products;
- Every product in the list can be quickly edited, deleted, copied or viewed on the site.
Adding new products
Adding new products can be done through a simple interface, which contains all the necessary fields to be filled in:
- Name;
- Description;
- Price;
- Category selection;
- Photo of the products;
- And others.
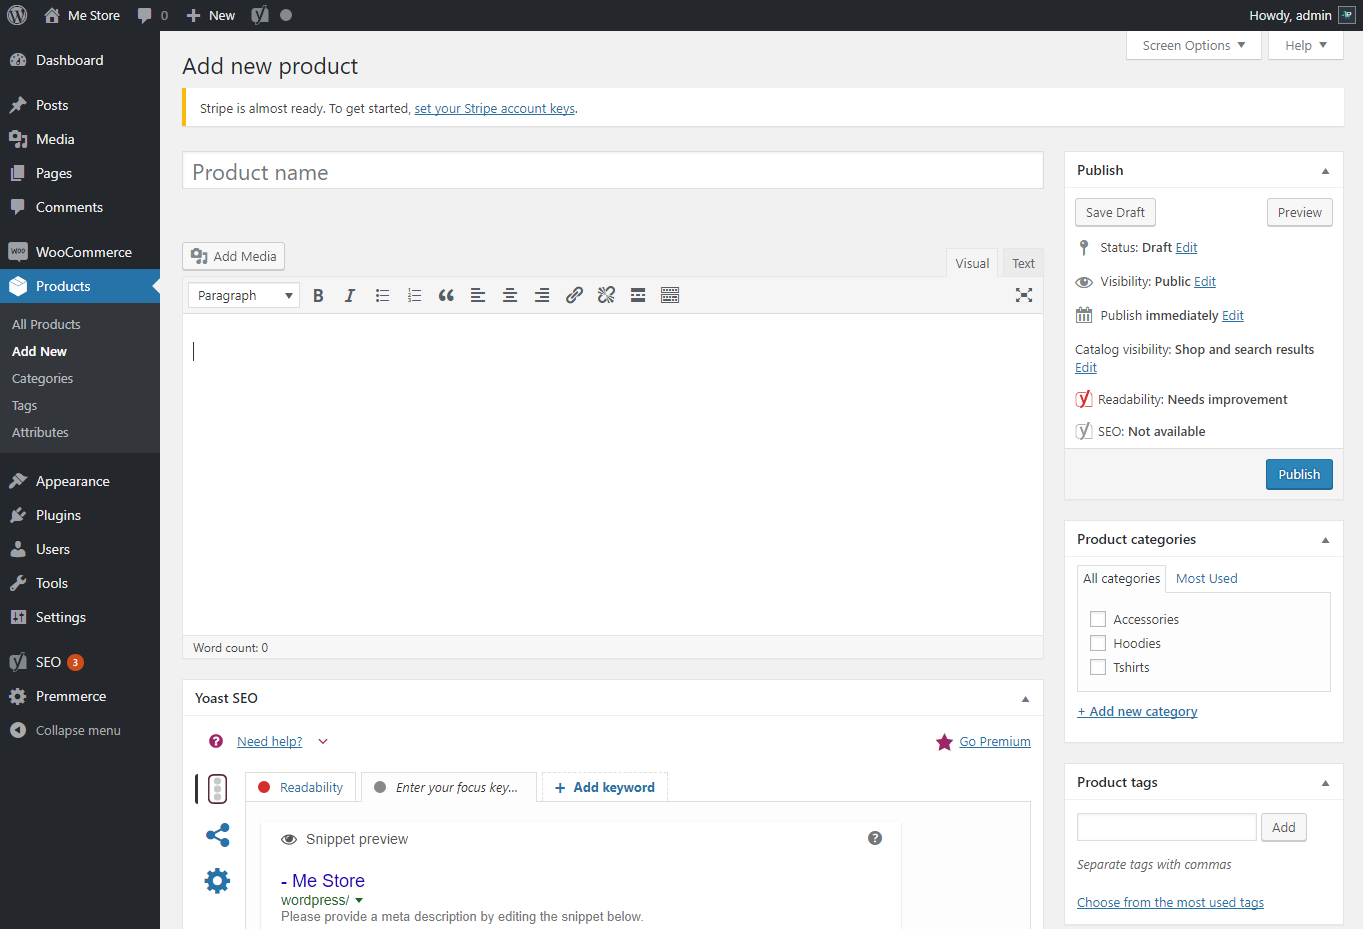
You can find out more about various types of products available and the process of adding products here: Adding and Managing Products
Store management
After a complete setup and adding all products to the store you can begin to work with orders and customers. WooCommerce also has a large number of convenient and efficient tools for this.
Orders management
All the orders made by your customers through the site are displayed in a unified interface, which allows you to quickly view all the basic information about an order, as well as to go to the card for a separate order for additional viewing and settings.
You can also create an order by yourself with this interface if the user has placed the order by phone.
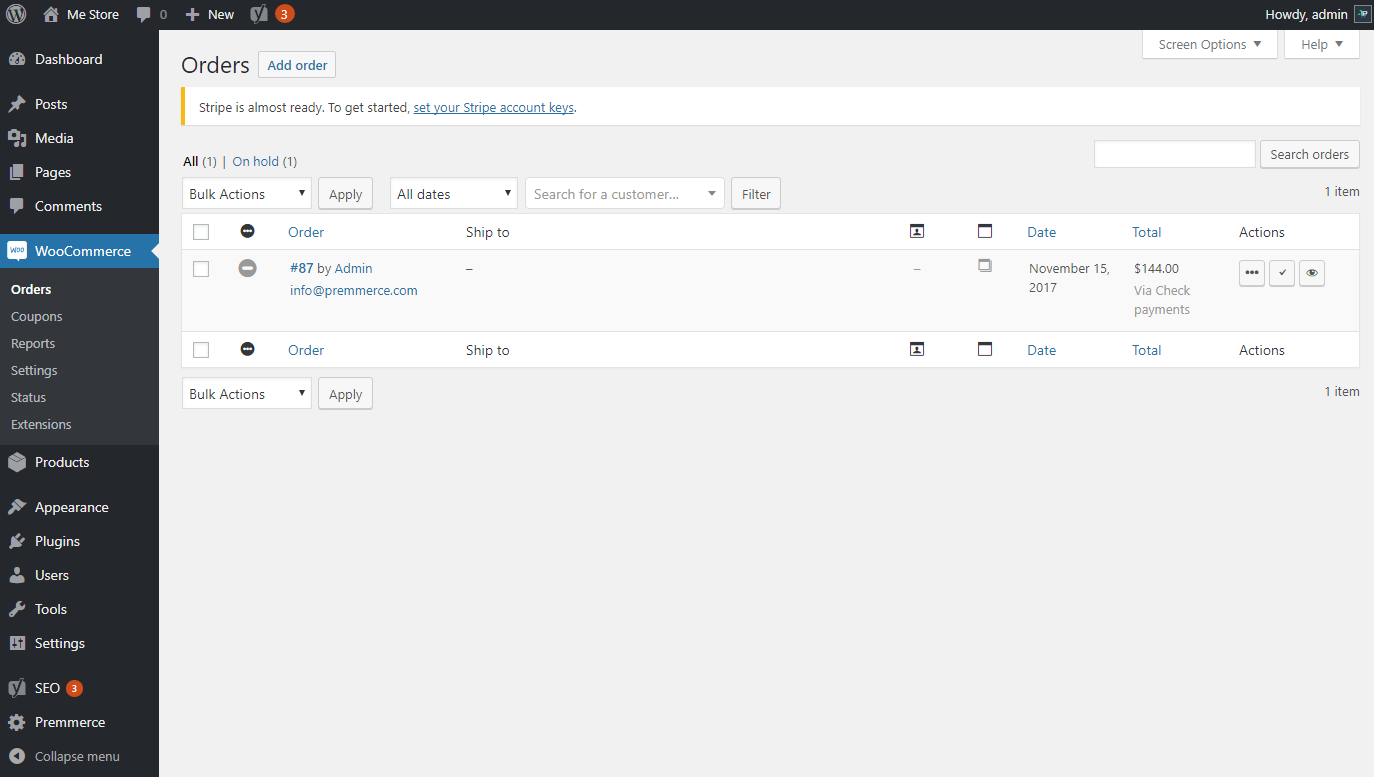
For more information on the orders management, you can read the following documentation: Managing Orders
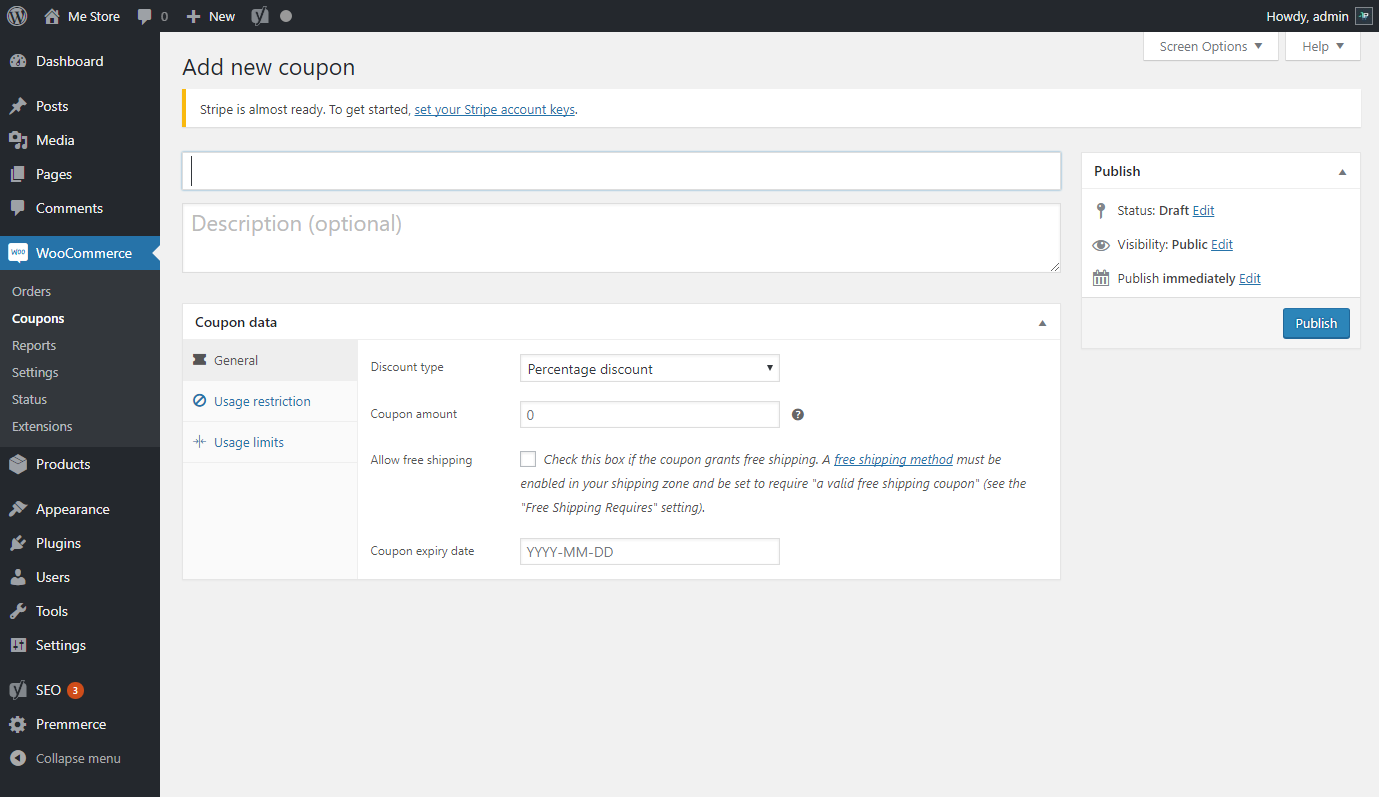
Creating discount coupons
For the marketing purposes, to attract more customers you can use the discount coupons. This feature is available after installing WooCommerce and allows you to create coupons in a user-friendly interface.
Reports
Besides using Google Analytics, you can also use the WooCommerce analytics to get the data about:
- Orders with comprehensive graphics and different settings for visualization;
- Customers and their purchases;
- Products only a few items of which are left in stock.
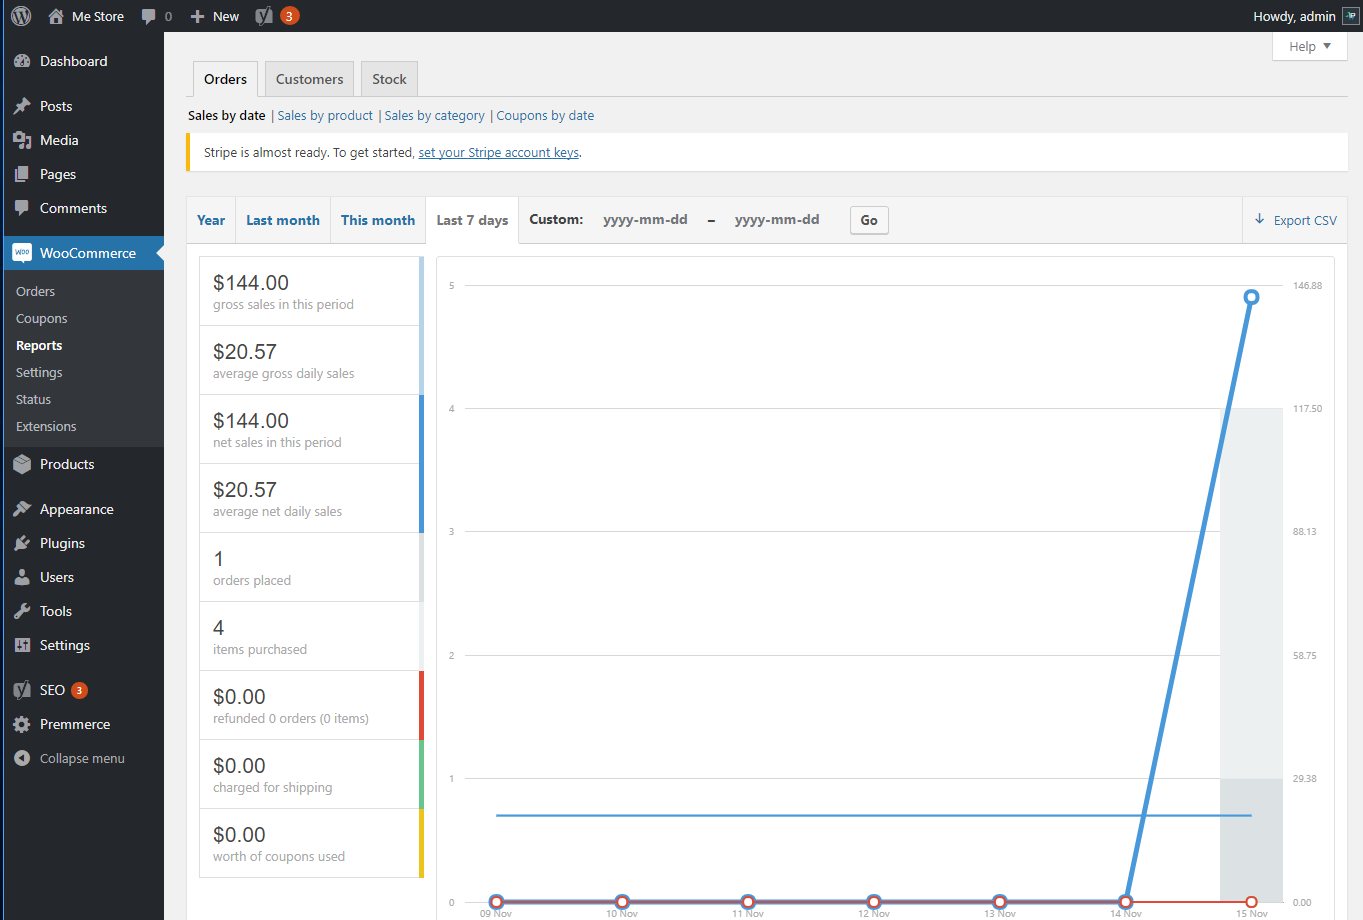
You can read more about available reports at WooCommerce Reports
Status
This page allows you to learn the basic information about the system and possible errors that occurred during the operation. If there are any problems in the store, visit this page first and check if there’re any errors.
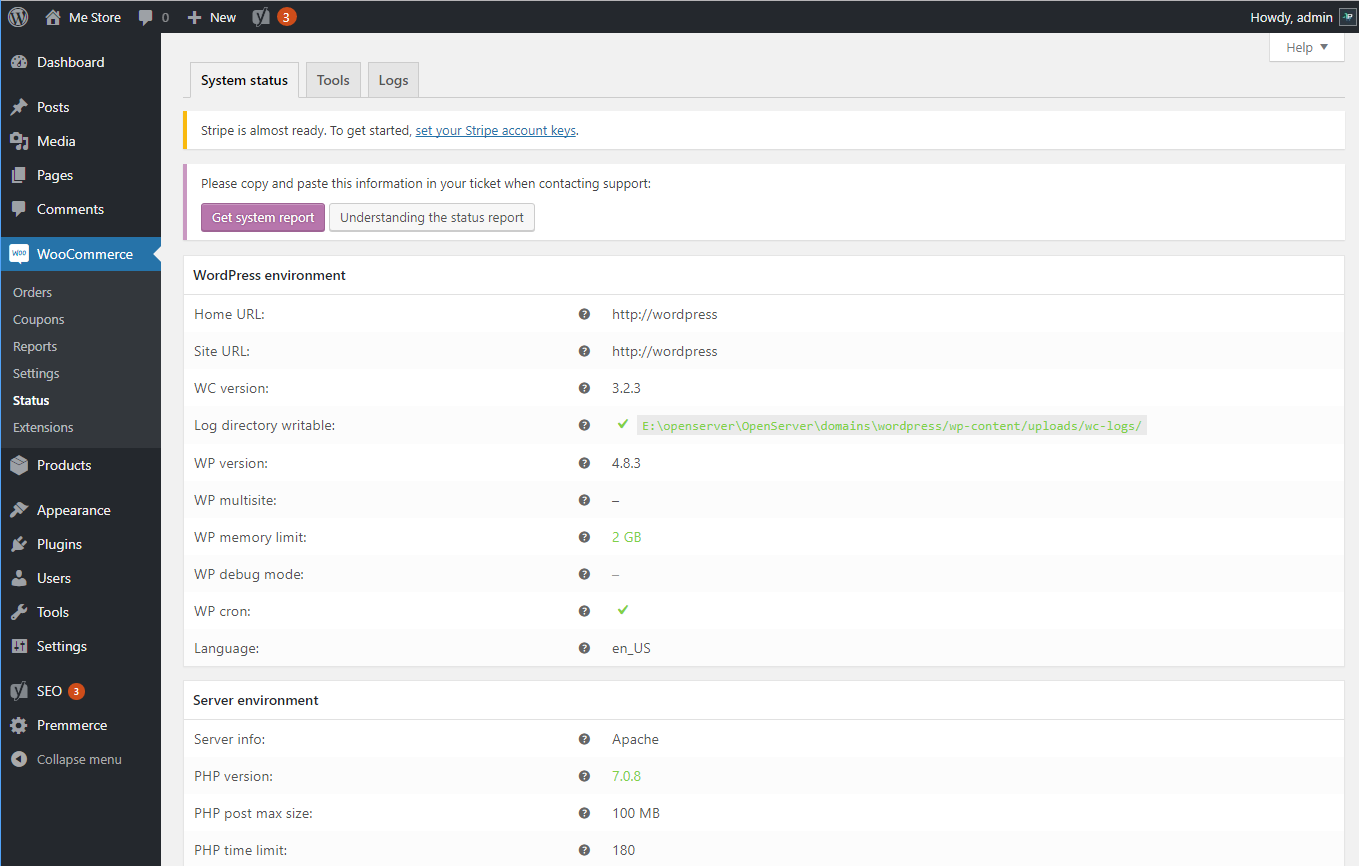
For more information on how the Status works, please visit Understanding the WooCommerce System Status Report
Additional features
We also recommend that you pay attention to the additional features and plugins that can make your store even more convenient, lead to the sales and conversion of your users into customers.
Premmerce Search
This plugin solves two problems at once:
- Replaces the regular WooCommerce search with Live Search;
- Provides search results despite possible mistakes the users can make.
You can find out more here: Premmerce Search – WooCommerce Product Search
Premmerce WooCommerce Product Filter
This plugin greatly improves the standard features of WooCommerce filtering and adds new features, such as filtering the search results, etc.
You can find out more here: Premmerce WooCommerce Product Filter
Premmerce WooCommerce Brands
If you need to add the information about brands of your products, or if you need to display the brand page and additional brand widgets, you can use this plugin, as the standard WooCommerce functionality does not imply adding brands.
You can find out more here: Premmerce WooCommerce Brands Free Plugin
WooCommerce Customers Manager
This plugin will improve the informative part of customer management. Namely, it adds filtering customers by the registration date and the amount of money spent, adds a display of the amount of money spent and a list of orders on the user’s card.
You can find out more here: Woocommerce Customers Manage
Premmerce User Roles
Premmerce User Roles will help you create new user groups for your own purposes.
You can find out more here: Premmerce User Roles
MetaSlider
It’s one of the most popular banners and slider plugins in the WordPress plugins directory. It provides you with a possibility to create banners or sliders by simply adding them to your site using the shortcode.
You can find out more here: MetaSlider
Premmerce WooCommerce Wishlist
This plugin provides customers with a possibility to create wishlists and share them with their friends.
You can find out more here: Premmerce WooCommerce Wishlist
Premmerce WooCommerce Redirect Manager
The Premmerce Redirect Manager enables you to create 301 and 302 redirects and to set up automatic redirects for the deleted products in a WooCommerce store.
You can find out more here: Premmerce WooCommerce Redirect Manager
Premmerce WooCommerce Wholesale Pricing
The Premmerce WooCommerce Wholesale Pricing is a plugin that allows you to add individual wholesale prices or other price types to WooCommerce products for any customers’ roles.
You can find out more here: Premmerce WooCommerce Wholesale Pricing
Premmerce Woocommerce Product Bundles
This plugin is used to add bundles of products with discounts and to display them as a list on a product page.
You can find out more here: Premmerce Woocommerce Product Bundles
Premmerce Dev Tools
This plugin facilitates the development, testing and debugging of the code on the WordPress platform. The important options are also the creation and removal of demo data, which can greatly simplify setup if you want to test the work of a store with many products and categories.
You can find out more here: Premmerce Dev Tools
WooCommerce Settings with Premmerce Wizard
As you see in our tutorial in order to launch a successful e-commerce project on WooCommerce you really need to install and configure about 10 plugins and complete nearly 40 different settings.
If you are a novice in WooCommerce or not very familiar with WooCommerce you’re likely to spend quite a while launching your store and you should be very careful so that you don’t miss some steps during the setup.
To make your life easier we’ve developed one plugin that contains all settings described and made with the help of an interactive Premmerce wizard and instruments for plugin installation from one interface.
Plus, the Premmerce plugin contains two addons:
- Premmerce Product Comparison – the feature which enables product comparison option on your website;
- Premmerce WooCommerce Toolkit enables the correct operation of the languages which contain symbols different from Latin, and also an option to add any script to the upper or lower part of the website without implementing any changes to the code.
The Premium version of the Premmerce plugin provides a variety of options for your store’s page speed optimization and its cashing system which is based on the Rocket Cache plugin.
You can read more about it and get it for free here: Premmerce Plugin – WooCommerce Wizard and Must-have Plugins Bundle.
Also you can see all our Premmerce WooCommerce Plugins to increase SEO rank of your store and get additional features for store management.
Comments

Ready to Get Started?
Join over 100,000 smart shop owners who use Premmerce plugins to power their WooCommerce stores.
Get started