Premmerce WooCommerce Redirect Manager

The Premmerce Redirect Manager enables you to create 301 and 302 redirects and to set up the automatic redirects for the deleted products in the WooCommerce store.
This is the main Premmerce plugin for the redirect management and it focuses on the improvement of your store’s SEO, usability and navigation.
At the moment we are working on the tools needed for migration from other platforms to WooCommerce and the Redirect Manager would ensure the seamless flow of this process. We make sure your store doesn’t lose its position in the search engine.
The main Premmerce WooCommerce Redirect Manager features:
- adding 301 redirects
- adding 302 redirects
- setting up automatic redirects for products
- a convinient interface for adding and editing redirects
In addition to realization of the main features, this plugin is tested with:
- base WooCommerce functionality
- WPML WooCommerce Multilingual
It’s worth mentioning that all capabilities that are developed according to our features list will be tested for compatibility with the Premmerce Redirect Manager.
This plugin interacts very well with the other Premmerce plugins, such as:
Premmerce WooCommerce Redirect Manager Demo
You can create your personal demo store and test this plugin together with Premmerce Premium and all other Premmerce plugins and themes developed by our team here: Premmerce WooCommerce Demo.
Installation
You can install this plugin from the official catalogue of WordPress plugins or download and install it manually:
- Unzip the downloaded zip file.
- Upload the plugin folder into the `wp-content/plugins/` directory of your WordPress website.
- Activate `Premmerce Redirect Manager` from the Plugins page
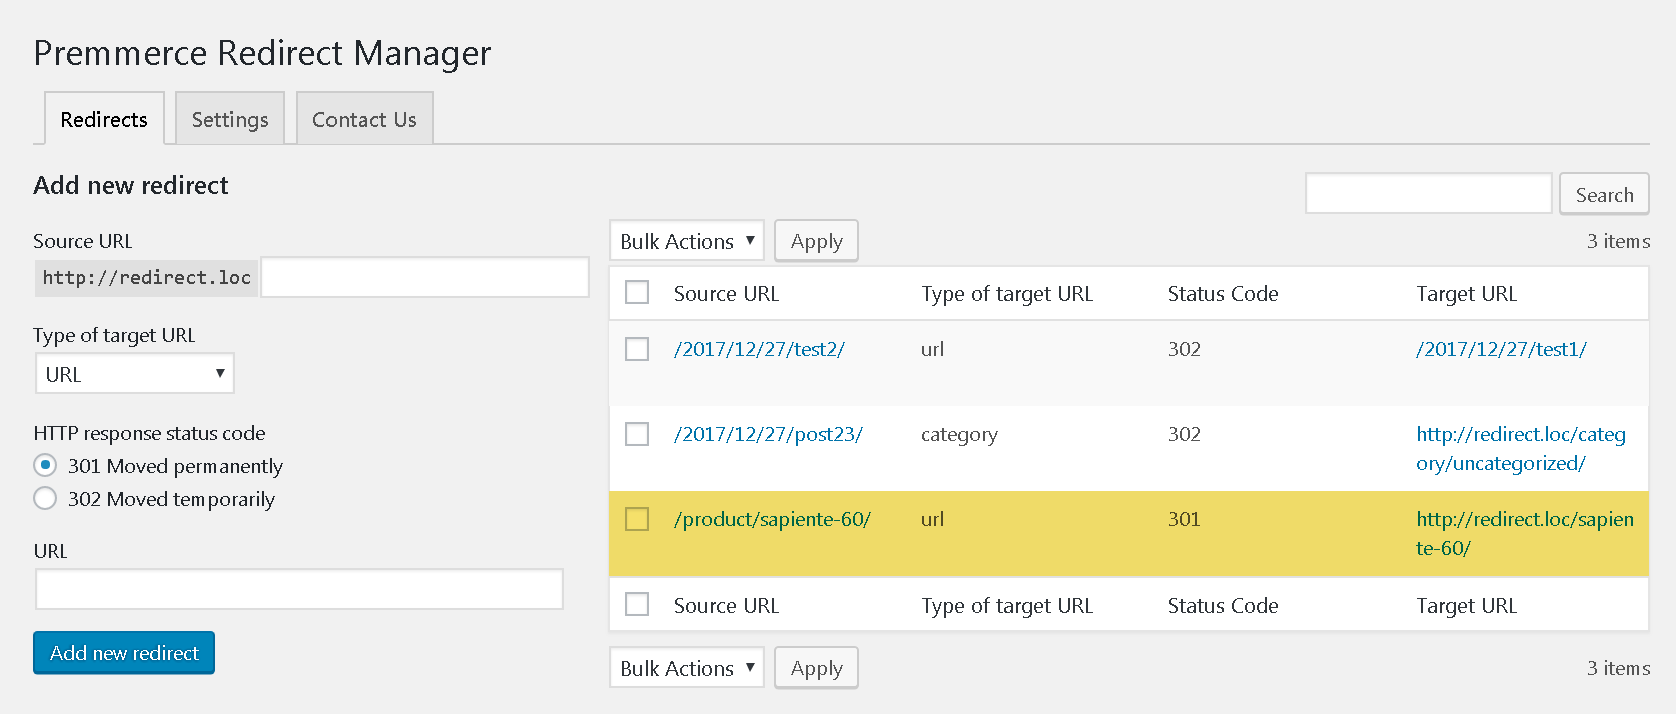
The Plugin Homepage
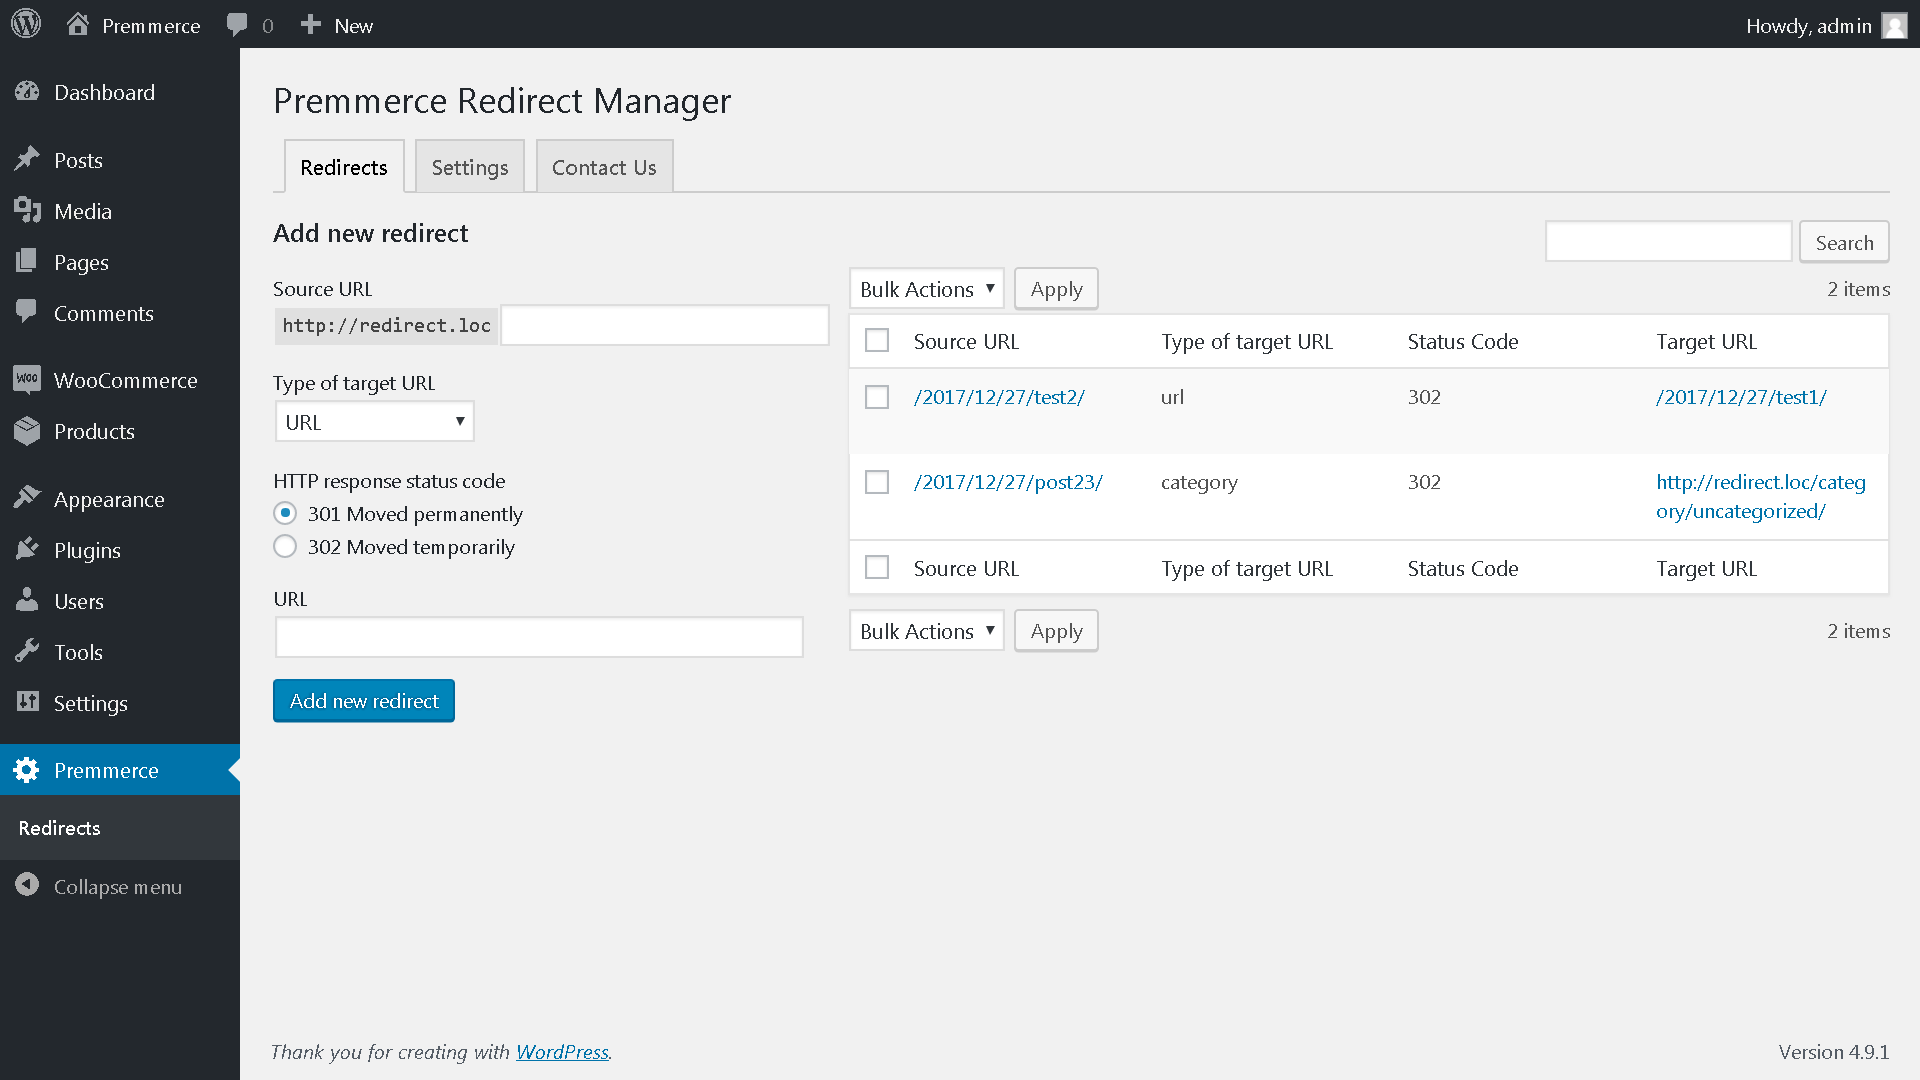
Here you can:
- Add redirects
- Delete redirects
- Edit redirects
- Set up auto-adding redirects for products
Adding Redirects
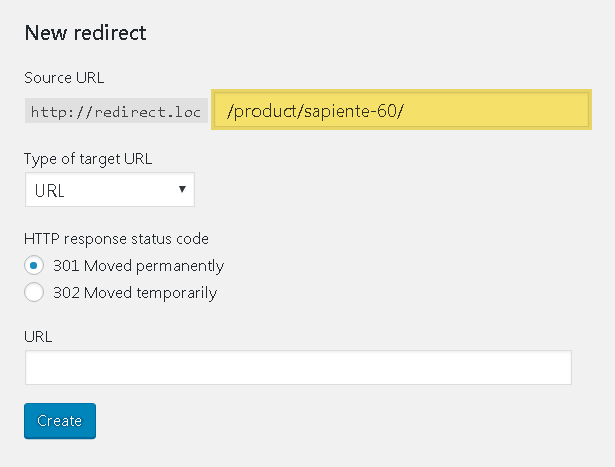
For example, you need to make a redirect from the former product URL:
http://redirect.loc/product/sapiente-60/
to the new one:
http://redirect.loc/sapiente-60/
You need to follow the steps below:
1. Copy the URL line except for the actual domain part of your website from the former URL (/product/sapiente-60/) and paste it into the Source URL field.
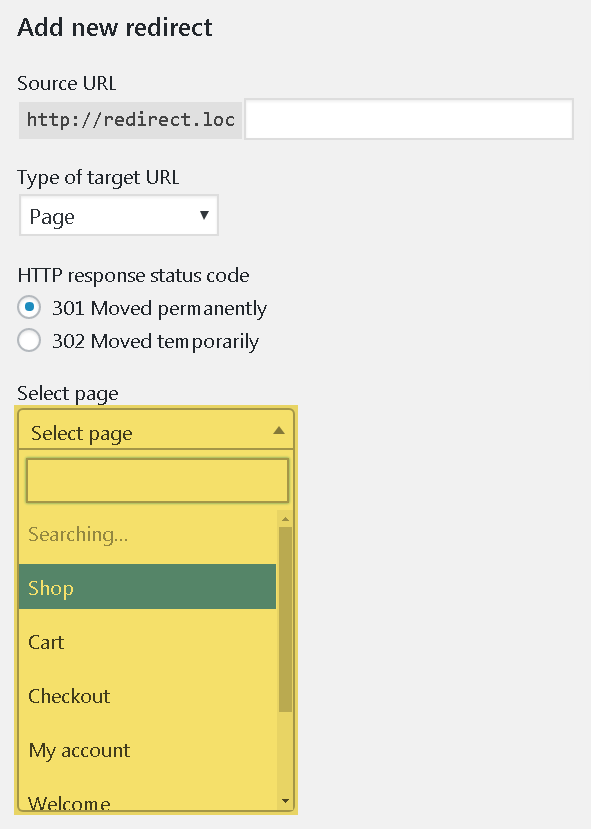
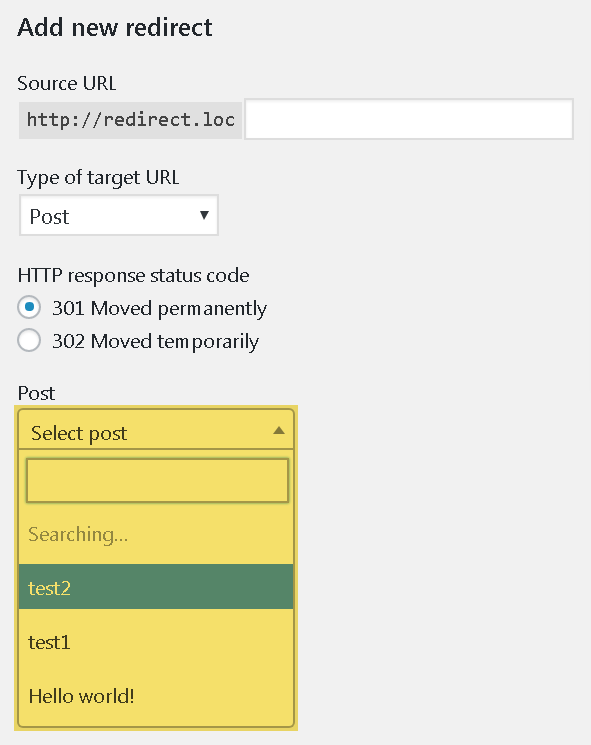
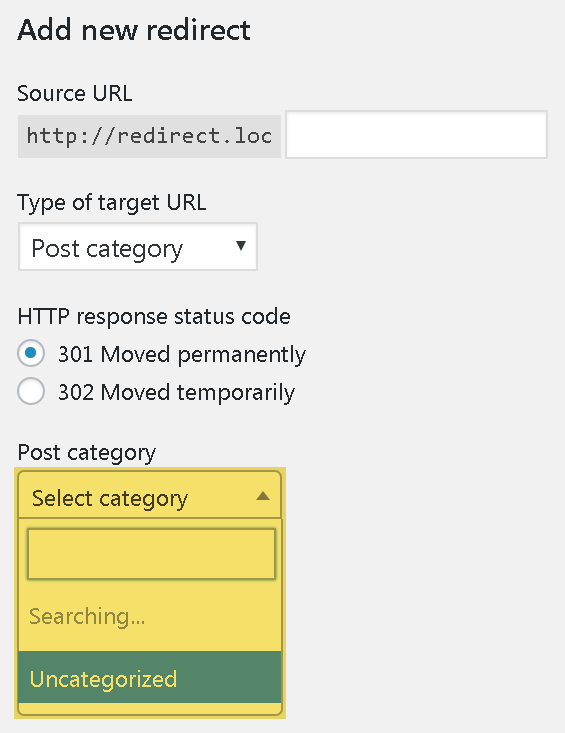
2. Choose the type of the URL to which a redirect will be added from the ‘Type of target URL’ drop-down list.
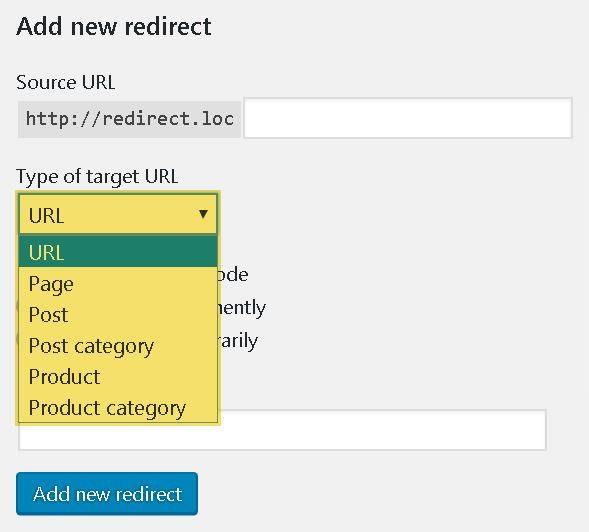
- URL – Enter the URL to which you need to add a redirect.
Important!
If you add a redirect to the external resource then make sure you enter the URL in the full format, for example http(s)://www.google.com
- Page – you can choose the page created earlier from the searchable drop-down list.
- Post – you can choose a previously created post from the searchable drop-down list.
- Category – you can choose a previously created category from the searchable drop-down list.
- Product – you can choose a previously created product from the searchable drop-down list.

- Product category – you can choose a previously created product category from the searchable drop-down list.

In our case, the URL type is required.
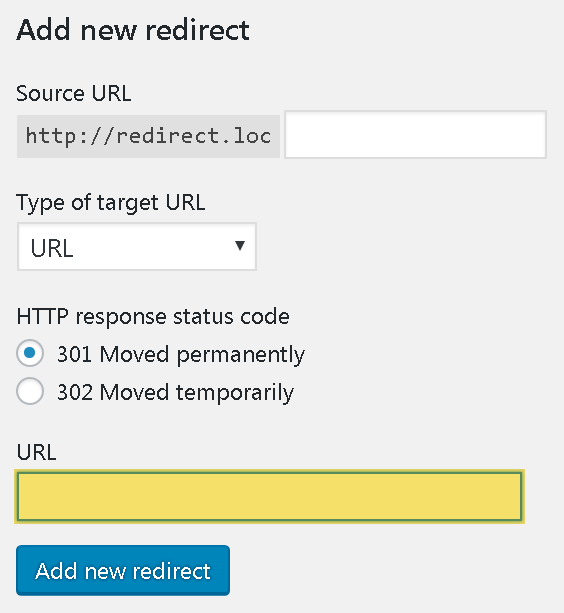
3. Choose HTTP response status code: 301 Moved permanently, 302 Moved temporarily. In our case, the needed type is 301, because you won’t need the former URL in future.
4. Paste the new URL ‘http://redirect.loc/sapiente-60/’ into the URL field.
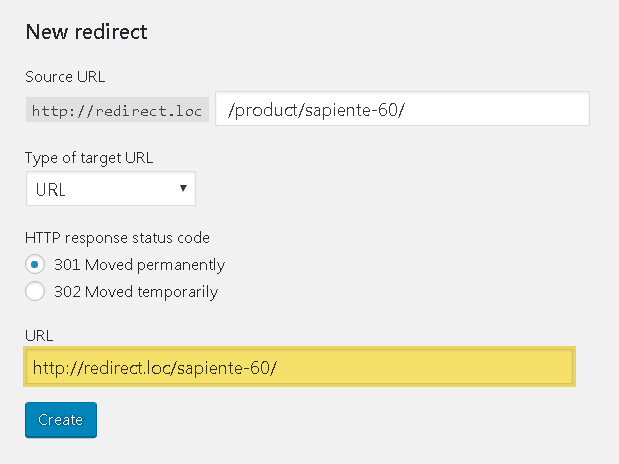
You can also paste only the part of the URL after the website domain. The result will be the same: /sapiente-60/.
5. Click ‘Add new redirect’.
6. The result:
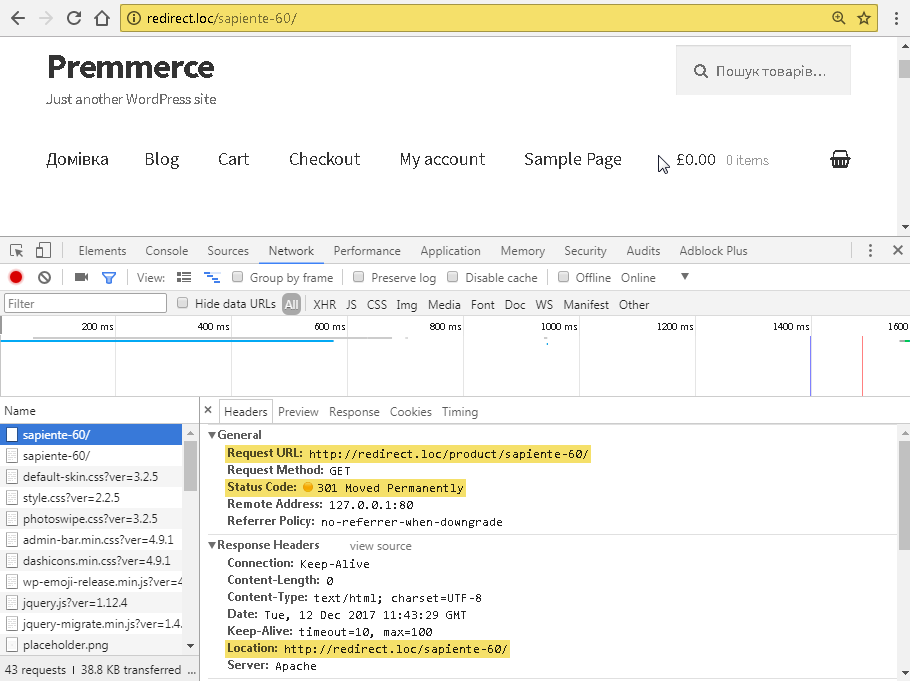
The result on the website:
After adding a new product with the URL that has a redirect, our plugin will automatically delete this redirect.
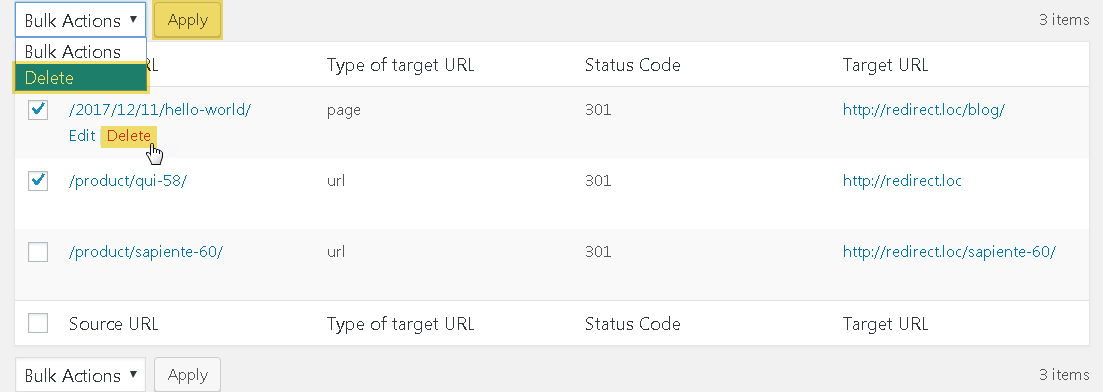
Deleting Redirects
You can delete existing redirects in two ways:
- Click ‘Delete’ under the needless redirect and confirm the deletion.
- Activate the checkboxes of the needless redirects, choose ‘Delete’ from the ‘Bulk Action’ drop-down list and click ‘Apply’.
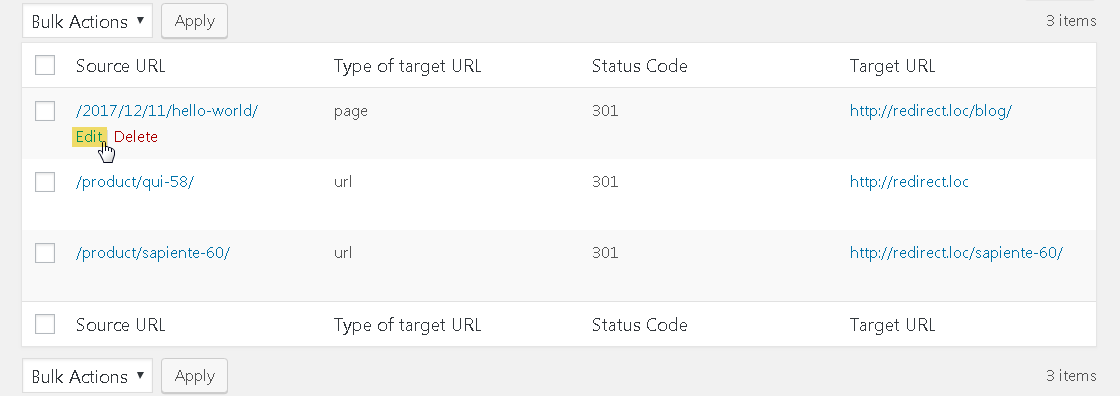
Editing Redirects
Click ‘Edit’ under the needed redirect to open the redirect editing page.
The redirect editing page:
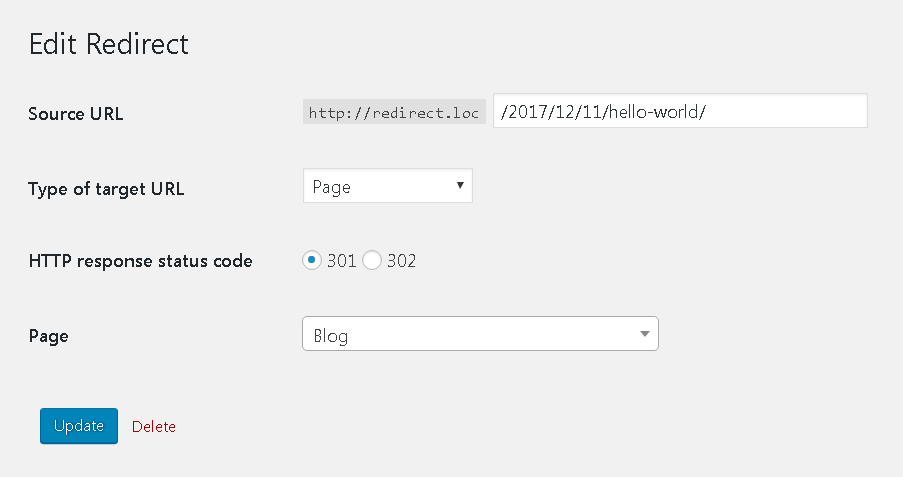
Here you can change everything: Source URL, Type of target URL, HTTP response status code, Target URL (Page).
Click ‘Update’ to save changes.
Click ‘Delete’ to remove a redirect and confirm the deletion.
Setting up Auto-Editing Redirects for Products

Activate the checkboxes of the needed options and click ‘Save Changes’.
This applies only to automatically created redirects:
- 302 redirects to a category will only be created if the product status is changed to ‘Draft’ or ‘Pending Review’.
- if the status of the product will be changed to ‘Published’, 302 redirects will automatically be deleted.
- if the product is restored, 301 redirects will automatically be deleted.
- if the product is permanently deleted, 301 redirects will remain.
Comments

Ready to Get Started?
Join over 100,000 smart shop owners who use Premmerce plugins to power their WooCommerce stores.
Get started