How to Filter Products by Custom Taxonomy in WooCommerce

Are you looking for ways to simplify the product search process for customers in your WooCommerce store?
Taxonomies are a way of organizing and categorizing products on an eCommerce site. This helps your site visitors narrow their search and find their desired products more quickly, providing a better customer experience and boosting conversions. In this post, we’ll examine the importance of taxonomies in WooCommerce and show you how to set up product filters for custom taxonomies on your online store, both manually and with the help of a plugin.
What is a custom taxonomy?
A taxonomy is a way to group and categorize products in WooCommerce based on shared characteristics or attributes. This allows you to create more specific product groupings that can be used to create targeted product filters.
Taxonomies can be created and managed through the WordPress dashboard in WooCommerce. There are two base types of WooCommerce taxonomies: categories and tags. Categories group products hierarchically, while tags group products by specific attributes or keywords.
Let’s explain the difference between categories and tags with a practical example.
1. Categories
Imagine you run an online clothing store that sells various clothing items, such as T-shirts, sweaters, and pants. To make your store easier to navigate, you could create categories for each type of clothing, enabling your customers to filter your product catalog by the specific type of item they are looking for or visit the specific category page for that product category.
You could even create sub-categories within each of your primary product categories. For example, you could create sub-categories for long-sleeved or short-sleeved T-shirts in the T-shirt category.
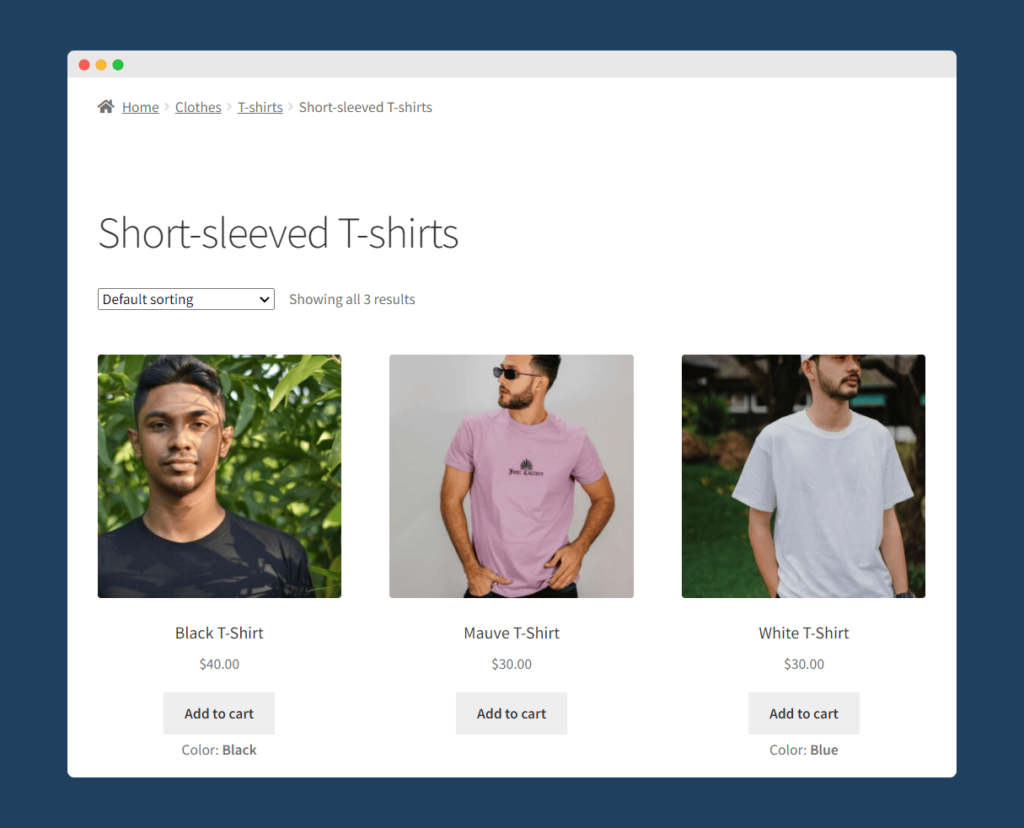
The hierarchical nature of categories makes them great for helping customers narrow their search of your product catalog until they find the product ideally suited to their needs.
However, sometimes customers want to view products from multiple categories and filter them by other attributes. This is where tags come in.
2. Tags
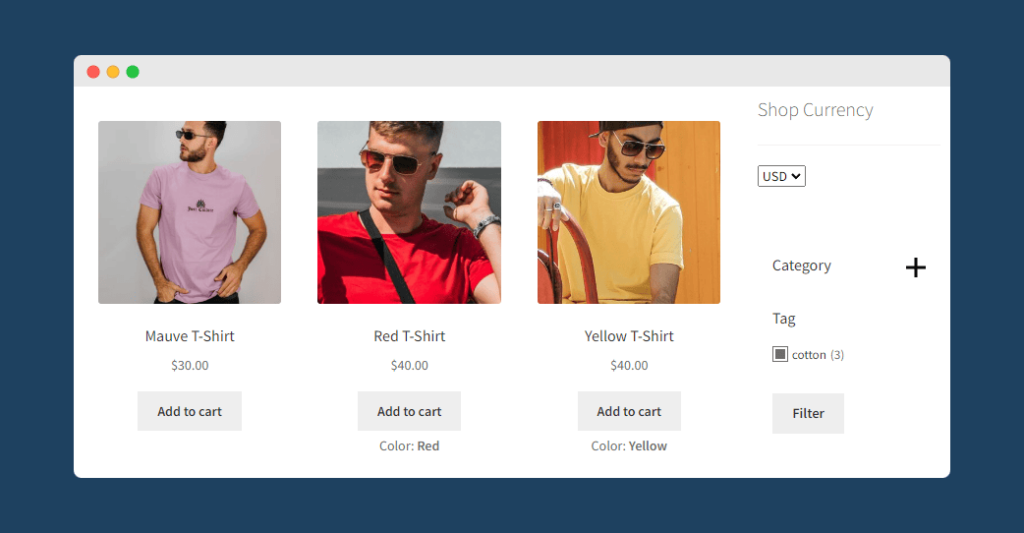
Tags enable you to attach specific terms to products in your WooCommerce that customers can then use when filtering your product catalog. Unlike categories, tags are not hierarchical – a product can have multiple tags, but sub-tags do not exist.
Let’s return to our clothing store for an example. Imagine a customer visiting your store is looking specifically for clothes made with cotton. Without the use of tags, determining which products fulfill their needs could be a laborious task as the customer would need to scroll through your entire product catalog. Alternatively, by adding a tag to all cotton-made products, you could enable the customer to use categories to filter your product catalog by that specific attribute, making for a much easier purchasing experience.
Custom taxonomies make it even easier for customers to filter your product catalog, making for an even smoother shopping experience. Essentially, they enable you to segment your product catalog by additional attributes of your choosing.
For example, you could create a new custom taxonomy for “Sizes” on your online clothing store, with taxonomies like “Small,” “Medium,” and “Large.” This would enable your customers to filter your product catalog by their preferred size.
The advantage of creating custom taxonomies is that they enable your customers to filter your catalog by multiple attributes at once, which makes it much faster for them to find the exact product they are looking for.
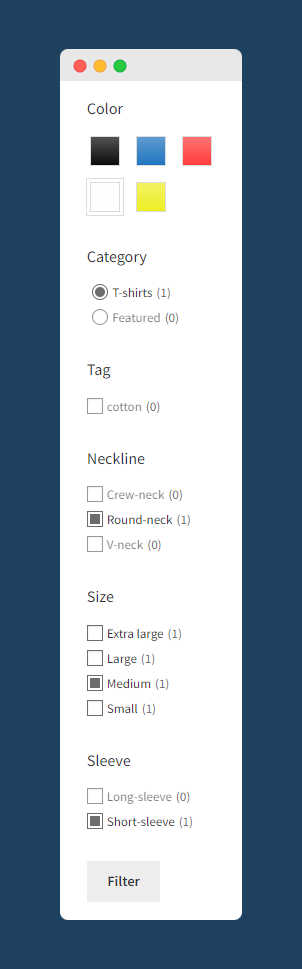
For example, if a customer visiting your store was looking for a white, round-necked, short-sleeved T-shirt, available in a medium size, you could provide a much better user experience on your store by creating custom taxonomies for size, neckline, color, and sleeve length. Your customers could then filter by all of these different categories at once, enabling them to find exactly what they are looking for in just a few clicks, with no need to scroll through your product catalog.
What is the difference between custom taxonomies and custom fields?
Custom taxonomies and custom fields are both ways to add extra information to your WooCommerce products, but they serve different purposes:
Custom taxonomies are used to categorize and group products. They create hierarchical or non-hierarchical relationships between products, allowing easy filtering and organization. Examples of custom taxonomies include product categories, tags, or custom attributes like “Brand” or “Material”.
Custom fields, on the other hand, store specific, individual pieces of information about a product. They are not used for categorization or grouping but typically contain unique data for each product. Examples of custom fields include product dimensions, SKU, manufacturer part number, or any other product-specific details.
While custom taxonomies are ideal for creating filterable attributes that apply to multiple products, custom fields are better suited for storing unique product information that doesn’t require grouping or filtering.
Custom taxonomies are generally more helpful in product filtering as they allow customers to quickly narrow down their product search based on specific attributes or categories. This makes custom taxonomies particularly valuable for improving the user experience in your WooCommerce store, especially when dealing with large product catalogues. Custom fields, while necessary for product information, are typically less suitable for filtering purposes unless you use additional plugins or custom code to make them.
How custom taxonomies can benefit your WooCommerce store?
Custom taxonomies organize products meaningfully in your WooCommerce store. They add product attributes, creating filters that help customers find exactly what they want. This provides several benefits:
- Improved customer experience: Custom taxonomies simplify the search process, making shopping faster and more intuitive. This enhances the overall experience and increases the likelihood of customers finding what they need.
- Improved SEO: Relevant custom taxonomies help search engines understand your store’s content better, leading to higher search rankings and more traffic. Higher organic traffic and purchases can further improve search rankings.
- Improved product discoverability: Grouping products by custom taxonomy increases visibility for new or less popular items. Customers searching for a specific product will discover similar items, boosting sales.
- Increased sales and average order value (AOV): Efficient product searches reduce cart abandonment, improve conversion rates, and encourage repeat purchases. Custom taxonomies also promote relevant upsells or cross-sells, increasing AOV.
Premmerce WooCommerce Product Filter
Get started giving your customers a better way to filter your products to increase site usability and revenue.

How to filter by custom taxonomies in WooCommerce?
WooCommerce doesn’t offer the option to create or filter by custom taxonomies as part of its core feature set. You can add this functionality in two ways: manually by code, if you have coding experience, or using a dedicated WordPress plugin. This section will explain both ways.
Using a plugin to filter products by custom taxonomies in WooCommerce
The easiest way to add new custom taxonomies in WooCommerce is by using a free plugin like Custom Post Type UI. This plugin enables you to create new taxonomies and custom post types for your WordPress site, including new product taxonomies.
Follow these steps to set up a new custom taxonomy with Custom Post Type UI:
1. Get the plugin
Download the plugin from the WordPress.org plugin repository and install it on your WordPress site.
2. Create taxonomy
From your WordPress dashboard, navigate to the new CPT UI section in the sidebar and click “Add/Edit Taxonomies.”
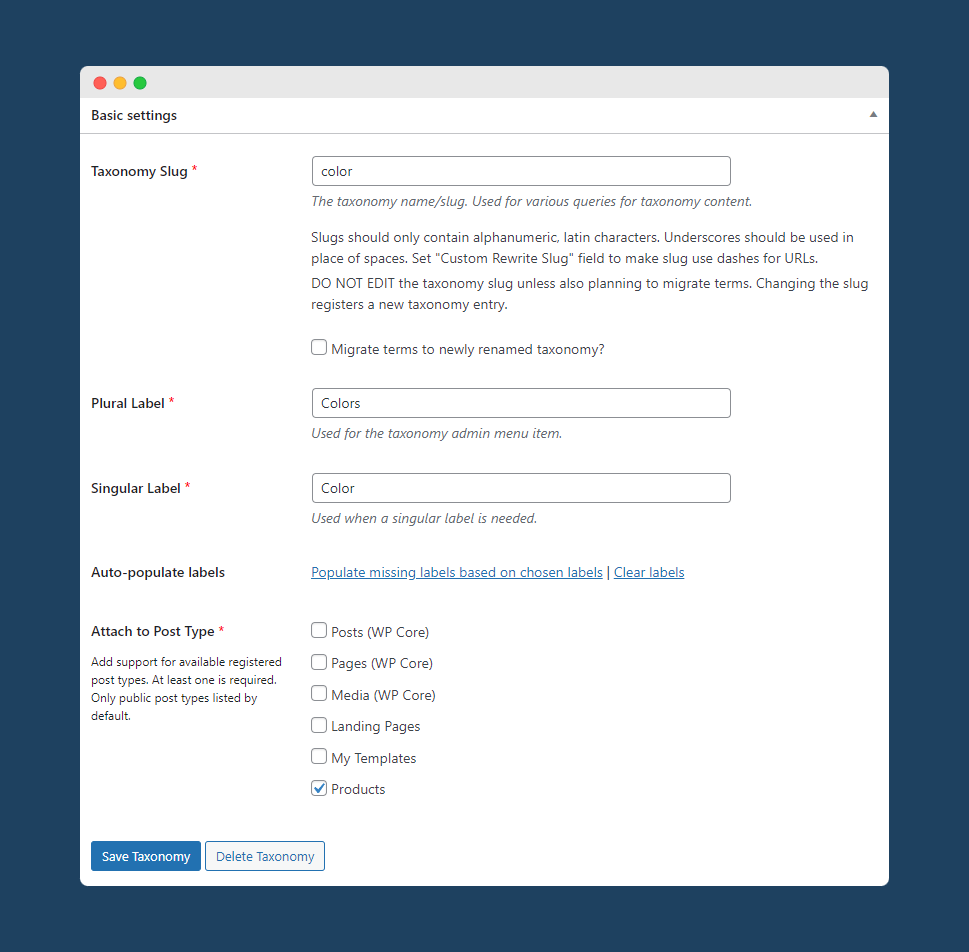
Then, fill in the basic details for your new taxonomy, including the taxonomy slug, name, and the type of post you want to attach it to. To create a new taxonomy to filter your product catalog, choose “Products.”
3. Add taxonomy
Click “Add Taxonomy”. Your new taxonomy will now appear in the product editor and a dedicated area will appear for it under “Products” in the WordPress dashboard.
4. Add terms to taxonomy
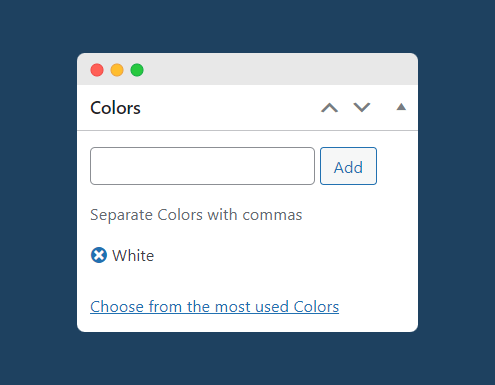
To add terms to your new taxonomy, either navigate to the dedicated section in the WordPress dashboard, where you can add terms in the same way as you would add new attributes, or navigate to the product editor for any product in your catalog—a new box will appear in the right-hand column where you can add or select terms for your taxonomy.
5. Create custom taxonomies
The best plugin for creating custom taxonomies in WooCommerce is WooCommerce Product Filter by Premmerce. You can set it up in seconds by following these steps:
1. First, you’ll need to ensure that your WooCommerce store has at least one custom taxonomy set up. If you haven’t set one up yet, jump back to the beginning of this section to set it up.
2. Download and install the plugin from the Premmerce website.
3. From your WordPress dashboard, navigate to Premmerce > Product Filter, then click the “Settings” tab. From this page, you can configure several options, including turning on price, stock, and rating filters, choosing which pages your filters display on, and enabling AJAX filtering.
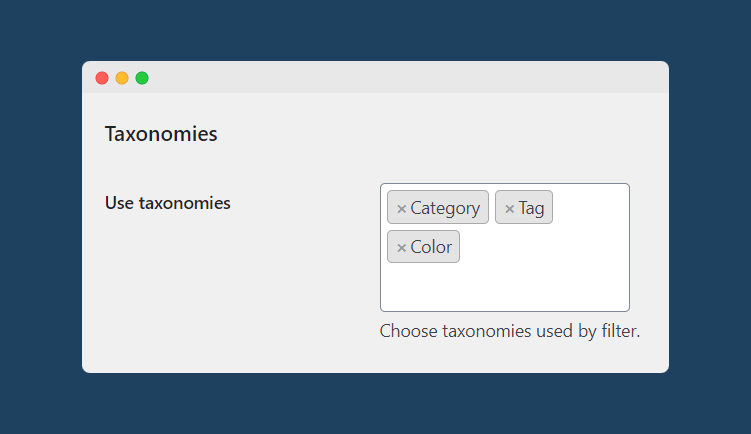
4. Under “Taxonomies,” you’ll see a box entitled “Use taxonomies.” Here, you can choose which taxonomies are used for creating filters. WooCommerce Product Filter supports the addition of any custom taxonomies to this section, so add any taxonomies that you want to create filters for on your site, then click “Save Changes”.
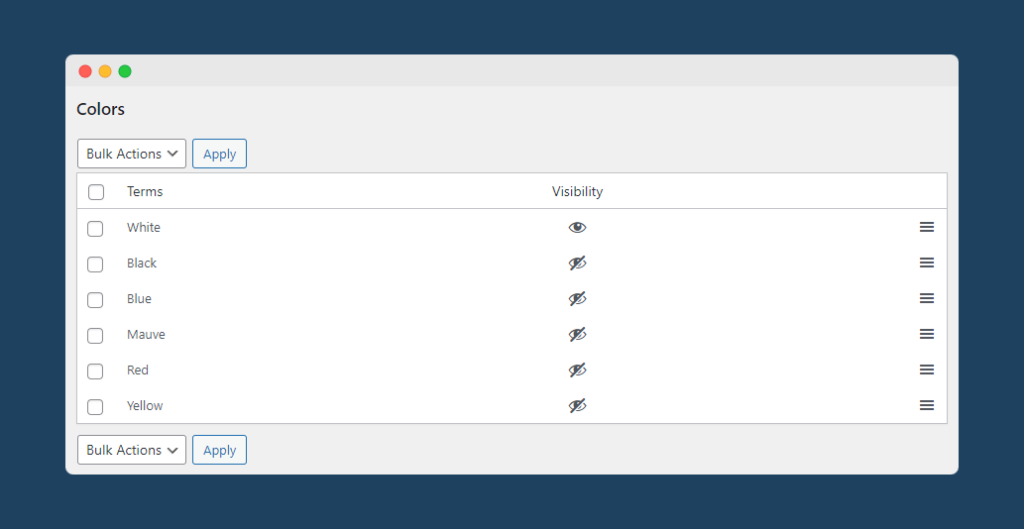
5. A new tab will appear at the top of the screen for the taxonomy you’ve just added—navigate to the new tab. From here, you can configure which terms will appear in your custom taxonomy filter. You can do this individually by clicking on the eye symbol next to each term or making bulk changes using the bulk actions dropdown.
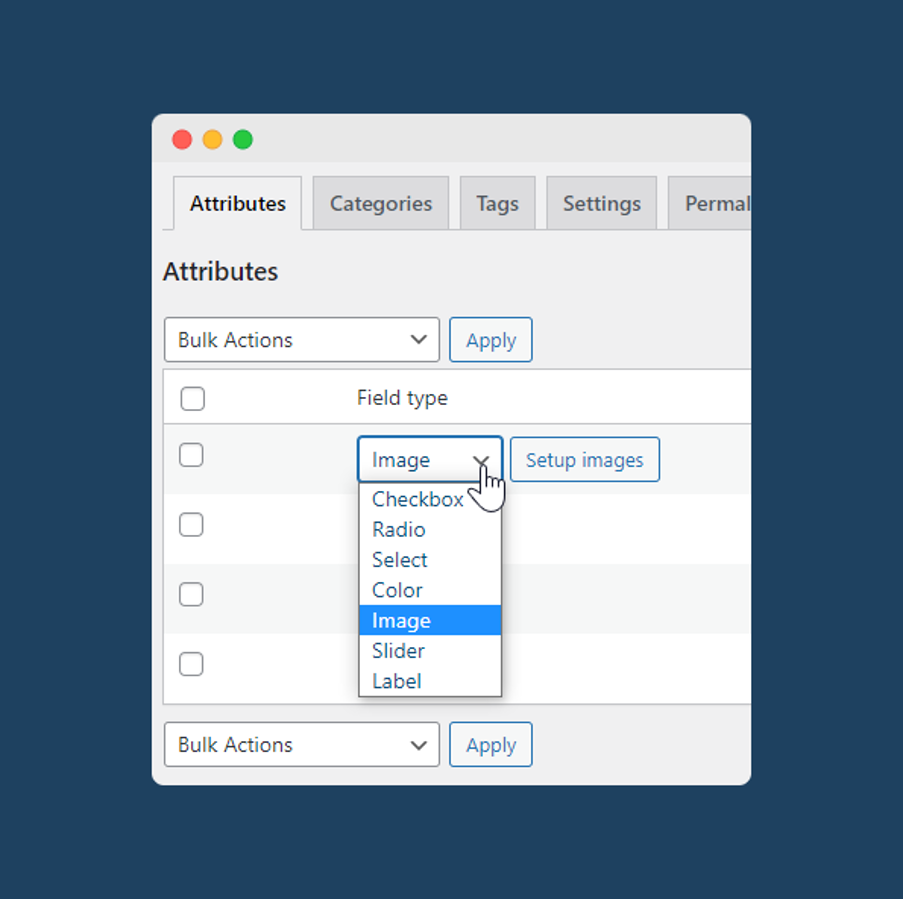
6. Next, head over to the “Attributes” tab. From here, you can configure the display of the various filters that will appear on your WooCommerce Product Filter widget. Choose your preferred input field and how the filter will display on the front end (for example, as a static field, dropdown, or scrolling field).
That’s it! Your filters will now display on the front end of your site on the pages you selected from the “Settings” tab. For even more control, you can also display your filters anywhere on your WooCommerce store using a shortcode widget by adding the dedicated Product Filter shortcodes:
[premmerce_filter] to display your filtering options, and
[premmerce_active_filters] to show which filter options are currently active.
Manually filtering products by custom taxonomies in WooCommerce
If you have some coding experience, you can easily add customer taxonomies without needing a plugin, by following the steps below.
1. Create the custom taxonomy
Using an SFTP client like FileZilla or your web host’s file manager, access your child theme’s functions.php file and register a custom taxonomy for your WooCommerce products. Here’s a blueprint of what you’ll need to add:
function create_product_taxonomy() {
  $labels = array(
    'name' => 'Product Types',
    'singular_name' => 'Product Type',
    'search_items' =>  'Search Product Types',
    'all_items' => 'All Product Types',
    'parent_item' => 'Parent Product Type',
    'parent_item_colon' => 'Parent Product Type:',
    'edit_item' => 'Edit Product Type',
    'update_item' => 'Update Product Type',
    'add_new_item' => 'Add New Product Type',
    'new_item_name' => 'New Product Type Name',
    'menu_name' => 'Product Types'
  );

  register_taxonomy('product_type', array('product'), array(
    'hierarchical' => true,
    'labels' => $labels,
    'show_ui' => true,
    'show_in_rest' => true,
    'show_admin_column' => true,
    'query_var' => true,
    'rewrite' => array( 'slug' => 'product-type' )
  ));
}
add_action( 'init', 'create_product_taxonomy', 0 );
This registers a new “product_type” taxonomy that you can assign to products. For example, if you run a fashion online store, this is the snippet you’ll need to add in your child theme’s functions.php file to create a custom taxonomy based on the season of the clothes:
function create_clothing_season_taxonomy() {
    $labels = array(
        'name'              => _x( 'Seasons', 'taxonomy general name' ),
        'singular_name'     => _x( 'Season', 'taxonomy singular name' ),
        'search_items'      => __( 'Search Seasons' ),
        'all_items'         => __( 'All Seasons' ),
        'parent_item'       => __( 'Parent Season' ),
        'parent_item_colon' => __( 'Parent Season:' ),
        'edit_item'         => __( 'Edit Season' ),
        'update_item'       => __( 'Update Season' ),
        'add_new_item'      => __( 'Add New Season' ),
        'new_item_name'     => __( 'New Season Name' ),
        'menu_name'         => __( 'Seasons' ),
    );

    $args = array(
        'hierarchical'      => true, // Make it hierarchical (like categories)
        'labels'            => $labels,
        'show_ui'           => true,
        'show_admin_column' => true,
        'query_var'         => true,
        'rewrite'           => array( 'slug' => 'season' ),
    );

    register_taxonomy( 'season', array( 'product' ), $args );
}

add_action( 'init', 'create_clothing_season_taxonomy', 0 );
2. Verify the custom taxonomy
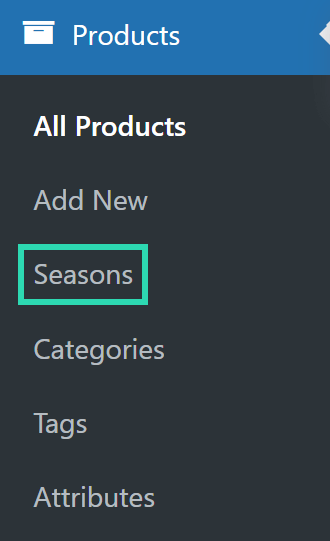
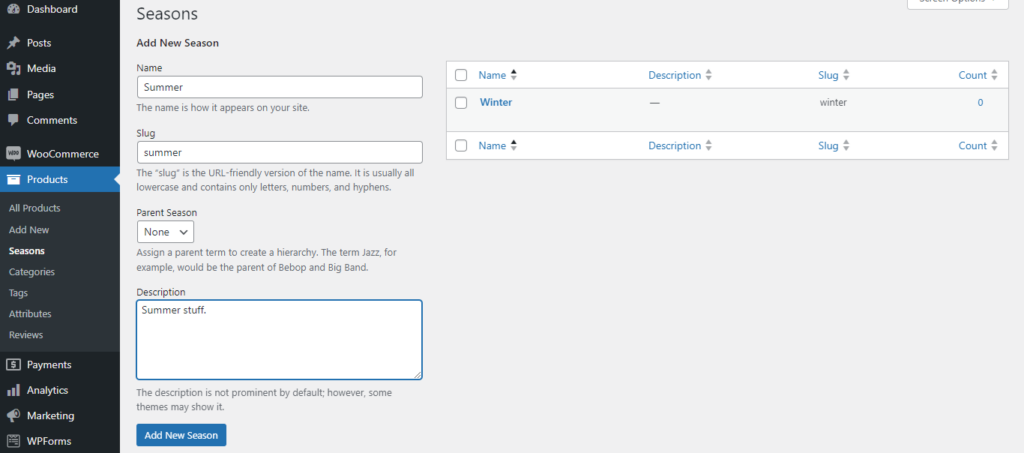
Go to your WordPress admin dashboard and navigate to Products. You should see a new taxonomy called “Seasons” where you can add and manage different clothing seasons (e.g., Spring, Summer, Fall, Winter).
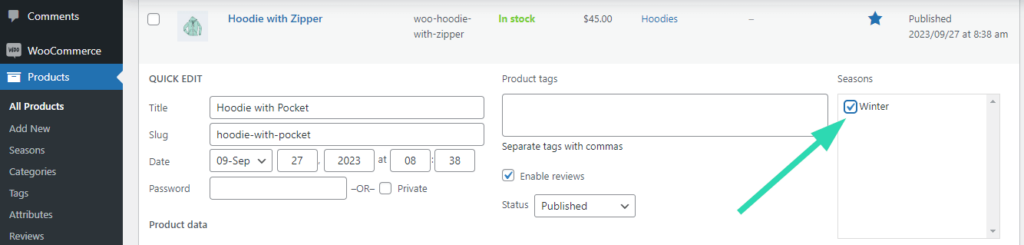
3. Assign seasons to products
Go to Products > All Products. In the product editing screen (or using the Quick Edit setting), you should see the new “Seasons” box, where you can assign one or more seasons to the product.
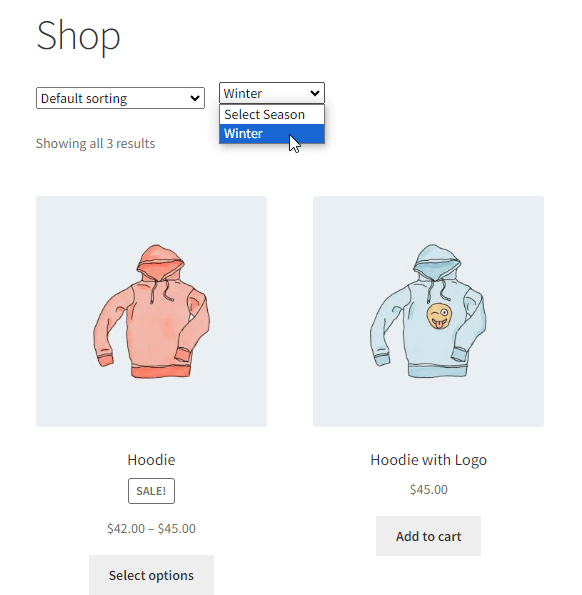
4. Filter products according to the season in WooCommerce
Add the following code snippet to your child theme’s functions.php:
function add_season_filter_to_shop() {
    if( is_shop() || is_product_taxonomy() ) {
        $terms = get_terms( array(
            'taxonomy' => 'season',
            'hide_empty' => true,
        ));

        if ( !empty( $terms ) && !is_wp_error( $terms ) ) {
            echo '<form method="GET" action="">';
            echo '<select name="season_filter" onchange="this.form.submit();">';
            echo '<option value="">' . __( 'Select Season',
'your-text-domain' ) . '</option>';
            foreach ( $terms as $term ) {
                $selected = ( isset( $_GET['season_filter'] ) && $_GET['season_filter'] == $term->slug ) ? 'selected' : '';
                echo '<option value="' . esc_attr( $term->slug ) . '" ' . $selected . '>' . esc_html( $term->name ) . '</option>';
            }
            echo '</select>';
            echo '</form>';
        }
    }
}

add_action( 'woocommerce_before_shop_loop', 'add_season_filter_to_shop' );


function filter_products_by_season( $query ) {
    if ( !is_admin() && $query->is_main_query() && ( is_shop() || is_product_taxonomy() ) ) {
        if ( isset( $_GET['season_filter'] ) && !empty( $_GET['season_filter'] ) ) {
            $tax_query = array(
                array(
                    'taxonomy' => 'season',
                    'field'    => 'slug',
                    'terms'    => sanitize_text_field( $_GET['season_filter'] ),
                ),
            );

            $query->set( 'tax_query', $tax_query );
        }
    }
}

add_action( 'pre_get_posts', 'filter_products_by_season' );
5. Display the custom taxonomy as a link on the shop page
In your child theme’s functions.php, add the following:
/ Add categories and custom taxonomies above products on shop page
function display_categories_and_taxonomies_above_products() {
    if ( is_shop() ) {
        // Display product categories
        $product_categories = get_terms( 'product_cat', array(
            'orderby'    => 'name',
            'order'      => 'ASC',
            'hide_empty' => true,
        ) );

        if ( ! empty( $product_categories ) && ! is_wp_error( $product_categories ) ) {
            echo '<div class="product-categories">';
            echo '<h3>Categories</h3>';
            echo '<ul>';
            foreach ( $product_categories as $category ) {
                echo '<li><a href="' . esc_url( get_term_link( $category ) ) . '">' . esc_html( $category->name ) . '</a></li>';
            }
            echo '</ul>';
            echo '</div>';
        }

        // Display custom taxonomy (Seasons)
        $seasons = get_terms( 'season', array(
            'orderby'    => 'name',
            'order'      => 'ASC',
            'hide_empty' => true,
        ) );

        if ( ! empty( $seasons ) && ! is_wp_error( $seasons ) ) {
            echo '<div class="product-seasons">';
            echo '<h3>Seasons</h3>';
            echo '<ul>';
            foreach ( $seasons as $season ) {
                echo '<li><a href="' . esc_url( get_term_link( $season ) ) . '">' . esc_html( $season->name ) . '</a></li>';
            }
            echo '</ul>';
            echo '</div>';
        }
    }
}

// Hook the function to display above products
add_action( 'woocommerce_before_shop_loop', 'display_categories_and_taxonomies_above_products', 10 );
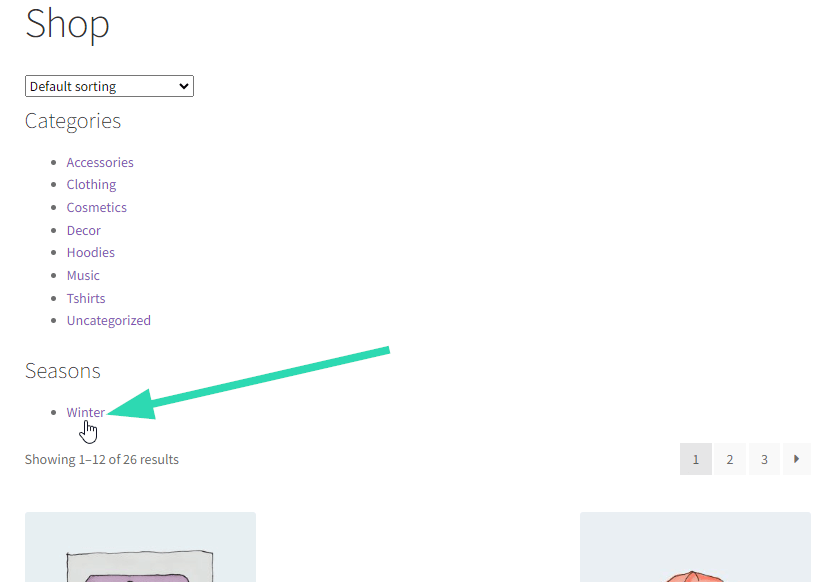
Of course, you can style these links as tabs, or however, you want to match your store’s aesthetic.
That’s it! You should now have working product filters based on your custom taxonomy!
Premmerce WooCommerce Product Filter
Get started giving your customers a better way to filter your products to increase site usability and revenue.
Simplify shopping and increase conversions with custom filters
By offering the option to filter products by custom taxonomy on your WooCommerce store, you can streamline the shopping experience, improving customer satisfaction, better product visibility, and, ultimately, increase sales.
The best way to add custom taxonomy filtering to your online store is with the help of the WooCommerce Product Filter plugin from Premmerce. Some of the standout features include:
- All filters in one place: Combines all filter options into a single, customizable widget. Supports filtering by categories, tags, price, rating, stock, brand, and custom taxonomies.
- Customizable widget appearance: The filter widget can be customized by using various input types, such as dropdowns, checkboxes, radio buttons, color swatches, etc.
- AJAX filtering: Enables fast filtering of products without page reloads for a smooth user experience.
- Caching system: Built-in caching improves filter load speed compared to default WooCommerce filters.
Are you ready to level up the shopping experience on your WooCommerce store and watch your conversions soar? Then get started with WooCommerce Product Filter today from $69.99/year with a 30-day money-back guarantee.
Comments

Ready to Get Started?
Join over 100,000 smart shop owners who use Premmerce plugins to power their WooCommerce stores.
Get started