Premmerce WooCommerce Pinterest
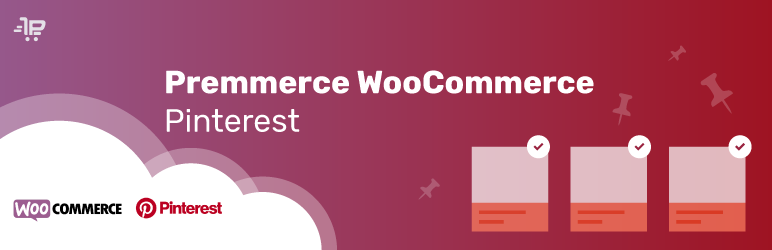
We’ve developed a new plugin version in official cooperation with WooCommerce and Pinterest. To learn more and purchase it you can visit the official WooCoomerce Extensions Store.
Premmerce WooCommerce Pinterest allows you to make the bulk automated and scheduled creation and editing of pins, based on the products in your WooCommerce store. Without any limits to the number of pins on your board per day or per month. It also automatically adds all the necessary for Rich Pins product data in the Open Graph format to your pins page markup and the possibility to track conversions with the Pinterest tag.
You can buy the Premmerce WooCommerce Pinterest plugin here.
Video presentation
The major plugin features
Adding pins to your Pinterest account from the WordPress dashboard
The plugin allows you to choose images on the adding / editing product page, that will be pinned in your Pinterest account at the appointed board. Together with the product image, all the data provided by Rich Pins are also transferred: the name, description, price, availability.
Updating pins after updating a product
If you change any product data (of the products presented on Pinterest) in the WooCommerce dashboard – price, description, name, or tick additional product images, all pins will automatically be added to the queue for updating on Pіnterest.
Adding multiple pins to the ‘All products’ page
The ability to choose all products, that you need to be posted on Pinterest. The main product image will be used for a pin.
Bulk updating of the added pins
This feature allows you to make bulk updating of the created pins from the WordPress dashboard. Thus, you can quickly update products’ price, description and name on all pins.
The ability to set up automatic creation of a pin description based on product shortcodes
The ability to transfer not only the product description to the pin description but to form a template based on shortcodes with the help of which the additional product data such as the product price, name, URL, description, a short description and site name will be transferred to Pinterest.
Adding the Rich Pins markup to the product page
The plugin also adds the necessary Open Graph markup to the product page so that it is validated by Pinterest and all the necessary data is transferred automatically.
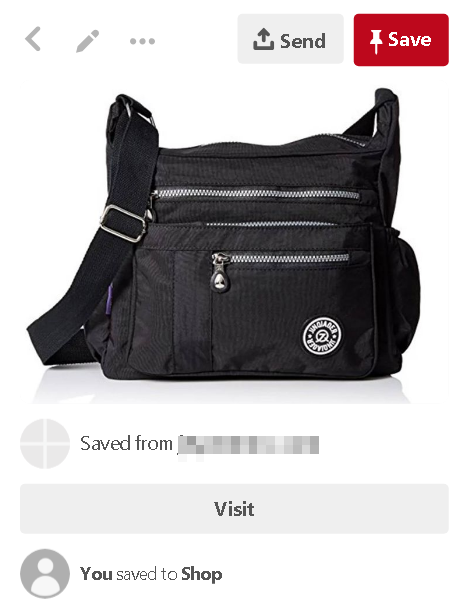
A pin without ‘Rich Pins’
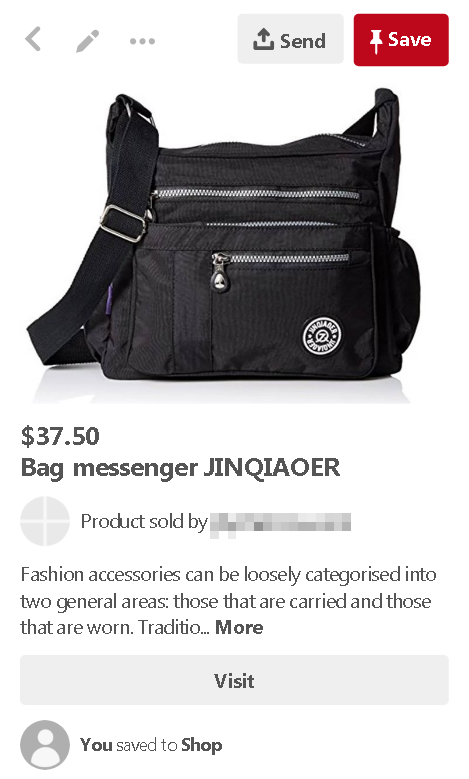
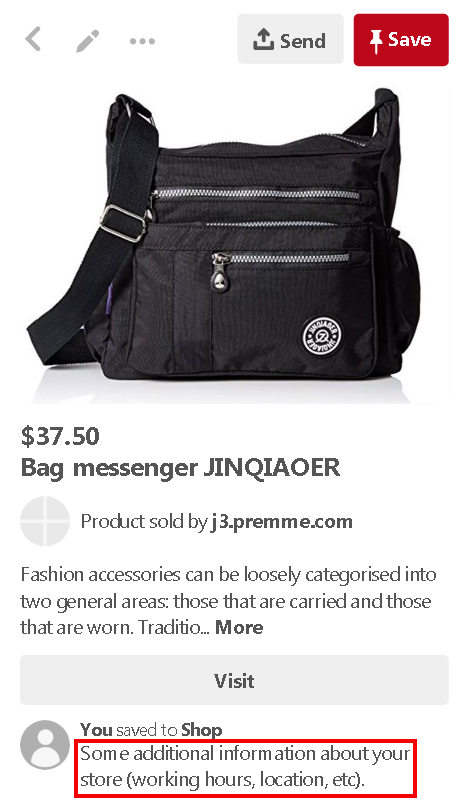
A pin with ‘Rich Pins’
Queue
To prevent your Account from being blocked on Pinterest, all operations should be executed during the time specified in the plugin settings (we recommend 1 min) and in the order suggested by the queue.
Scheduled Pinning
Schedule pins to publish when you see fit. Flexible settings will allow you to set the day, time, number of images, and publication intervals of your Pins.

Analytics
We’ve added the ability to integrate Pinterest Tag into your online store. The Pinterest tag allows you to track customers’ actions on your website after viewing your Promoted Pin. You can use this information to measure return on ad spend (RoAS) and create audiences to target on your Promoted Pins.
Installation
You can buy the Premmerce Pinterest plugin on the premmerce.com website and after that download its premium version archive on the ‘My subscriptions’ tab of your Personal Account.
After the archive has been downloaded, follow the steps below:
- Log in your site dashboard and go to the ‘Add New’ page.
- Click ‘Download plugins’.
- Choose the downloaded plugin archive.
- Click ‘Install’.
- Click ‘Activate’.
- Enter the license key (you can find it in your Personal Account) and click ‘Agree & Activate License’.
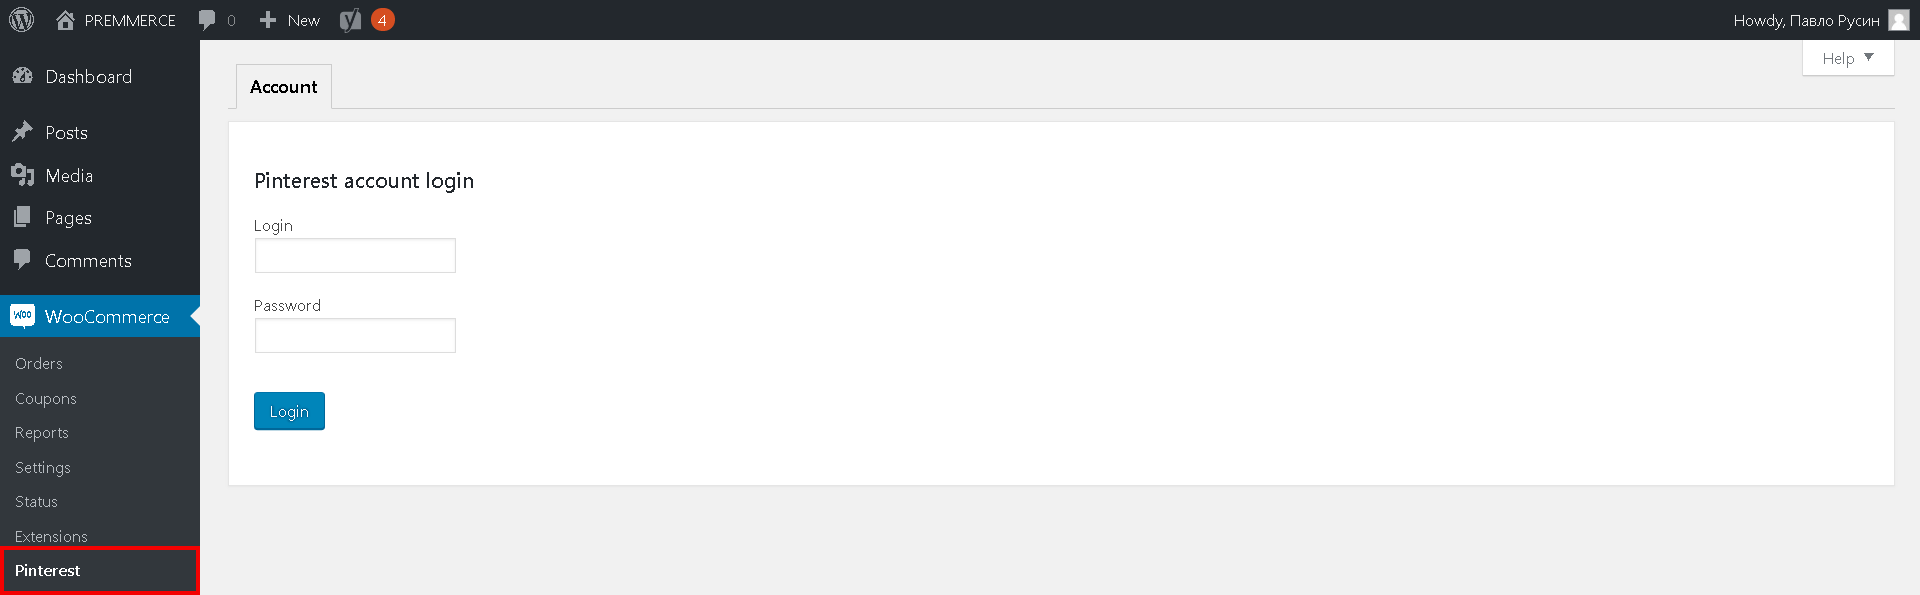
Getting started
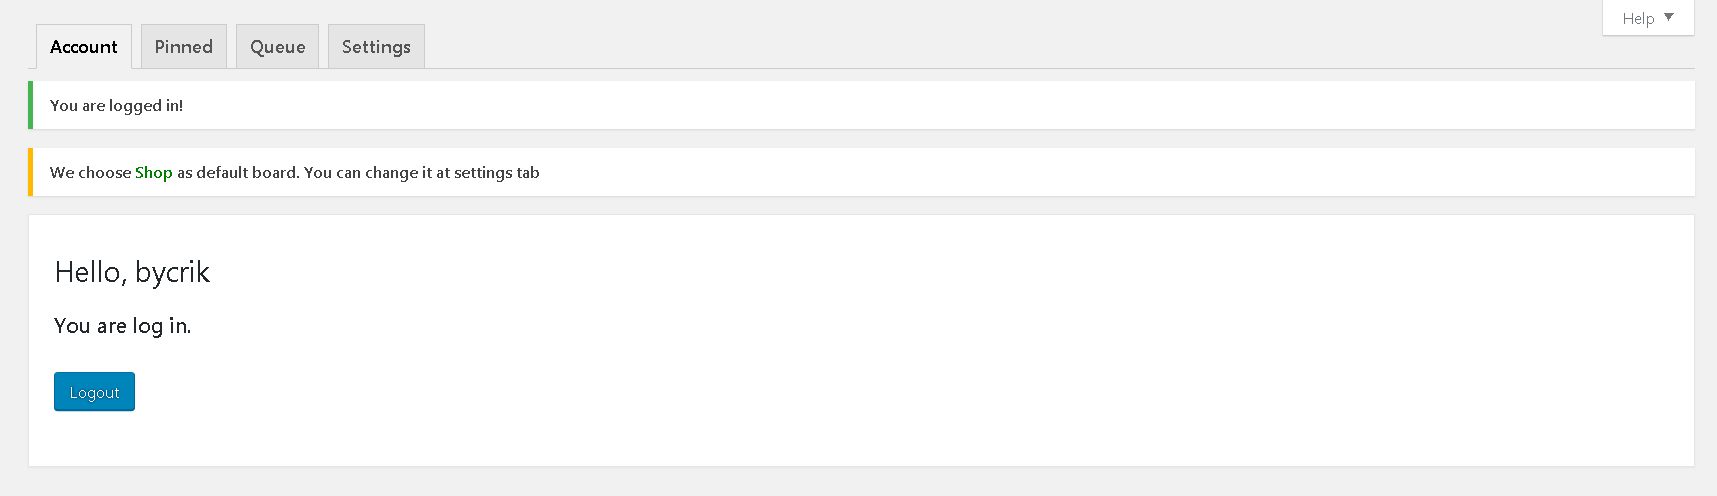
After the plugin has been installed and activated, you need to connect your website to your Account on Pinterest. To do this, log on to the plugin main page, using the login and password from your Account on Pinterest.
After authorization, if the default pin board hasn’t been chosen, the first board from the user’s board list on Pinterest will be selected automatically.
Settings
Before pinning products on Pinterest, we recommend to make the following settings:
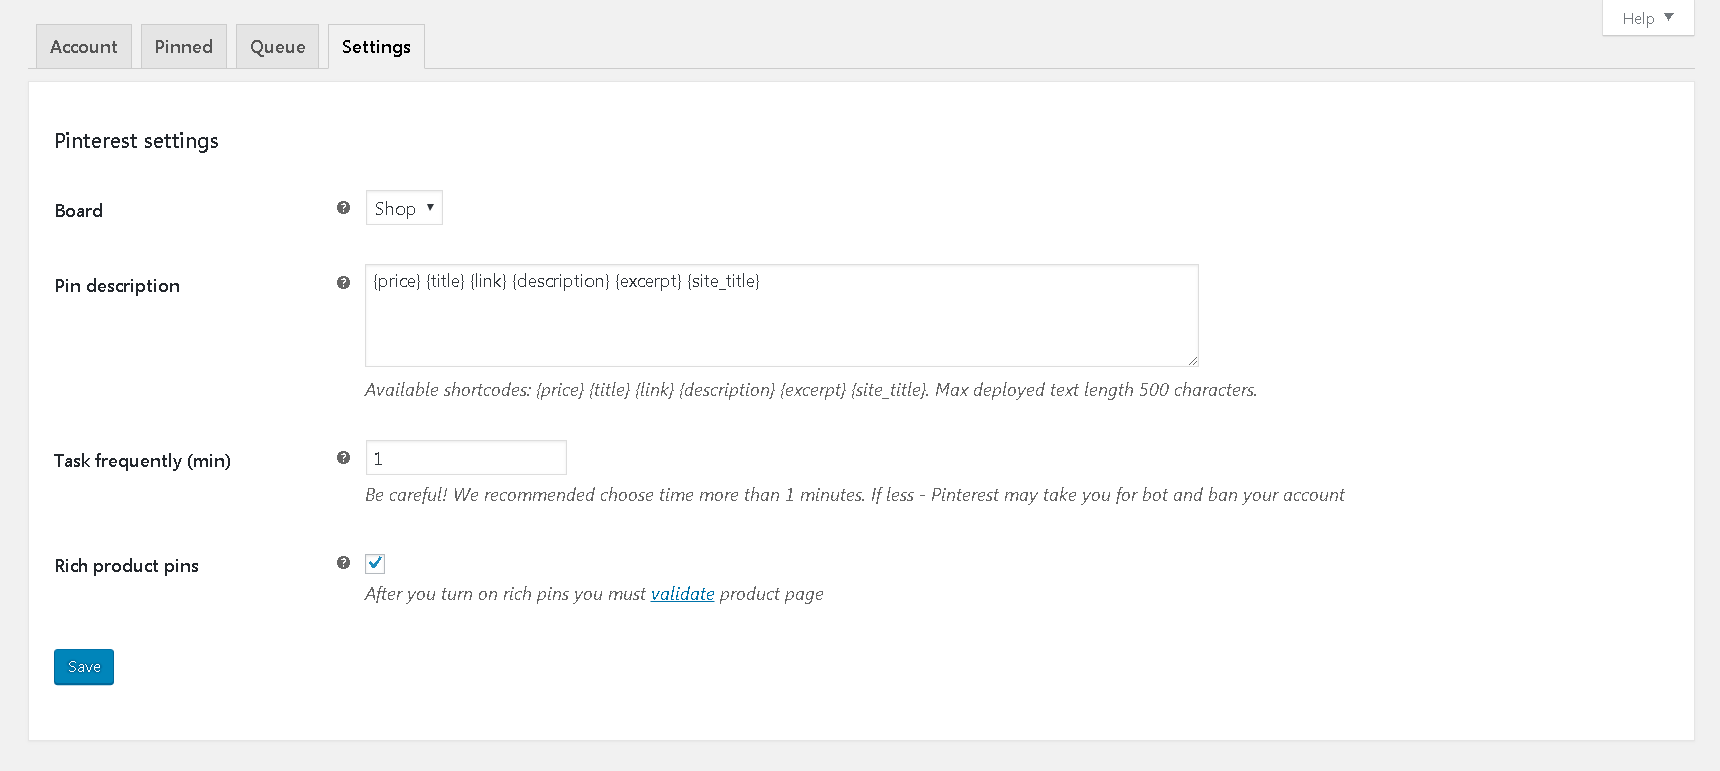
- Choose the board for pins from the ‘Board’ drop-down list.
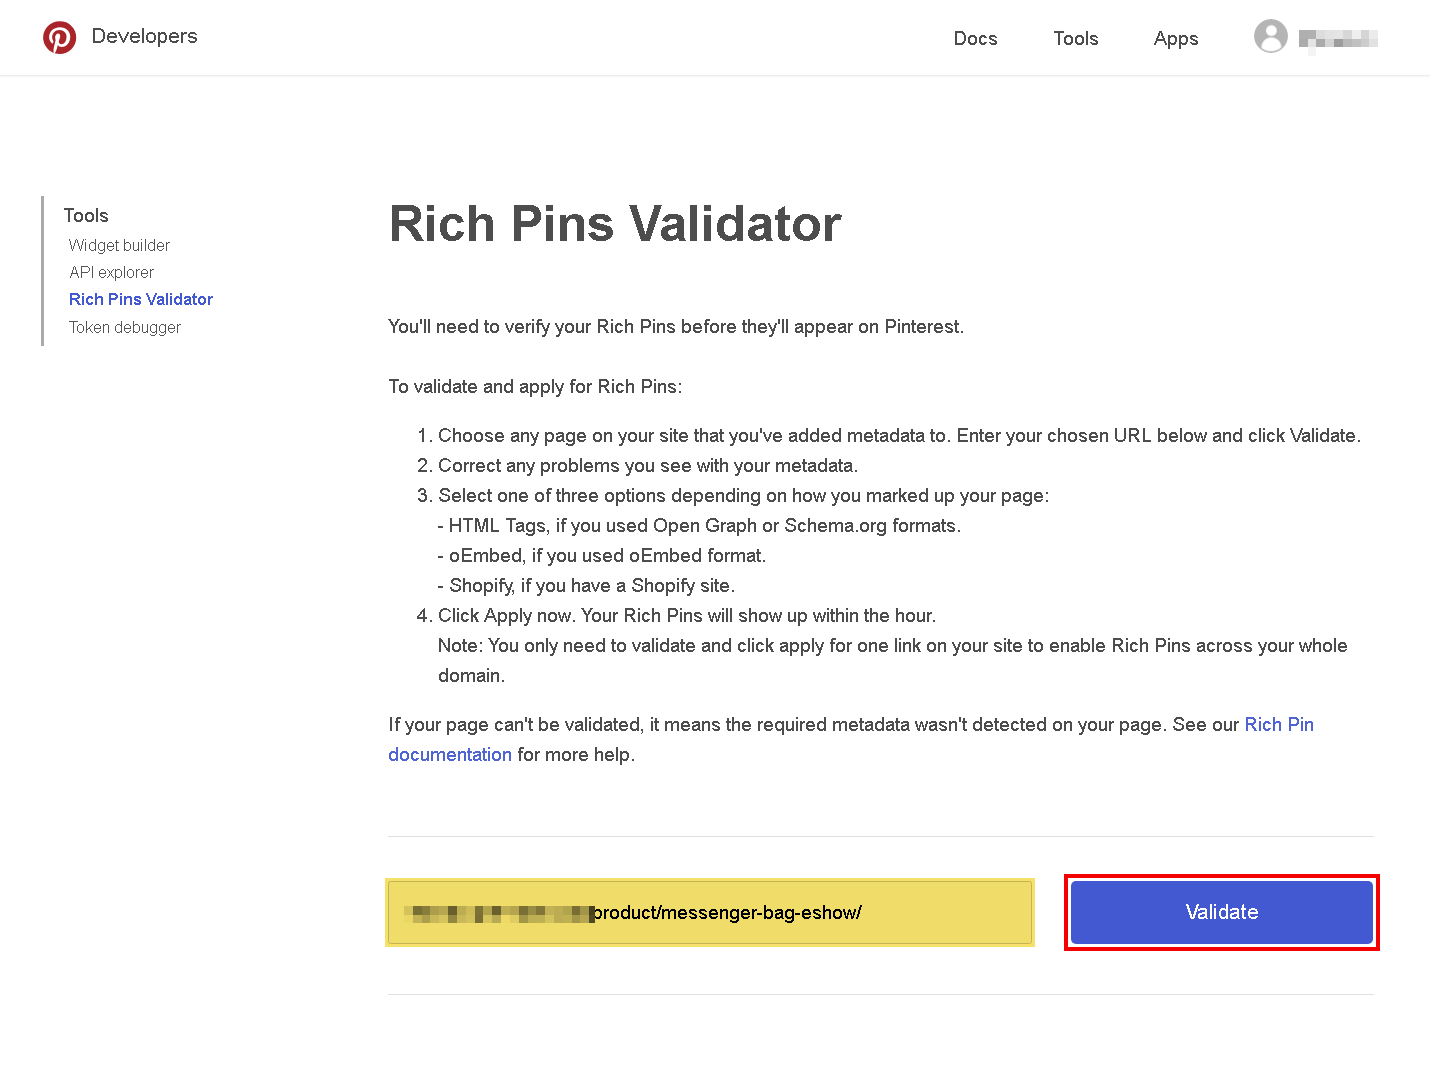
- Run the Rich Pins validation:
- Activate the ‘Rich product pins’ checkbox and click ‘Save’.
Note
After ‘Rich product pins’ has been activated, the main product details (price, currency, name, availability) will be added to the product page markup in the Open Graph format. If Yoast SEO is activated, Premmerce Pinterest disables the Yoast SEO tags and adds its own.
-
- Copy the URL of the product which has all the main details filled in (name, image, price, description).
- Click ‘Validate’ to go to the ‘Rich Pins Validator’ page.
- Paste the product URL and click ‘Validate’.
-
- Within an hour, a letter approving the creation of detailed pins will be sent to your email.
- Pin descriptions – this description will be added to all pins. You can use variable product and website information using shortcodes.

- Task frequently (min) – a time interval between tasks in minutes. We recommend to set up 1 min interval to prevent blocking your Account.
Pinning Productss
The plugin will add the ‘Premmerce Pinterest’ metabox to the Add/edit product page.
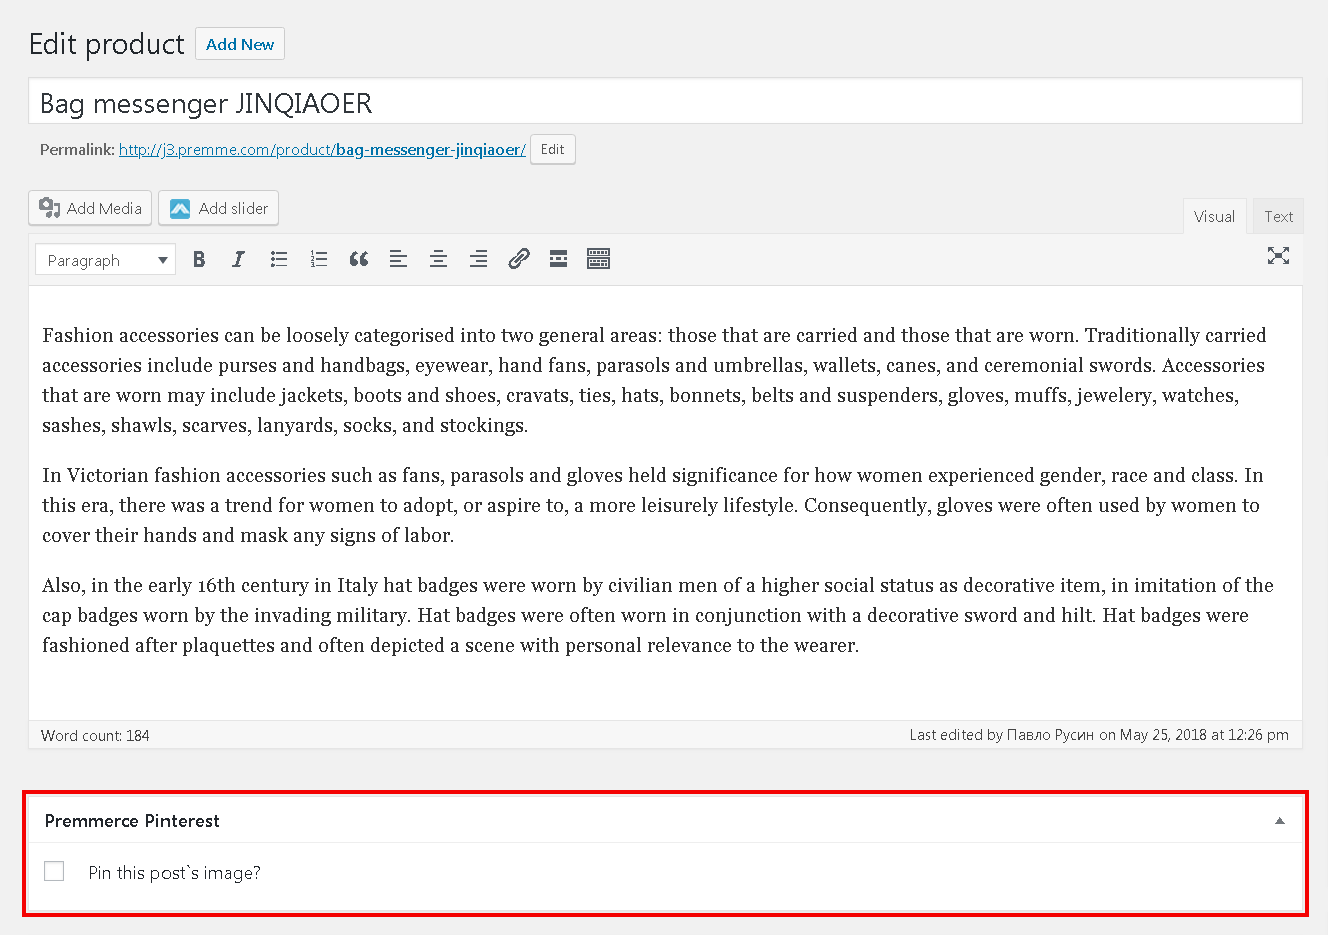
To pin a product image, follow these steps:
- Activate the ‘Pin this post`s image?’ checkbox.
- Mark images to be pinned.
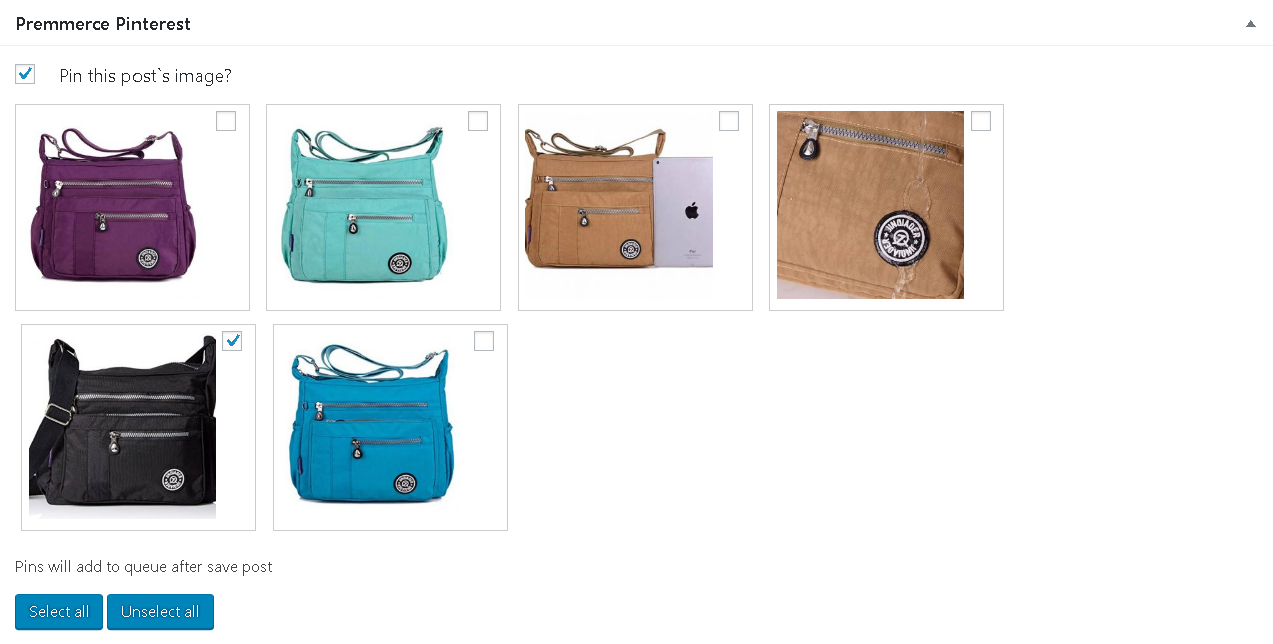
- Update the product.
- The chosen images will be added to the queue to be pinned on Pinterest.
- The result:

Note
If there are tasks for pinning in the queue, and you’ve deactivated the checkboxes for pinning, a new task for deletion won’t be added and the tasks for pinning will be removed. But, if a pin has already been published to Pinterest, a new task for deletion will be added.
If you deactivate the ‘Pin this post`s image?’ checkbox, all pins will be in the queue for deletion.
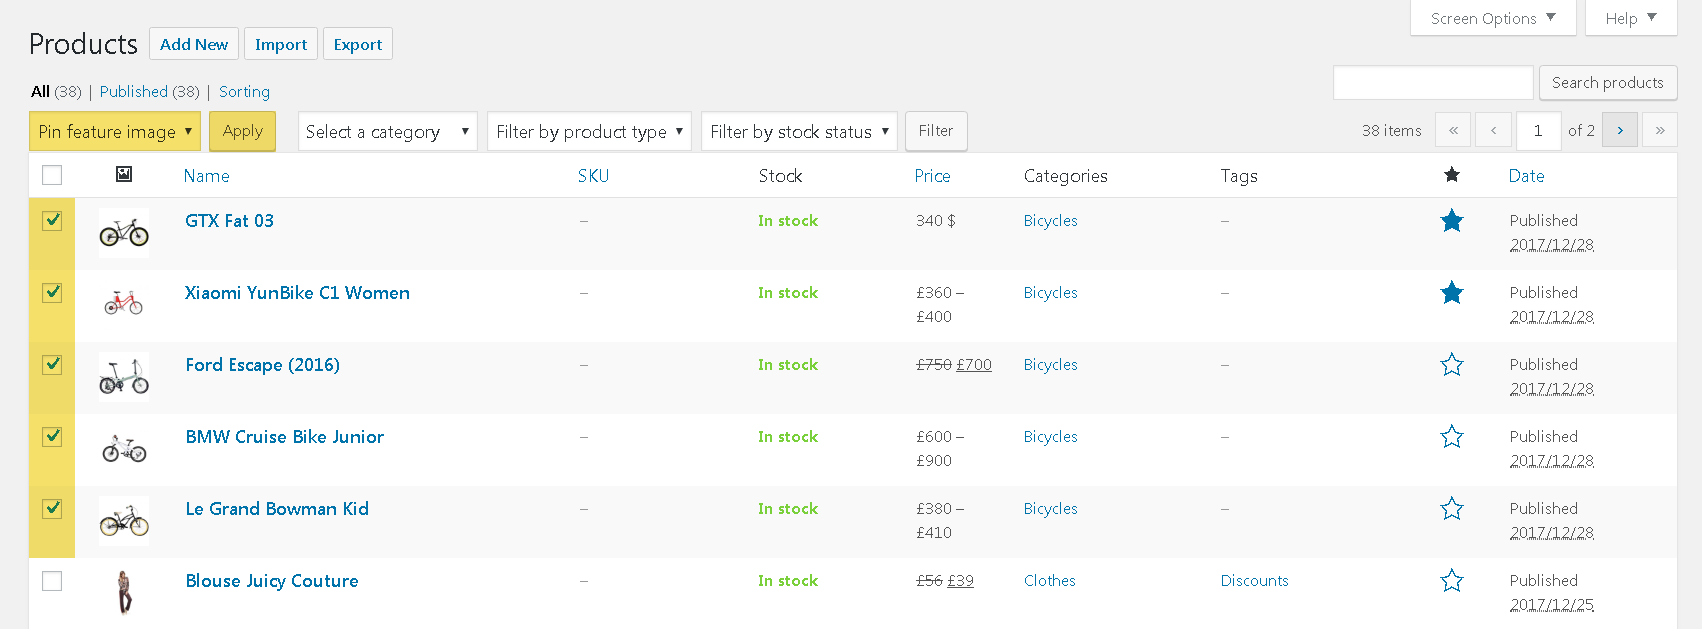
Bulk Pin
- On the ‘Products’ page choose the products you want to pin.
- Choose ‘Pin feature image’ from the ‘Bulk Actions’ drop-down list.
- Click ‘Apply’.
Note
When you use bulk pinning, only the main product images will be published.
- Main product images will be added to the queue to be pinned on Pinterest, if they haven’t been published yet.
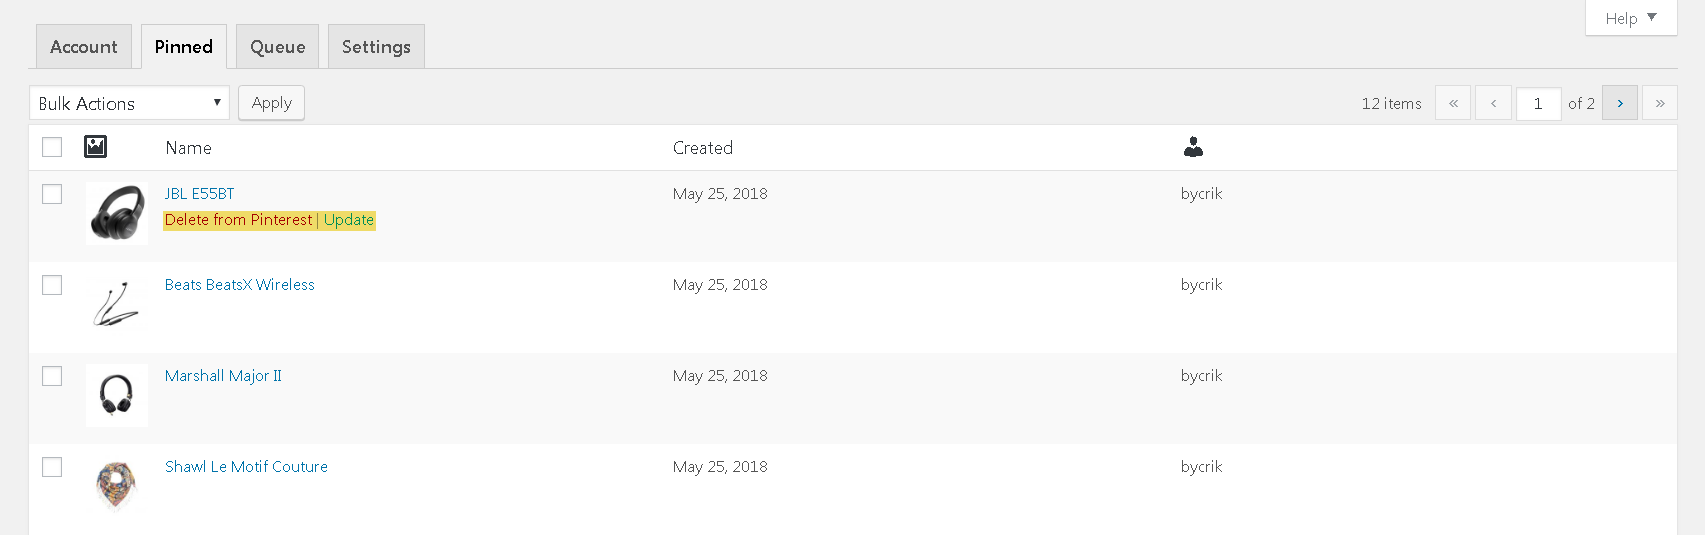
Tab Pinned
On this tab you can review all pinned products, delete a product pin from Pinterest or update it. The bulk actions are also available: deleting and updating pins. All operations are added to the queue.
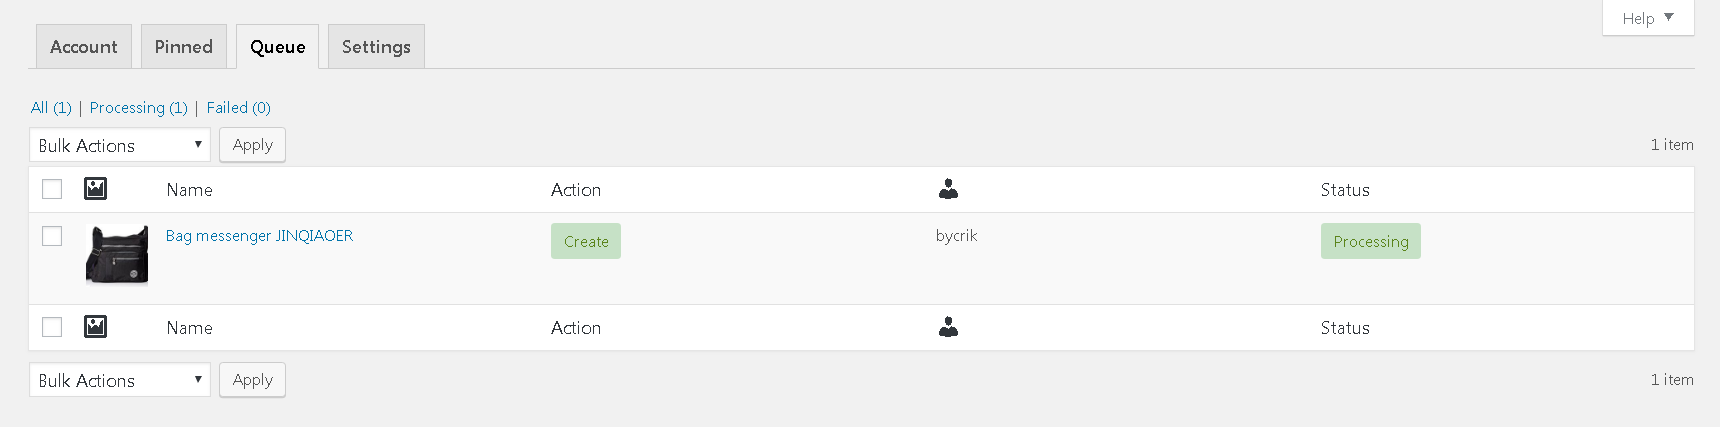
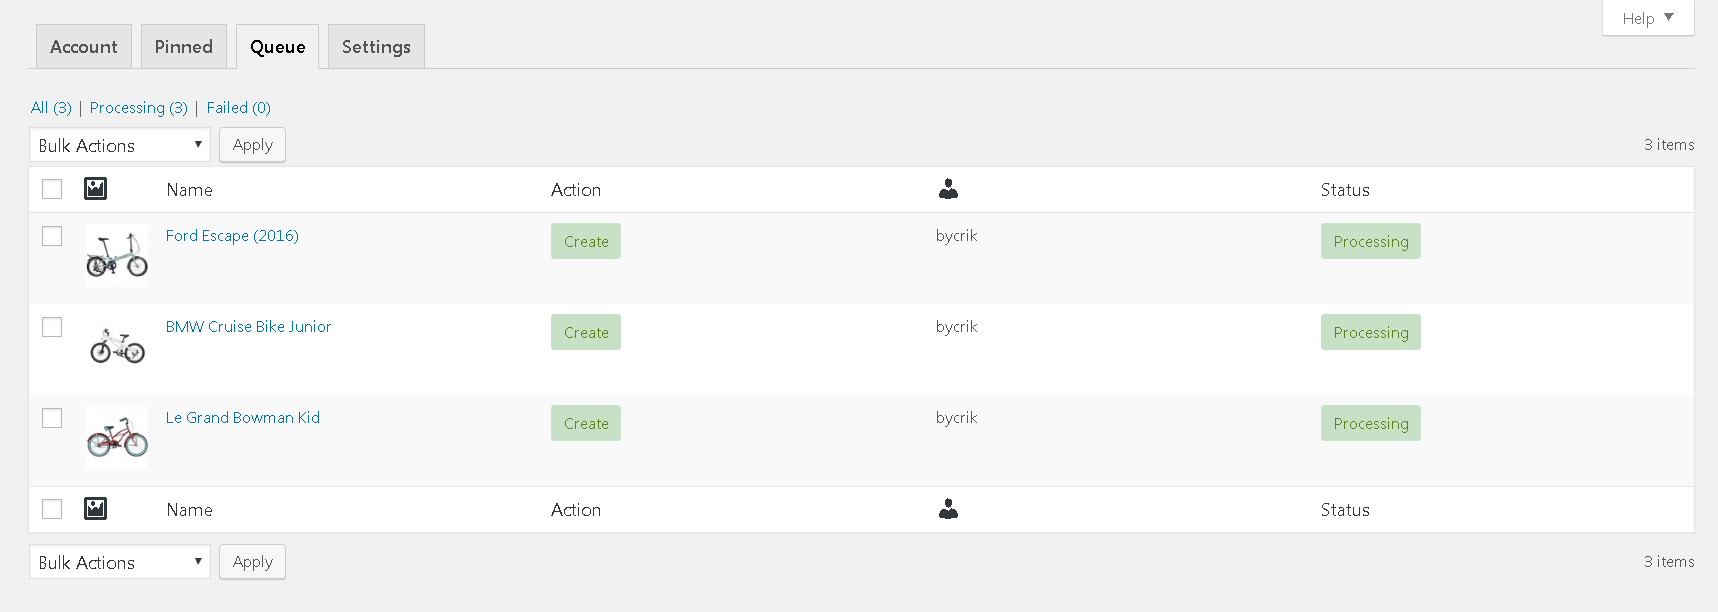
Tab Queue
On this tab a list of all scheduled tasks is displayed. After execution – the task is removed from the queue. The available actions: Delete from queue and Retry.
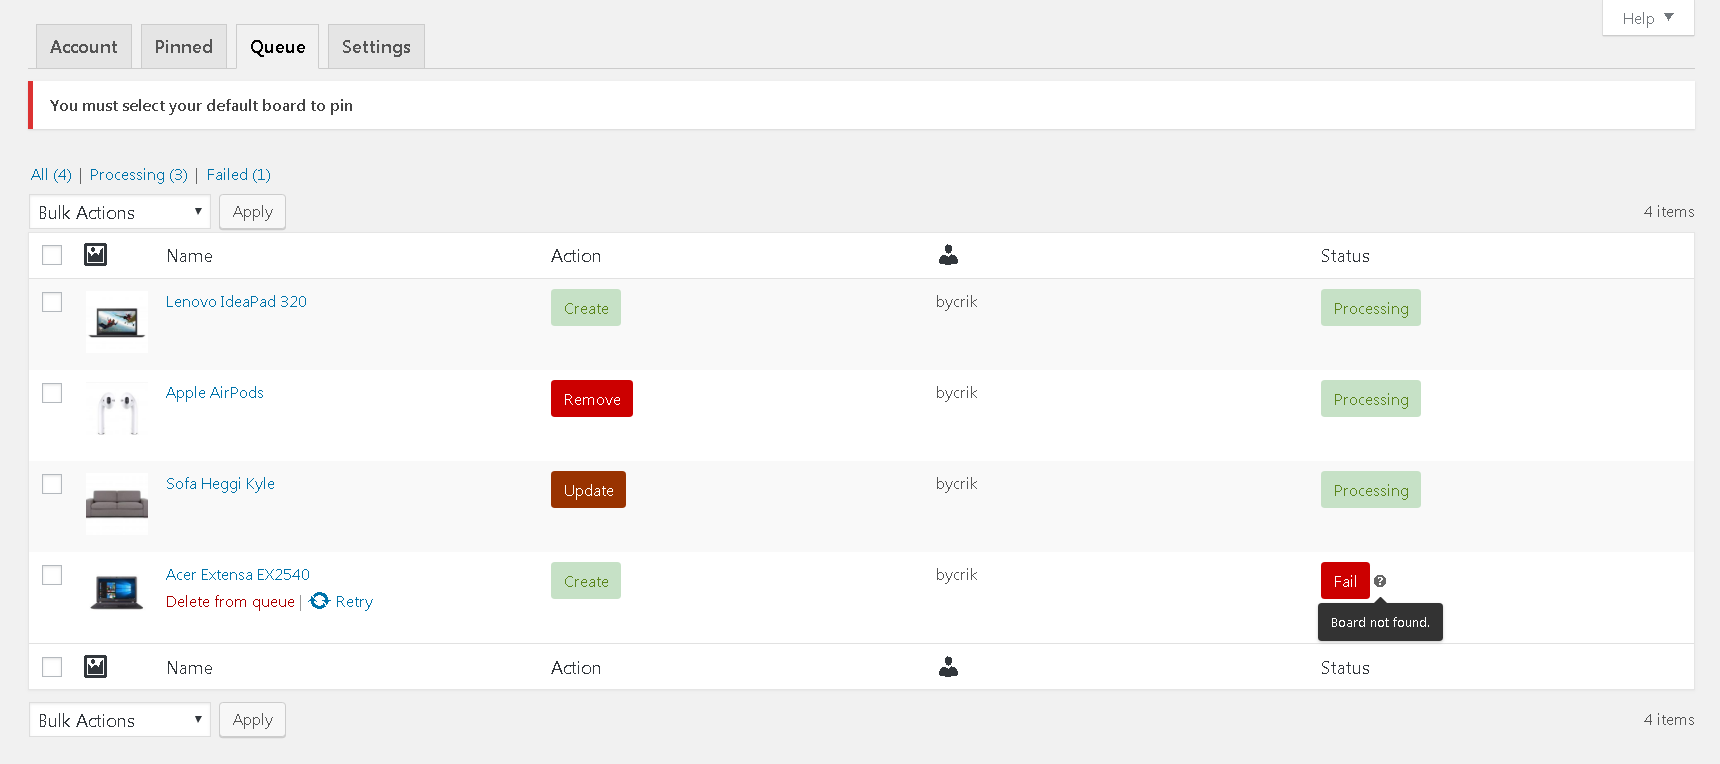
Tasks may have two statuses: ‘Processing’ and ‘Fail.
Available actions:
- Delete from queue – if you update an existing pin or delete it, the pin will be returned to the previous state and if you create a new one, the task will be deleted and a pin won’t be created.
- Retry – it places a task to the end of the queue so that it is executed again.
A queue is divided into three tabs:
All– a list of all the tasks (which are processed and failed).
Processing – a list of the tasks which are in the queue to be executed.
Fail – a list of the tasks which have completed with a mistake; a mistake is displayed next to the task status. In addition, in the ‘Fail’ tab this action is available in the ‘bulk action’.
Setting up Track conversions with Pinterest tag
- Activate the ‘Enable for Pinterest Pixel’ checkbox to add the main code to the site.
- Enter the Tag ID. You can find it here.
- Activate the events you want to track.
- Save your changes.
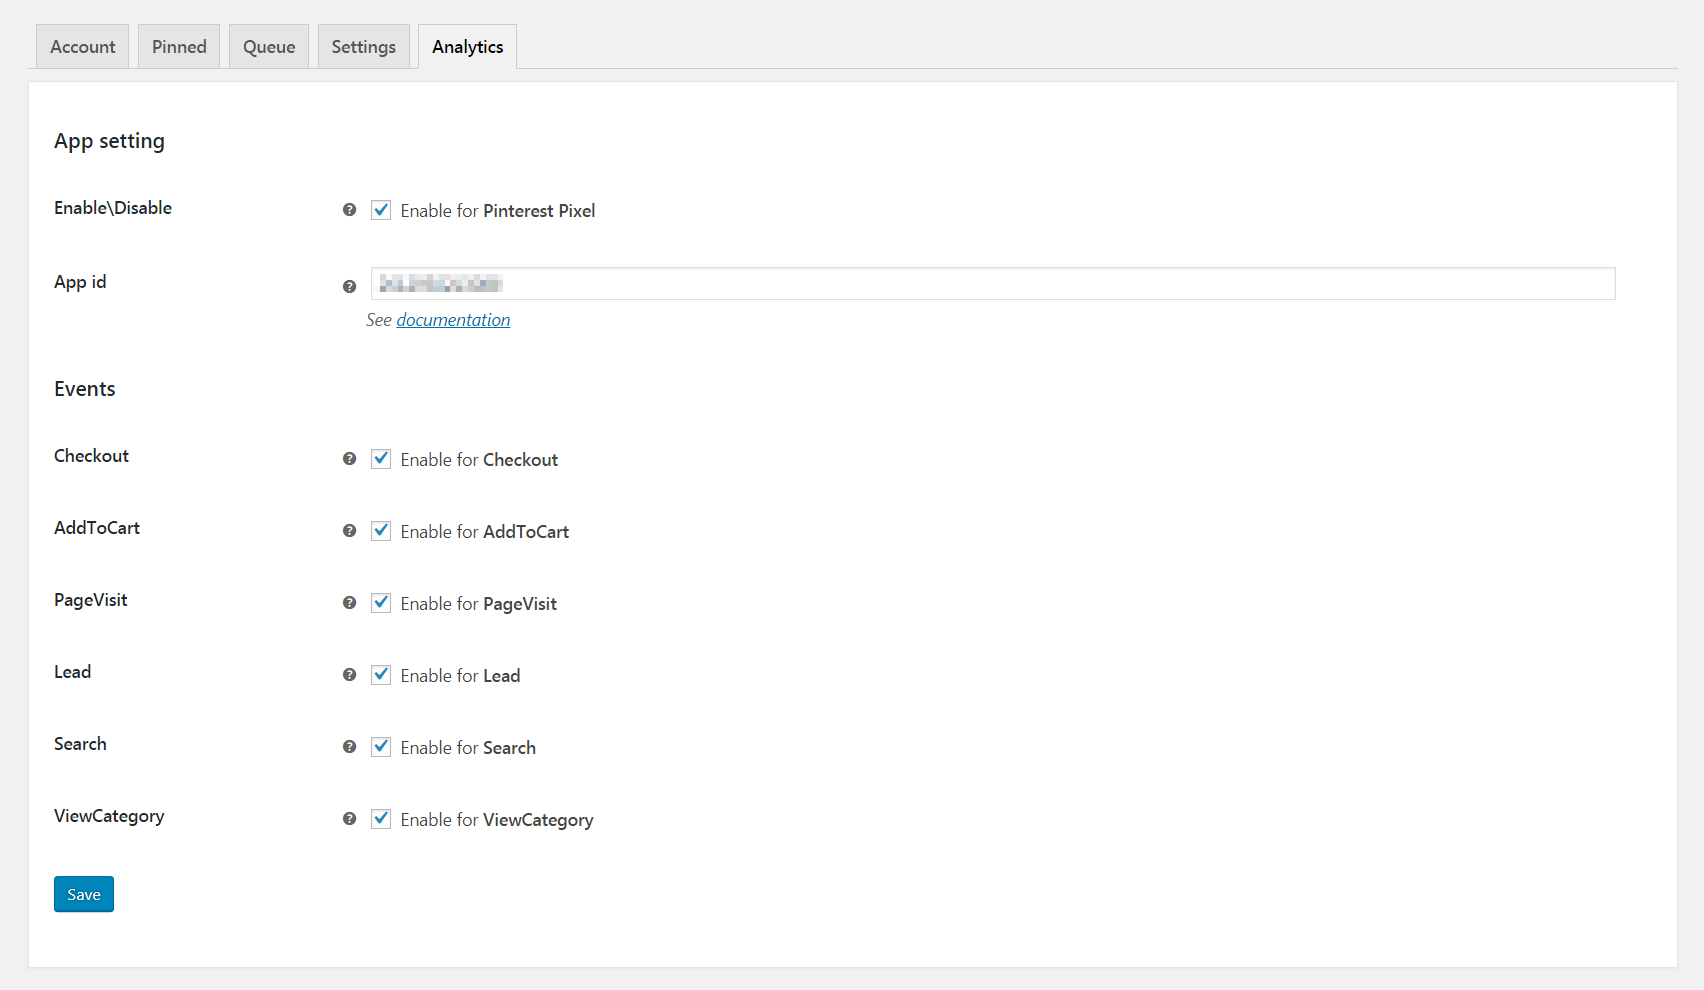
To check if everything works you can use Pinterest Tag Helper Chrome extension.
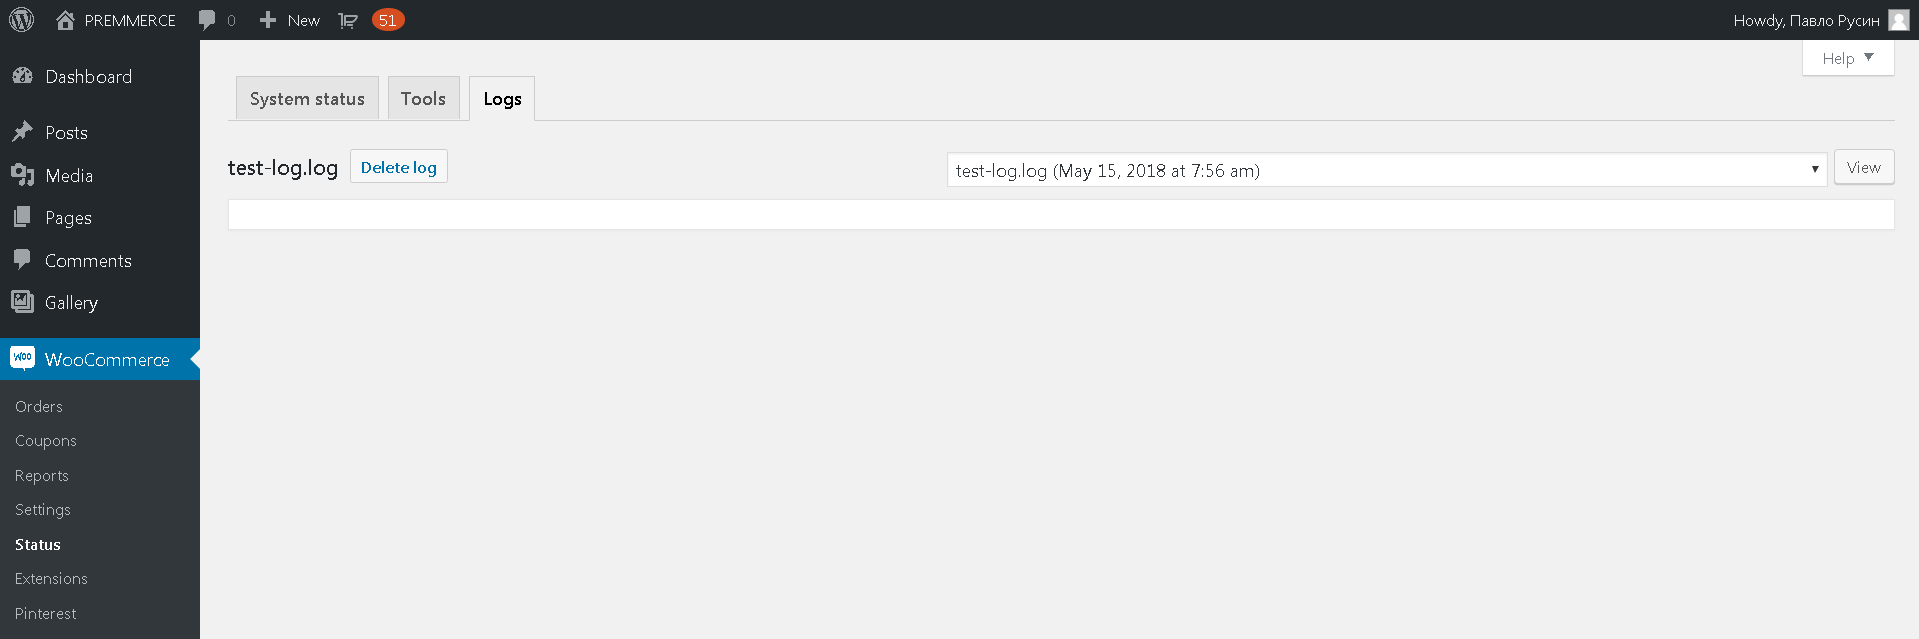
Logs
Unknown errors are saved in the WooCommerce log with the ‘premmerce pinterest*.log‘ name.
To learn more and purchase it you can visit the official WooCoomerce Extensions Store.
Comments

Ready to Get Started?
Join over 100,000 smart shop owners who use Premmerce plugins to power their WooCommerce stores.
Get started