Exporting Products in WooCommerce. Tutorial And Settings Guide
In this guide we’ll review a convenient and powerful plugin for product exporting and some other useful tools for your online store management. For the reasons of clarity we’ve decided to focus on the product exporting topic only. WooCommerce orders and customers exporting highlighted in detail in this tutorial.
WooCommerce Product Exporting
WooCommerce Export is suitable for exporting a small quantity of products, but not for migrating your online store from another platform. Moreover, it’s completely unsuitable for the exporting your store products to price comparison websites.
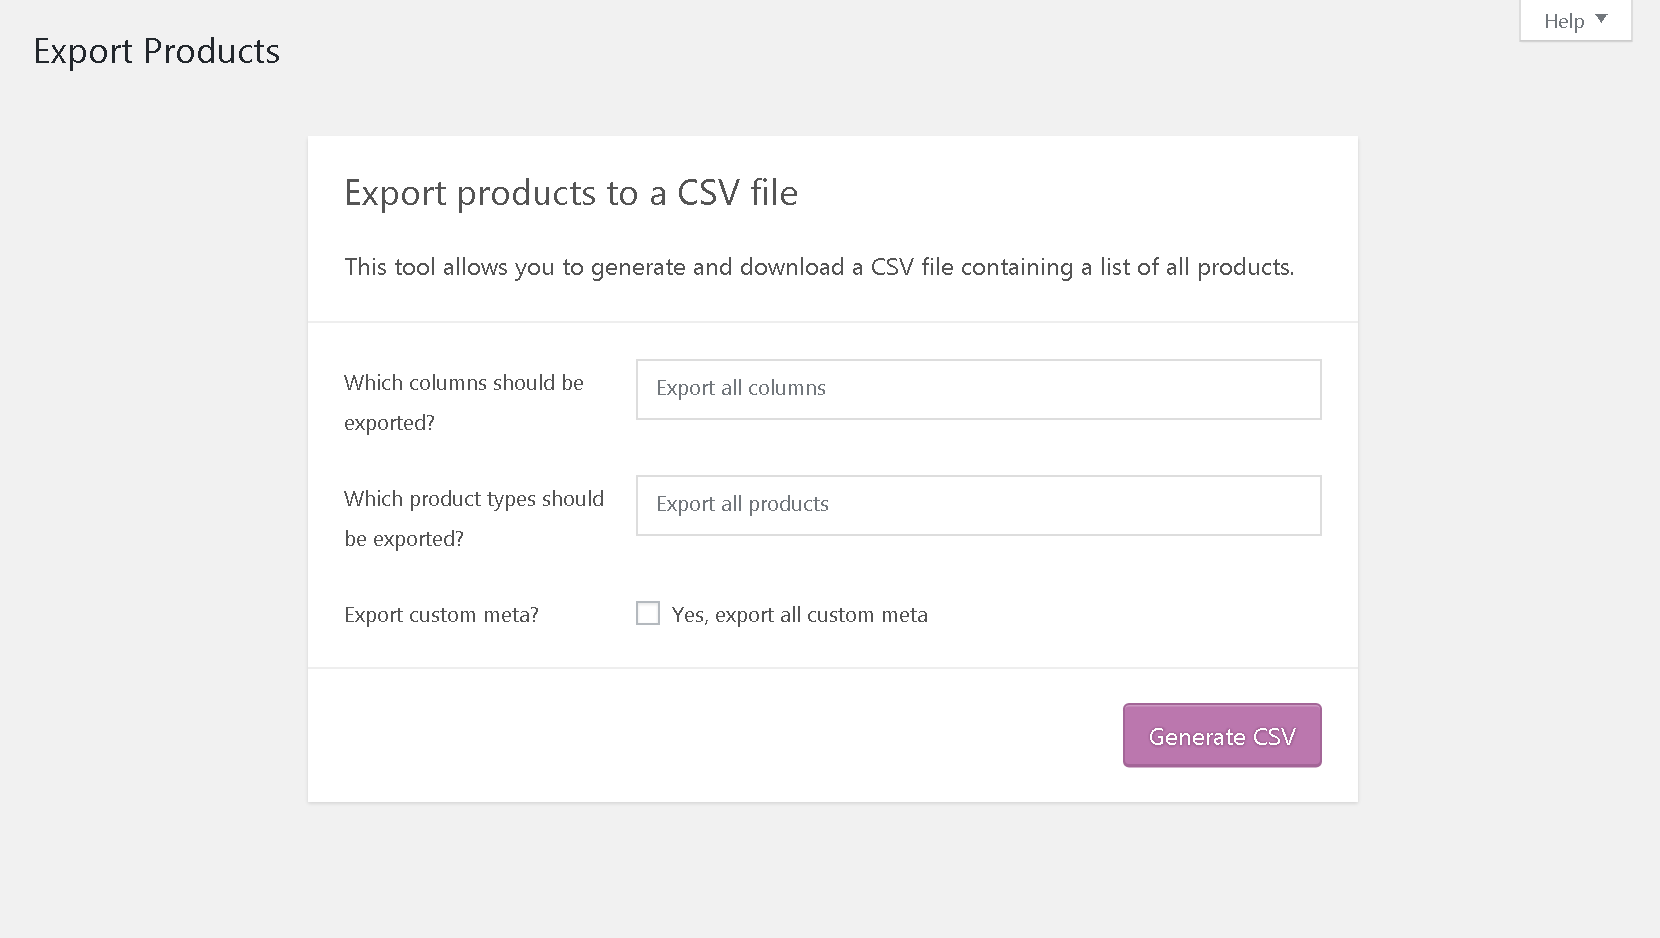
The advantages:
- exporting in several stages
- it is a part of the WooCommerce plugin, so you don’t need to install any other plugins
The disadvantages:
- it supports only CSV files
- there are no flexible settings
The Exporting products with WP All Export Pro Plugin
After the research of solutions existing on the market that are aimed at standard exporting improvement, we’ve pointed out the WP All Import Pro plugin.
Besides the regular product exporting that the WooCommerce importing provides it has the following features:
- Export to CSV, XML and Excel
- Flexible settings
- A convenient and simple interface
- Automatically run exports on a schedule
- Easily filter exported data
- Fully integrated with WooCommerce & Advanced Custom Fields
- Post-process exported data using PHP
Product Exporting Preparation
For the specific product exporting make sure that the following plugins have been installed and activated:
Product Exporting Guide
1. Open the WP All Export Pro page.
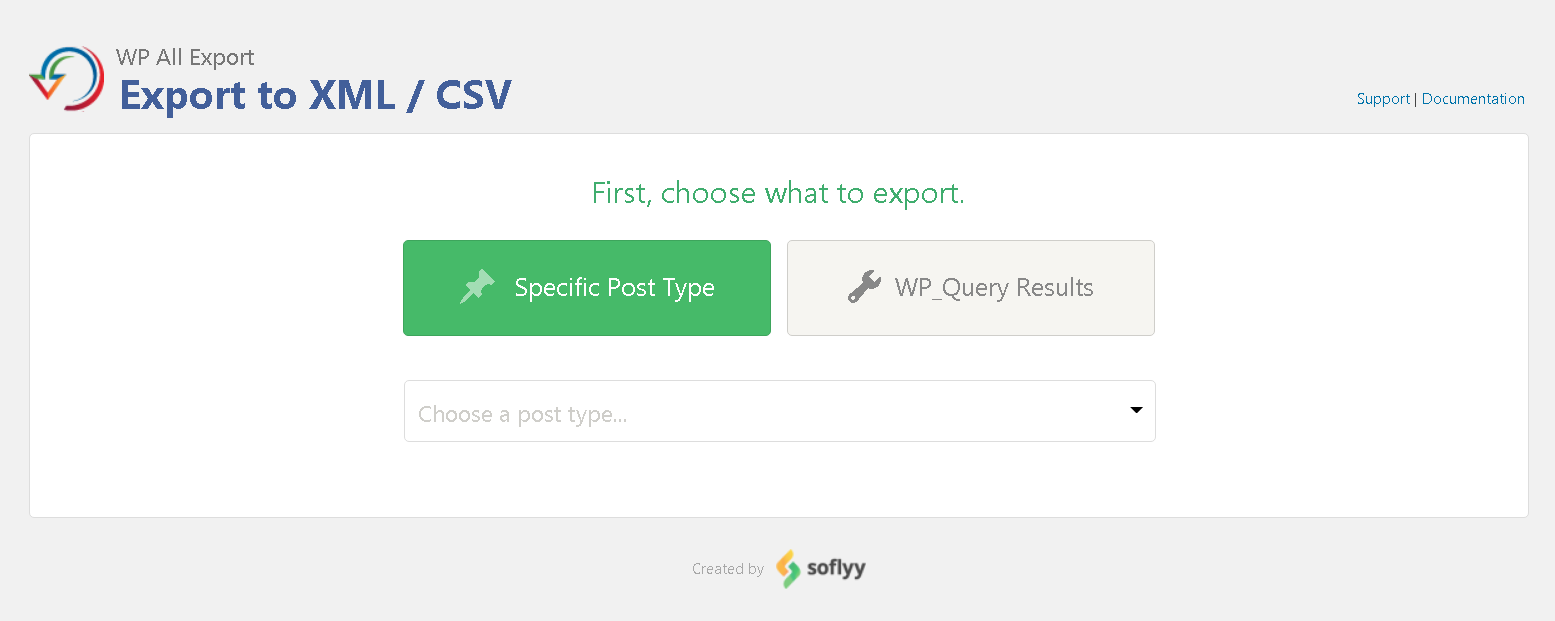
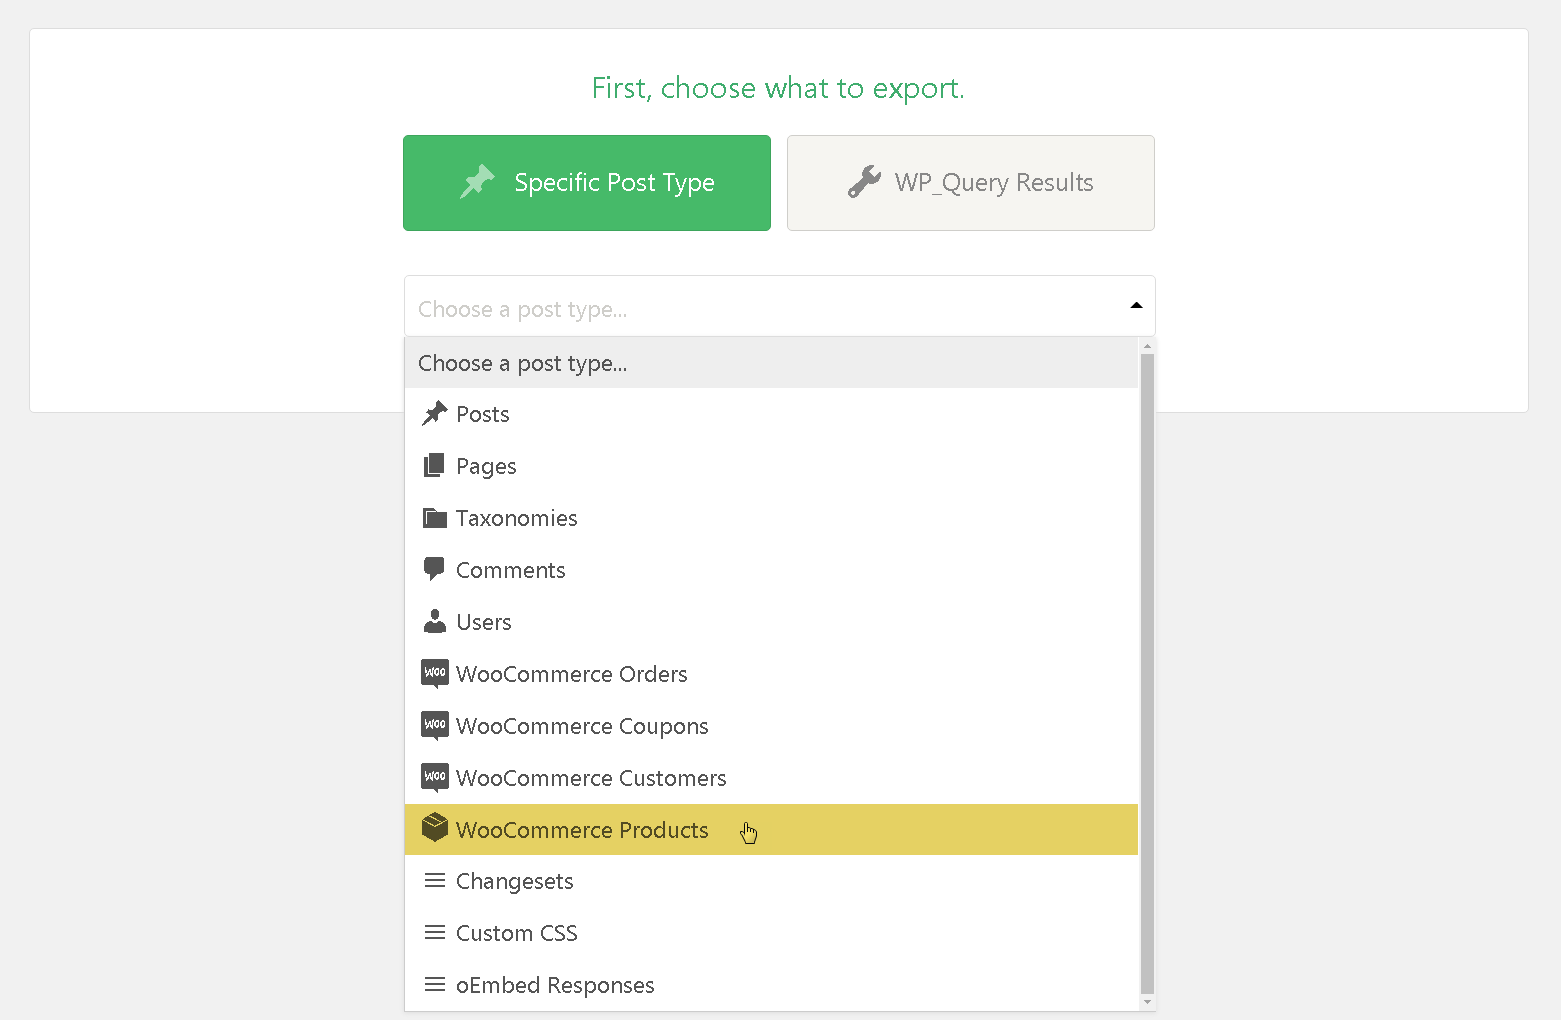
2. Choose the exporting type ‘WooCommerce Products’ from the drop-down list.
3. This step is optional. After data for exporting has been chosen, the plugin provides the ability to add filters to remove the unnecessary information. For example, if you only need Woo products, follow the steps below:
3.1. Click the ‘Add Filtering Options’ block.

3.2. Choose the item ‘Product categories’ from the Element drop-down list, the item ‘In Product Cat’ from the Role drop-down list and enter a category name in the Value field, in our case enter Woo.
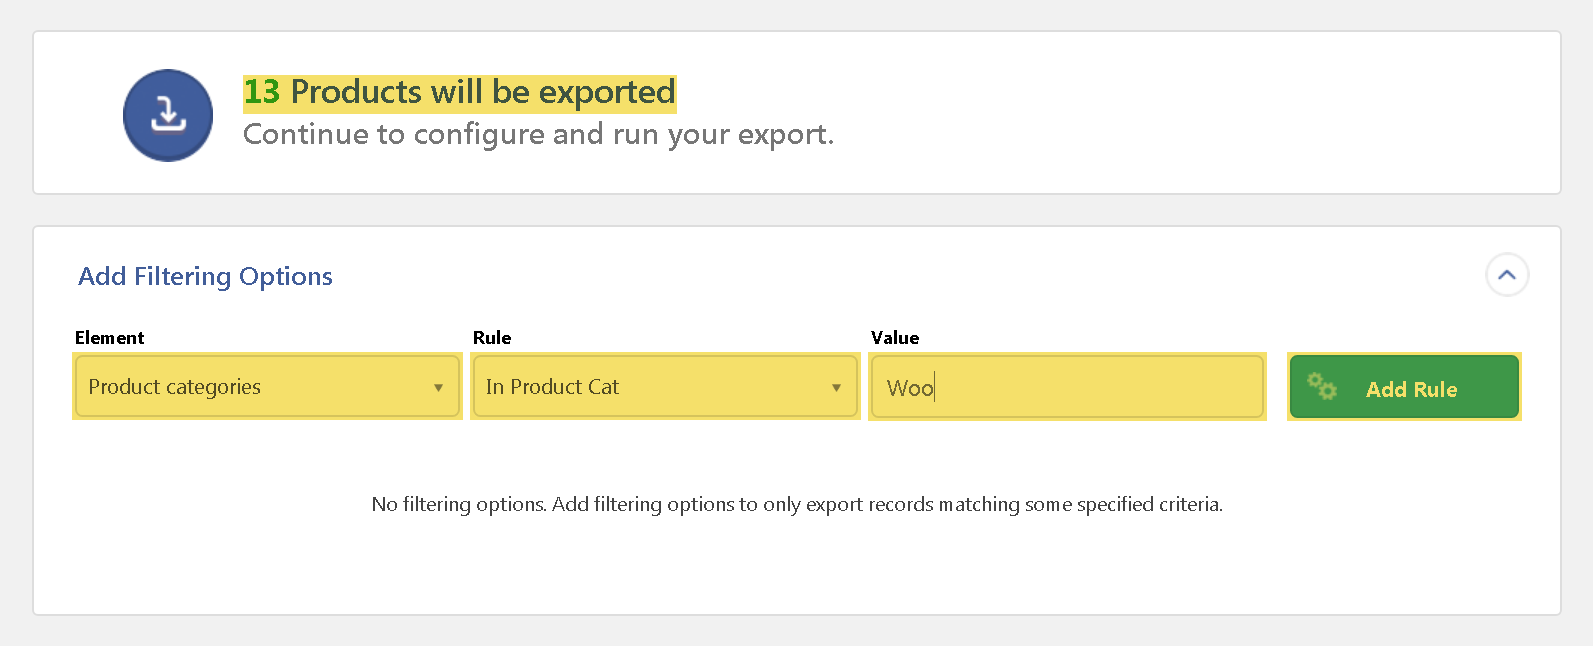
3.3. Click the ‘Add Rule’ button.
3.4. The system will automatically recount the number of elements filtered by the chosen criteria.

4. If you need to export all the data about products:
4.1. Click the ‘Migrate Products’ button.
4.2. Go to item 6.
5. If you need to set up exporting data:
5.1. Click the ‘Customize Export File’ button.
5.2. The plugin provides 6 different data exporting types:
- CSV
- Excel File (XLS)
- Excel File (XLSX)
- Simple XML Feed
- Custom XML Feed
- Google Merchant Center Product Feed
The interface of data export setup is identical in the first four types specified above, the only difference is in the type of an exported file and in the formation of its data structure.
5.3. To change the type of data exporting:
5.3.1. Click the ‘Export Type’ block.
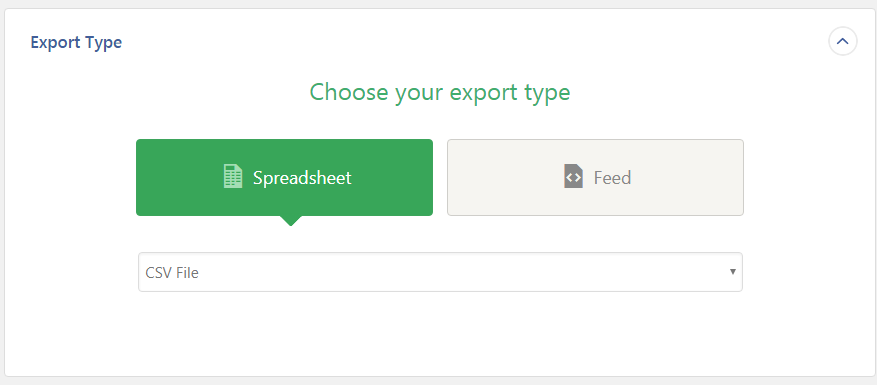
5.3.2. Click on the needed types group: Spreadsheet (CSV, Excel File (XLS), Excel File (XLSX)) and Feed (Simple XML Feed, Custom XML Feed, Google Merchant Center Product Feed).
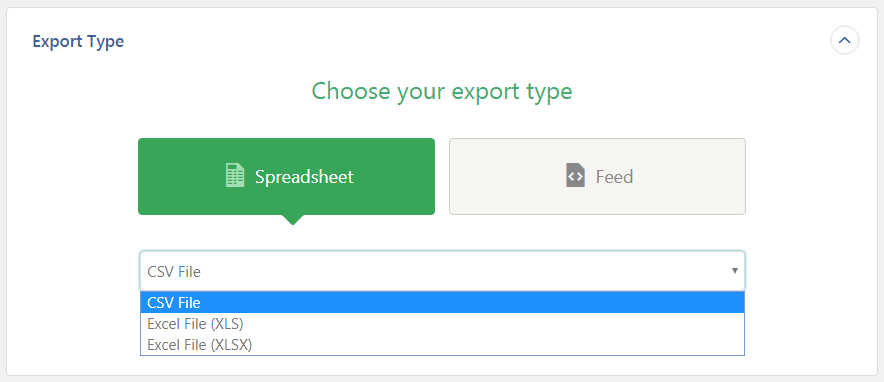
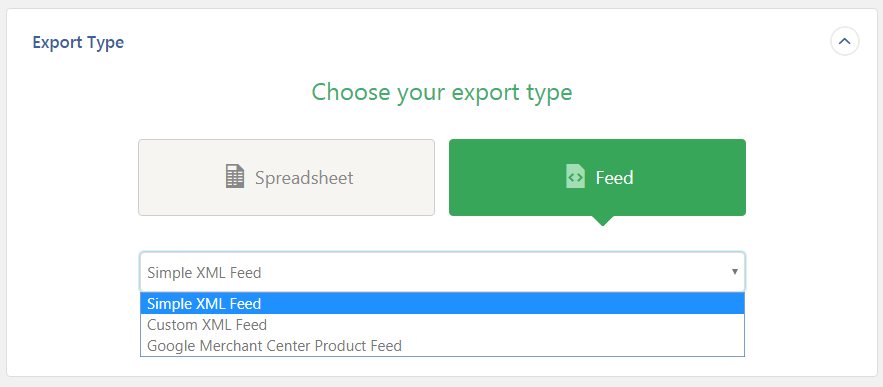
5.3.3. Choose the needed type from the drop-down list.
5.4. Export setup in CSV, Excel File (XLS), Excel File (XLSX), Simple XML Feed:
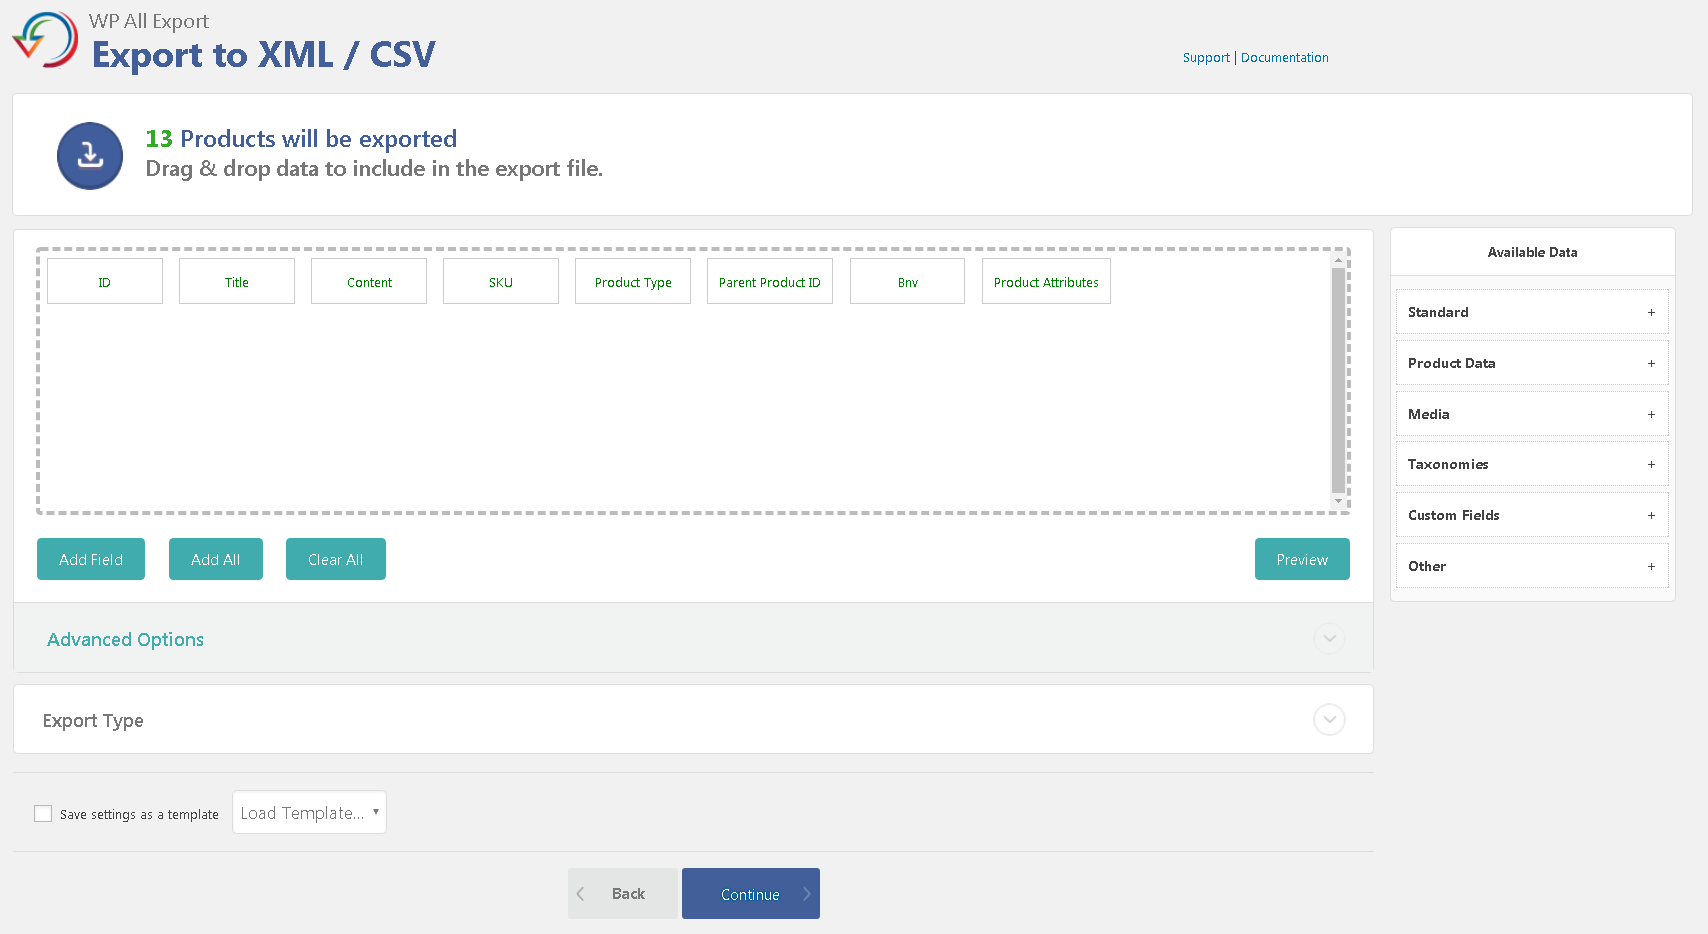
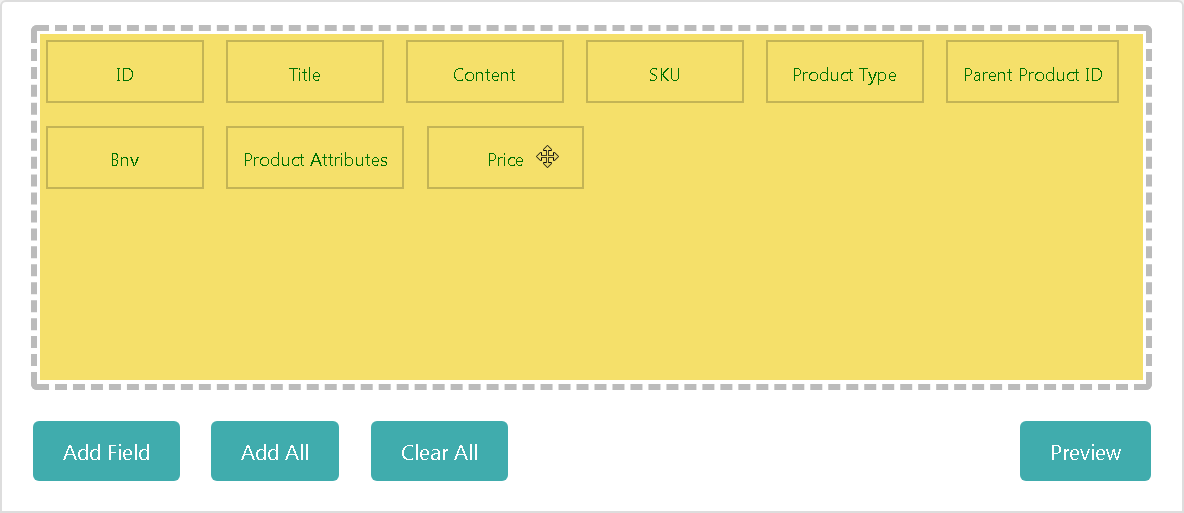
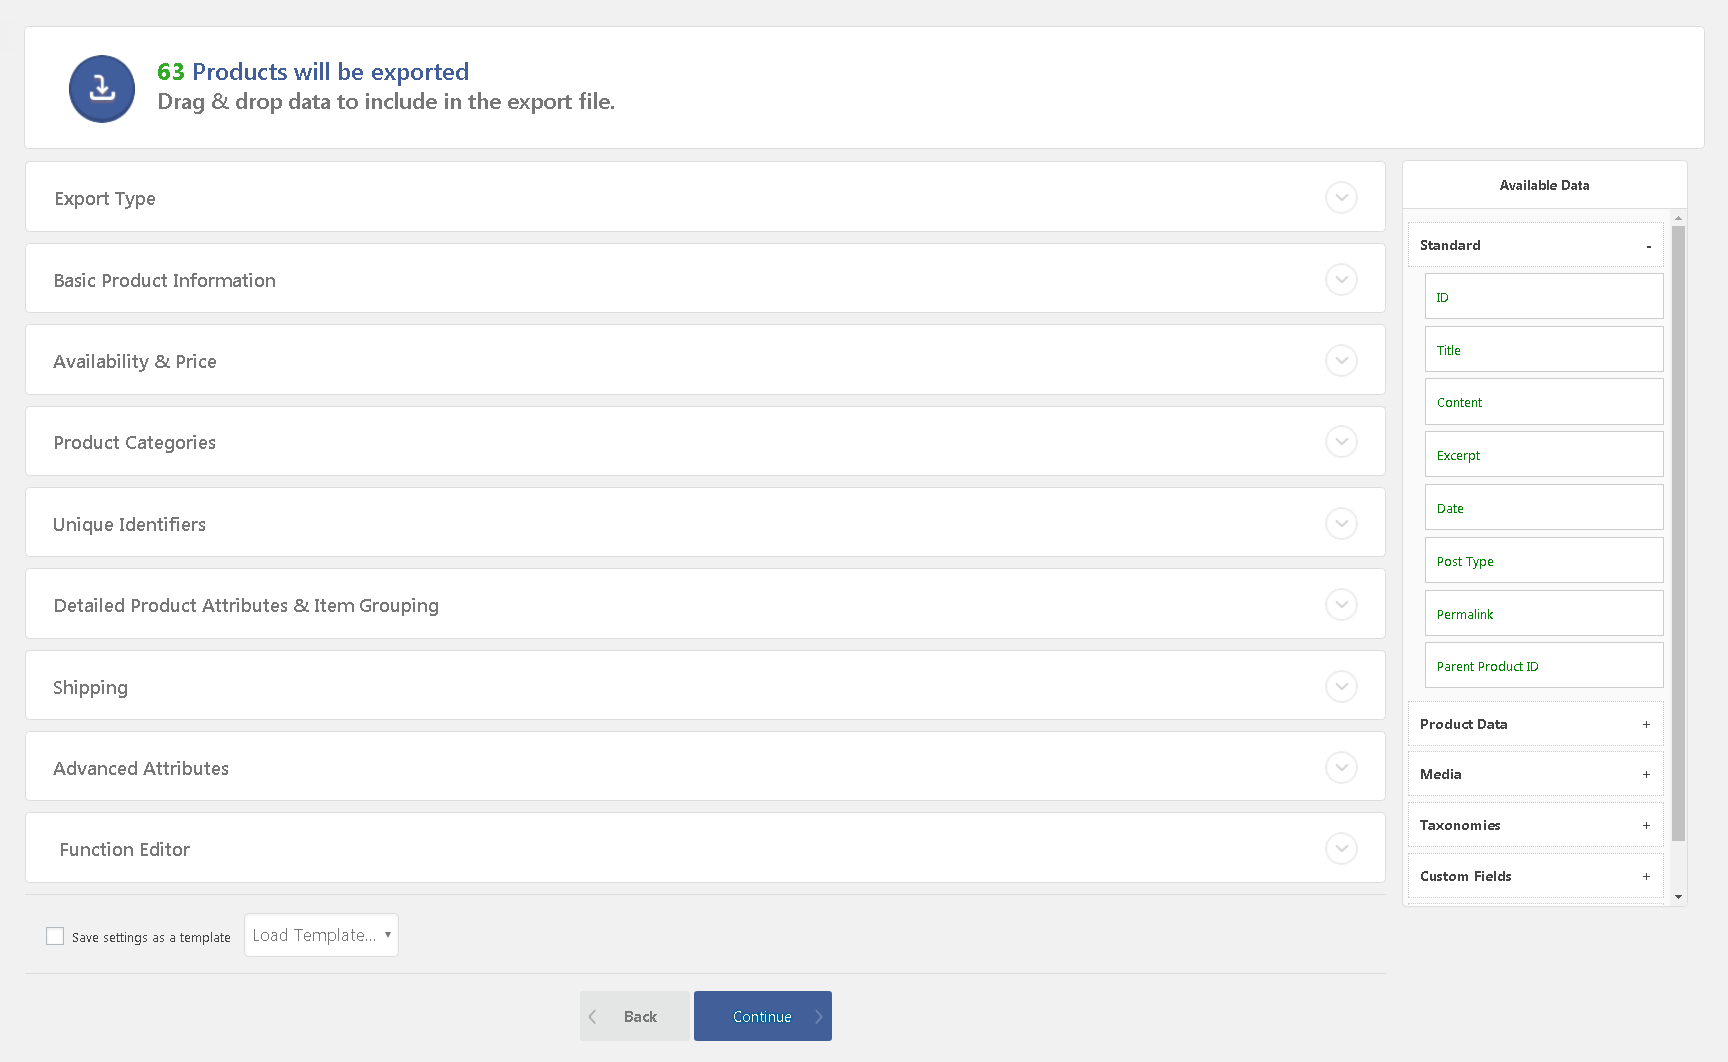
5.4.1. Formation of the export file is done by dragging & dropping the fields of the available data that are connected with the orders or customers from the ‘Available Data’ block to the block on the left.
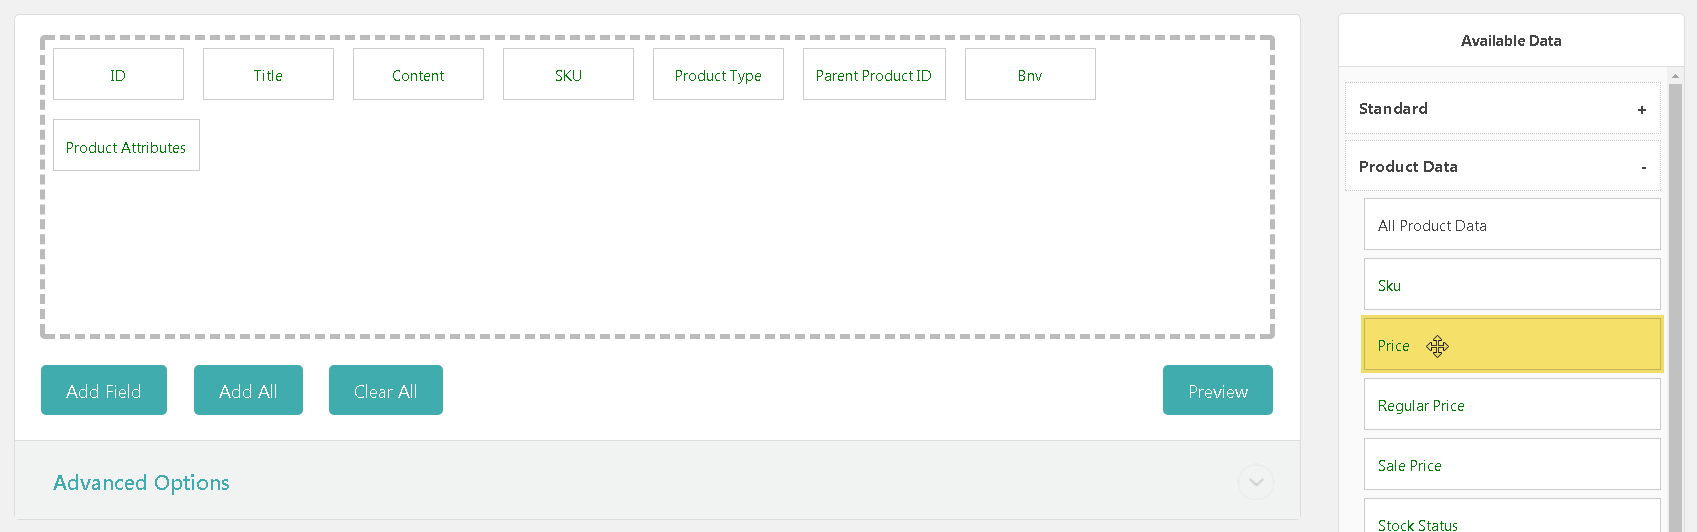

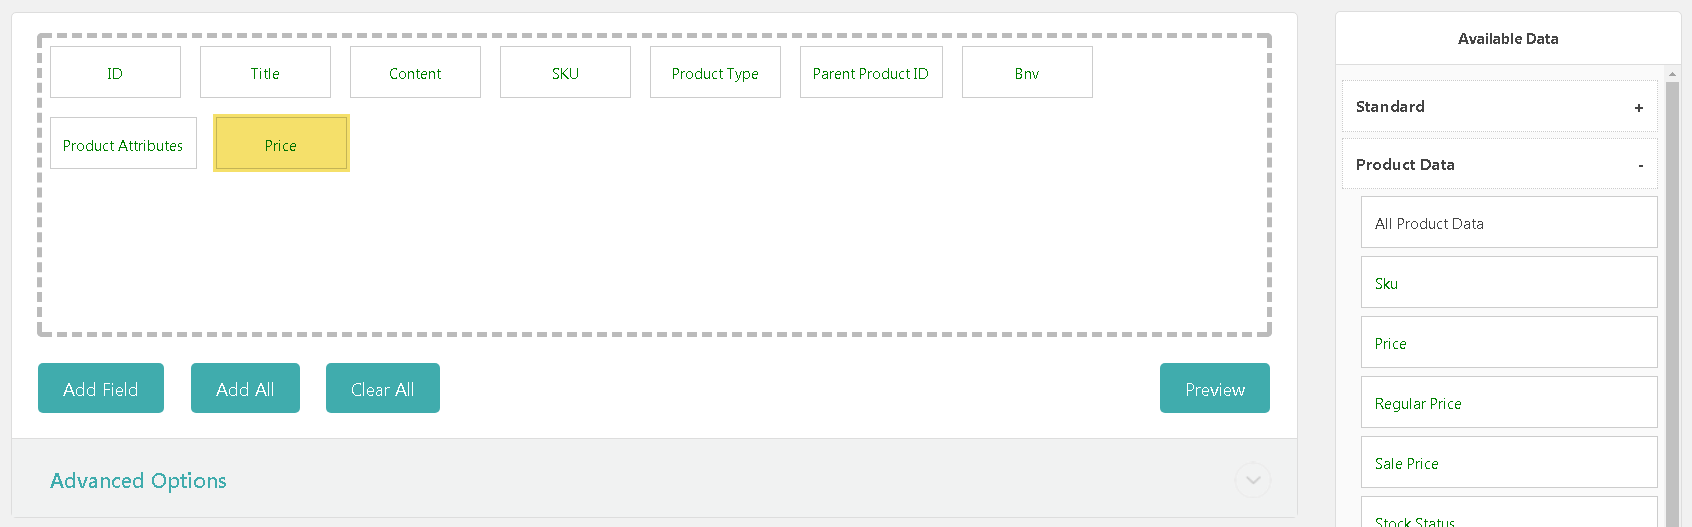
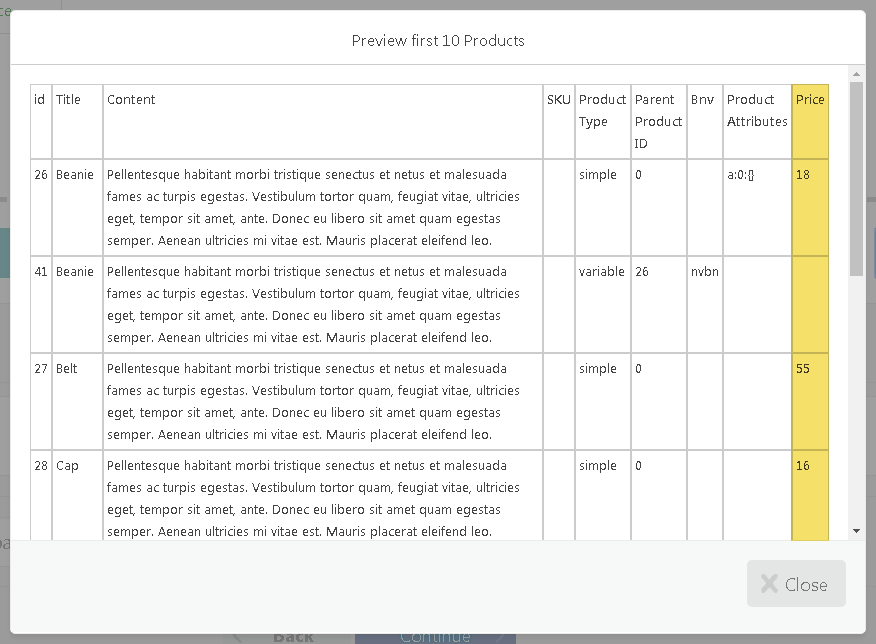
Data order of the exported file in the main export block is changed the same way. To see the result of your work click the ‘Preview’ button. This option is very convenient when you make export settings.
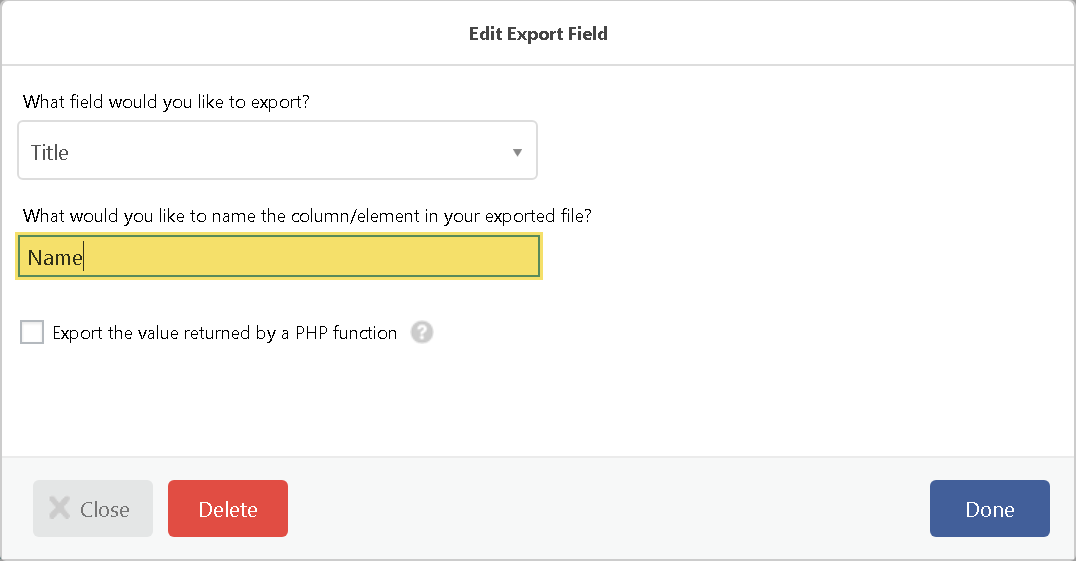
5.4.2. There are additional possibilities for editing data in CSV, Excel File (XLS), Excel File (XLSX) and Simple XML Feed:
- a change of the column/element name in the exported file:
- click on the needed element
- change the name and click ‘Done’
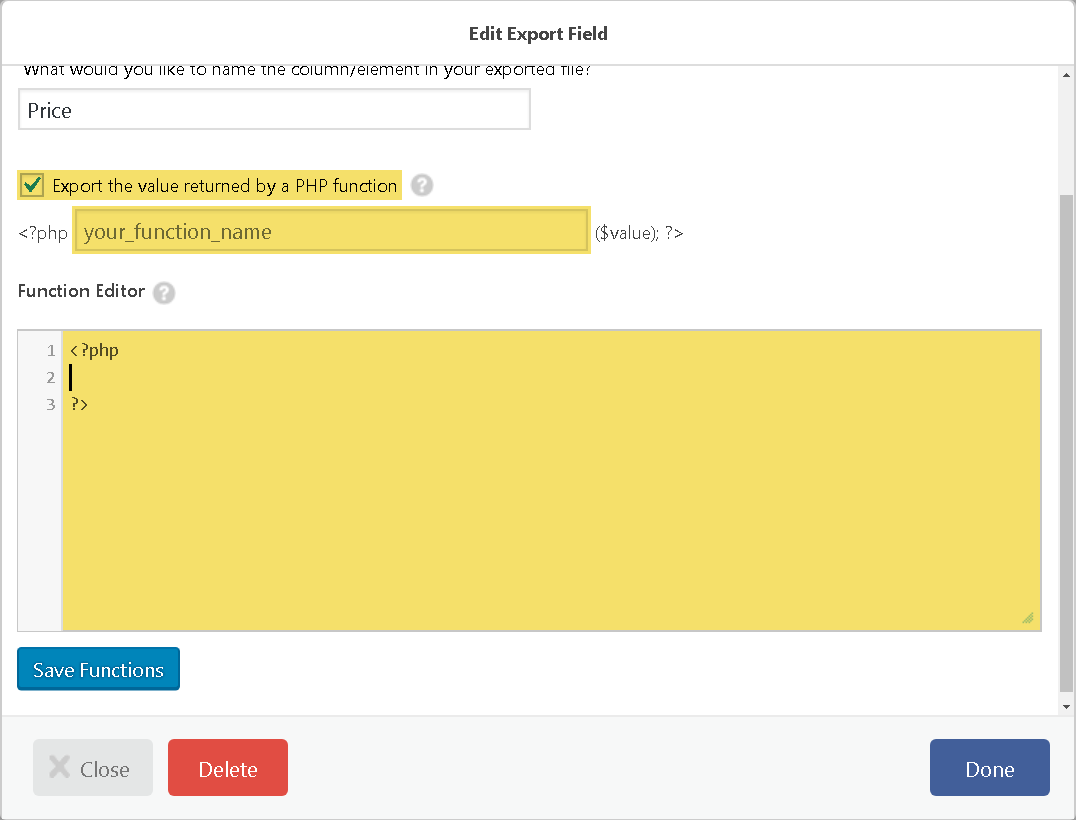
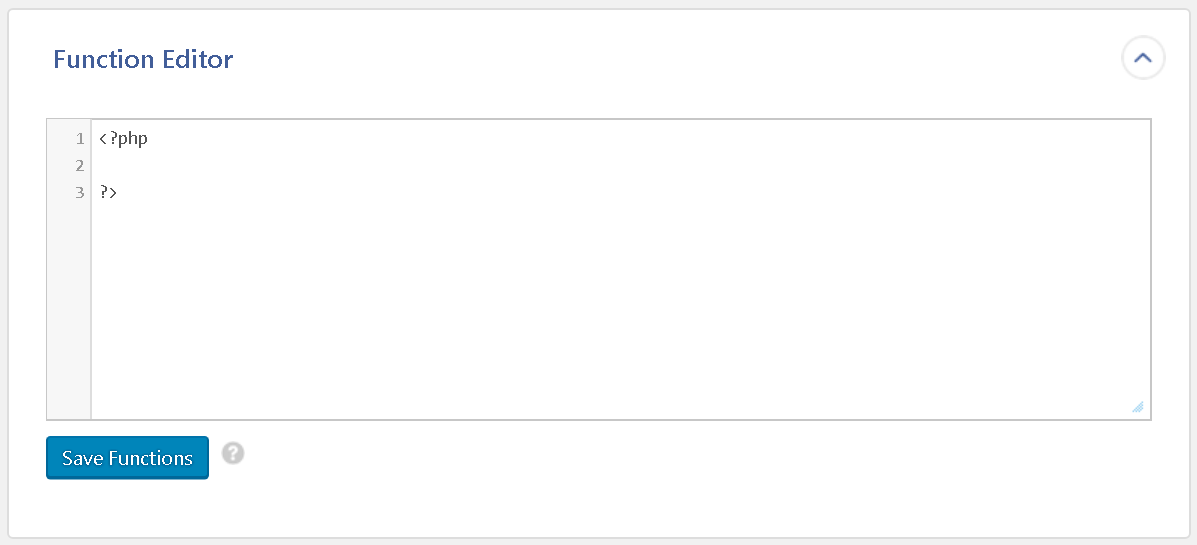
- processing by own php functions:
- activate the checkbox ‘Export the value returned by a PHP function’
- enter function name and its code
- click ‘Save Function’
- click ‘Done’
5.4.3. The ‘Available Data’ block is divided into several groups:
- Standard – basic information about a product, such as ID, Title,
- Content, Date, Post Type, Permalink and others
- Product Data – SKU, Price, Stock, Visability, Attributes and others
- Media – all data of images and attached data
- Taxonomies – Product Type, Product tags, Product categories and Brands (if you have installed the Premmerce WooCommerce Brands plugin)
- Custom Fields
- Others – detailed information about a product
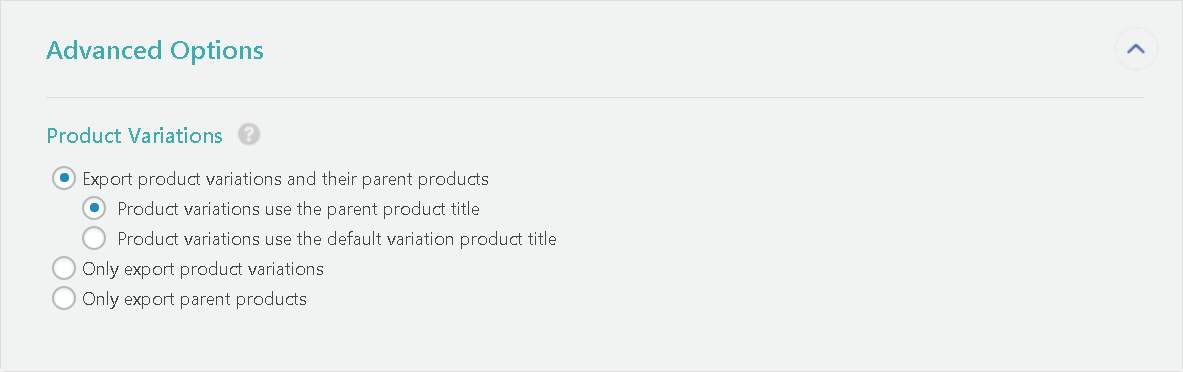
5.4.4. Advanced options
- for XLS and XLSX:
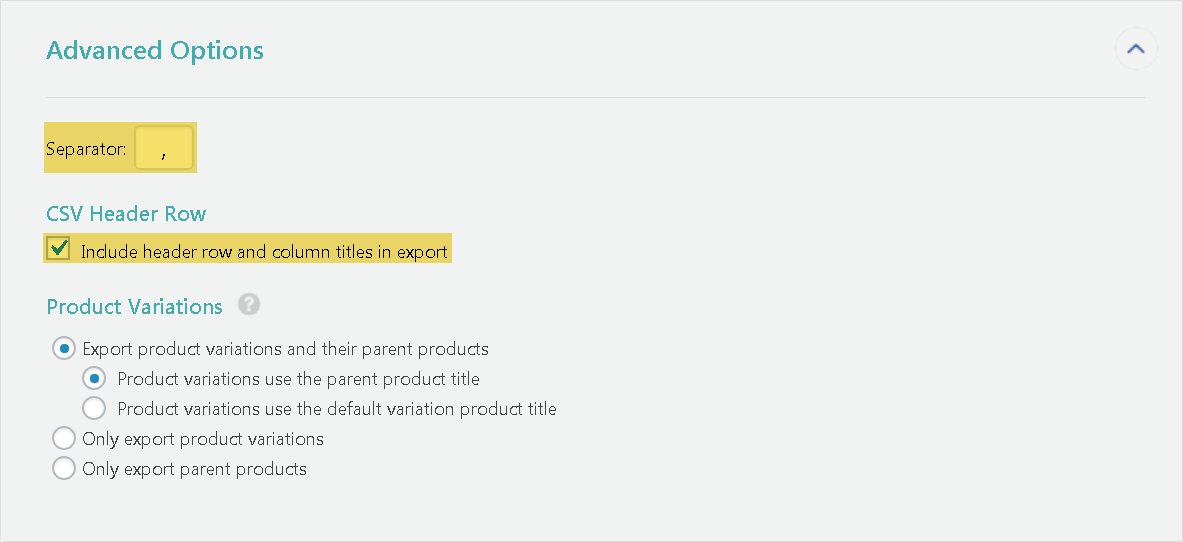
for CSV:
- to set your own data separator
- the possibility to add the line with the columns names in the exported
- CSV file.
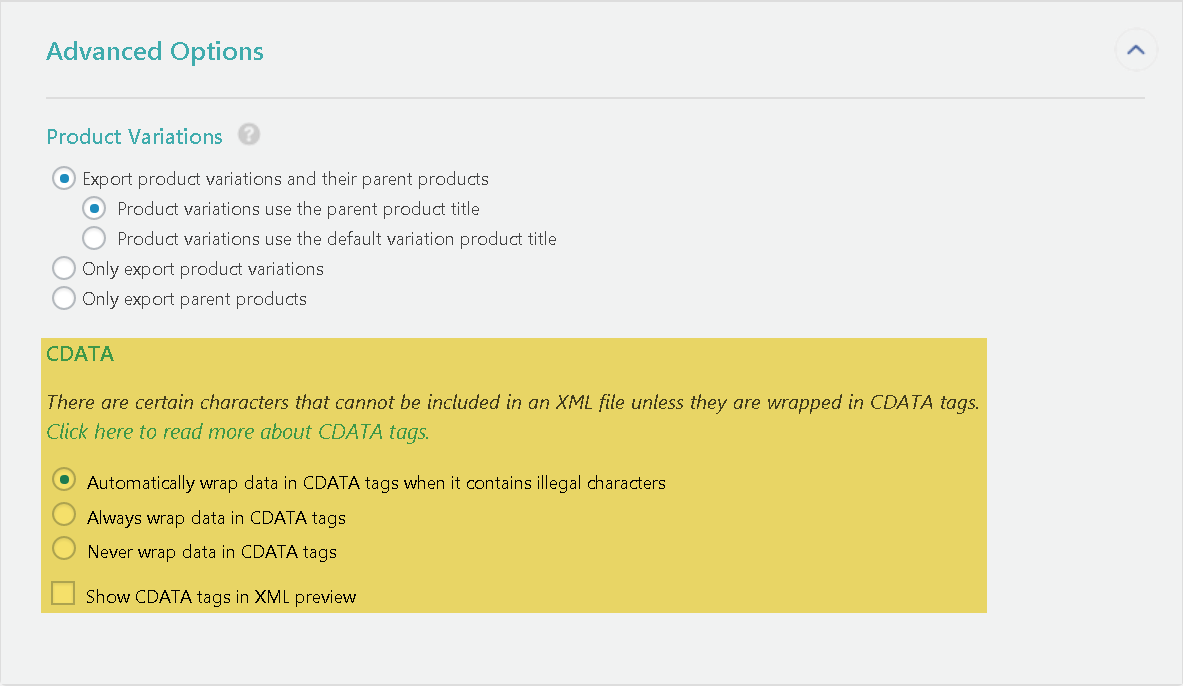
for Simple XML Feed:
- the possibility to name the main XML tags
- additional settings of CDATA
 for Custom XML Feed:
- additional settings of CDATA
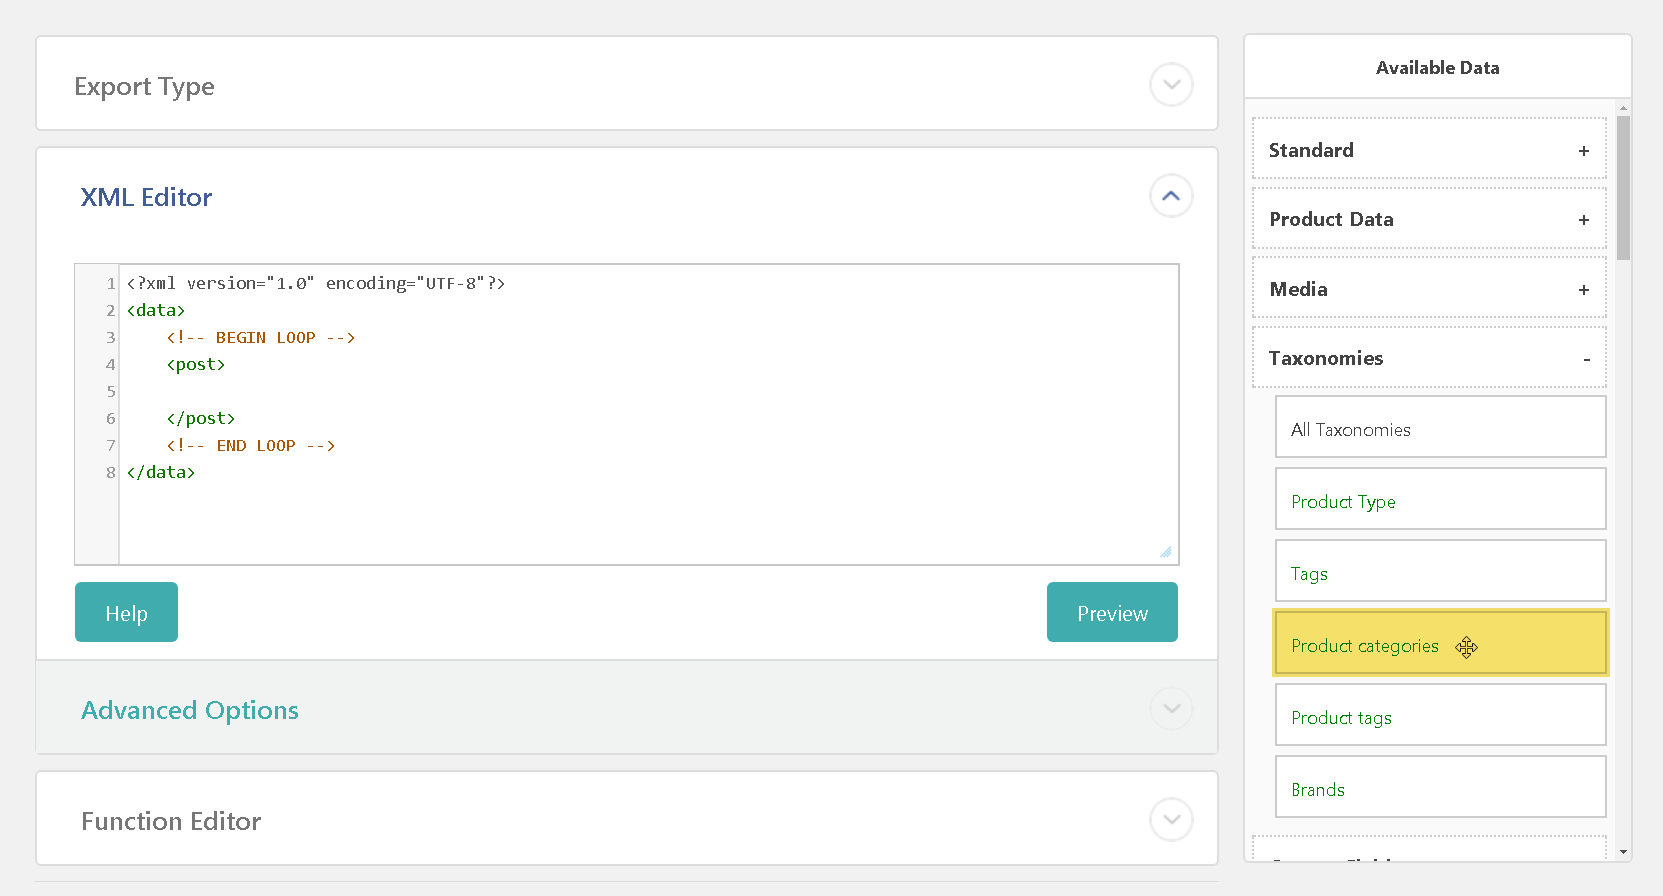
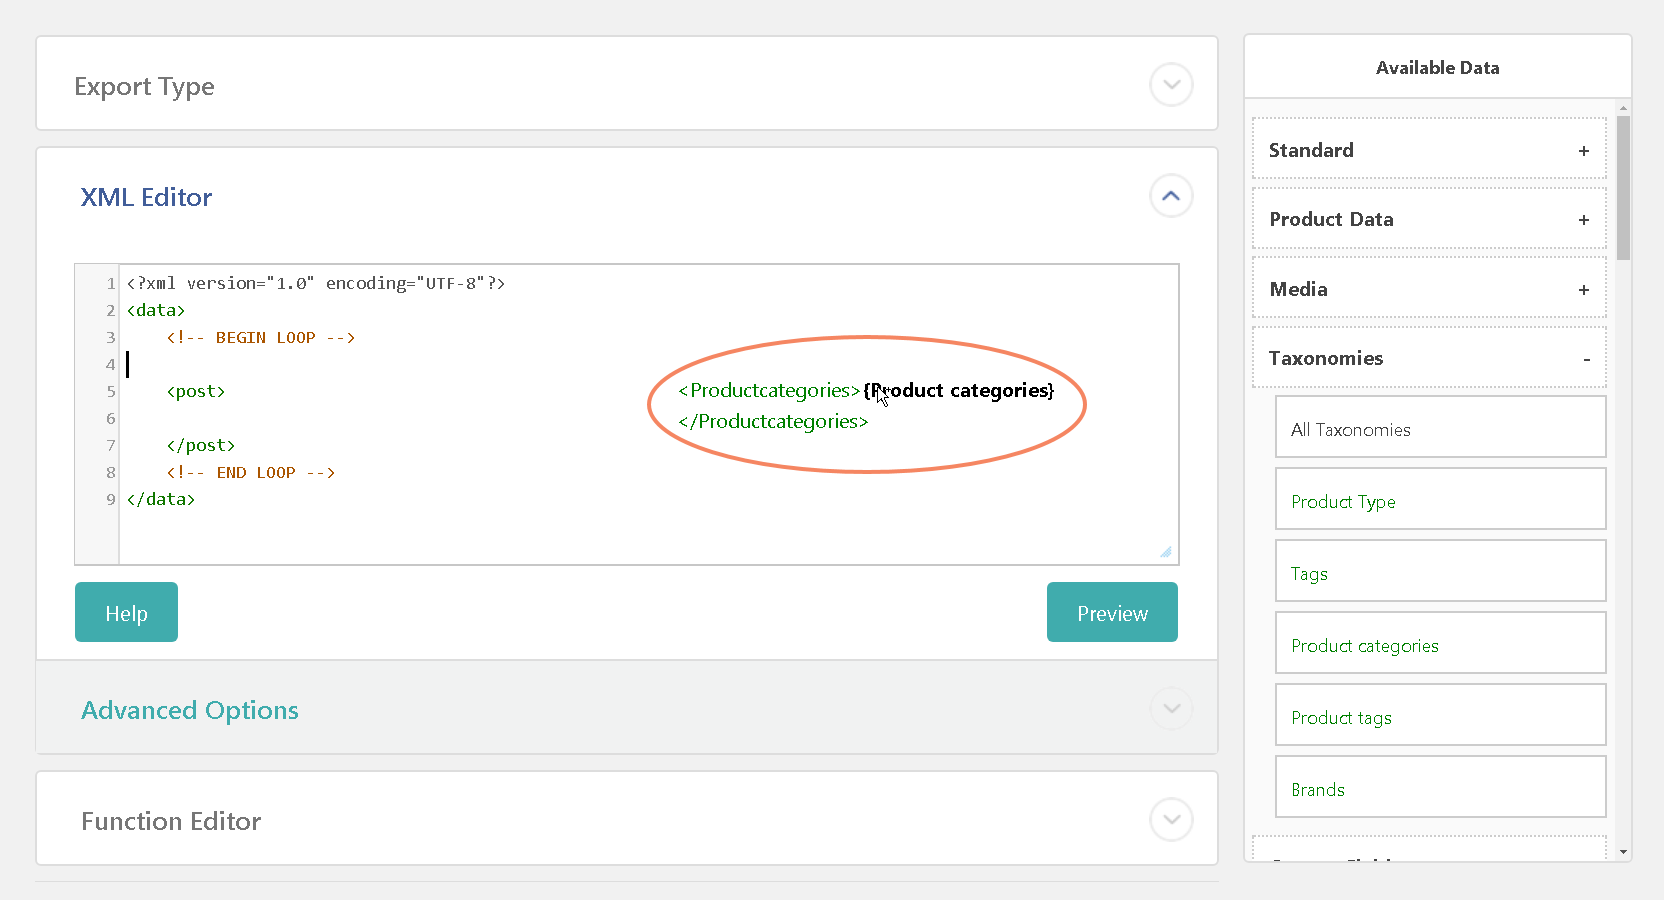
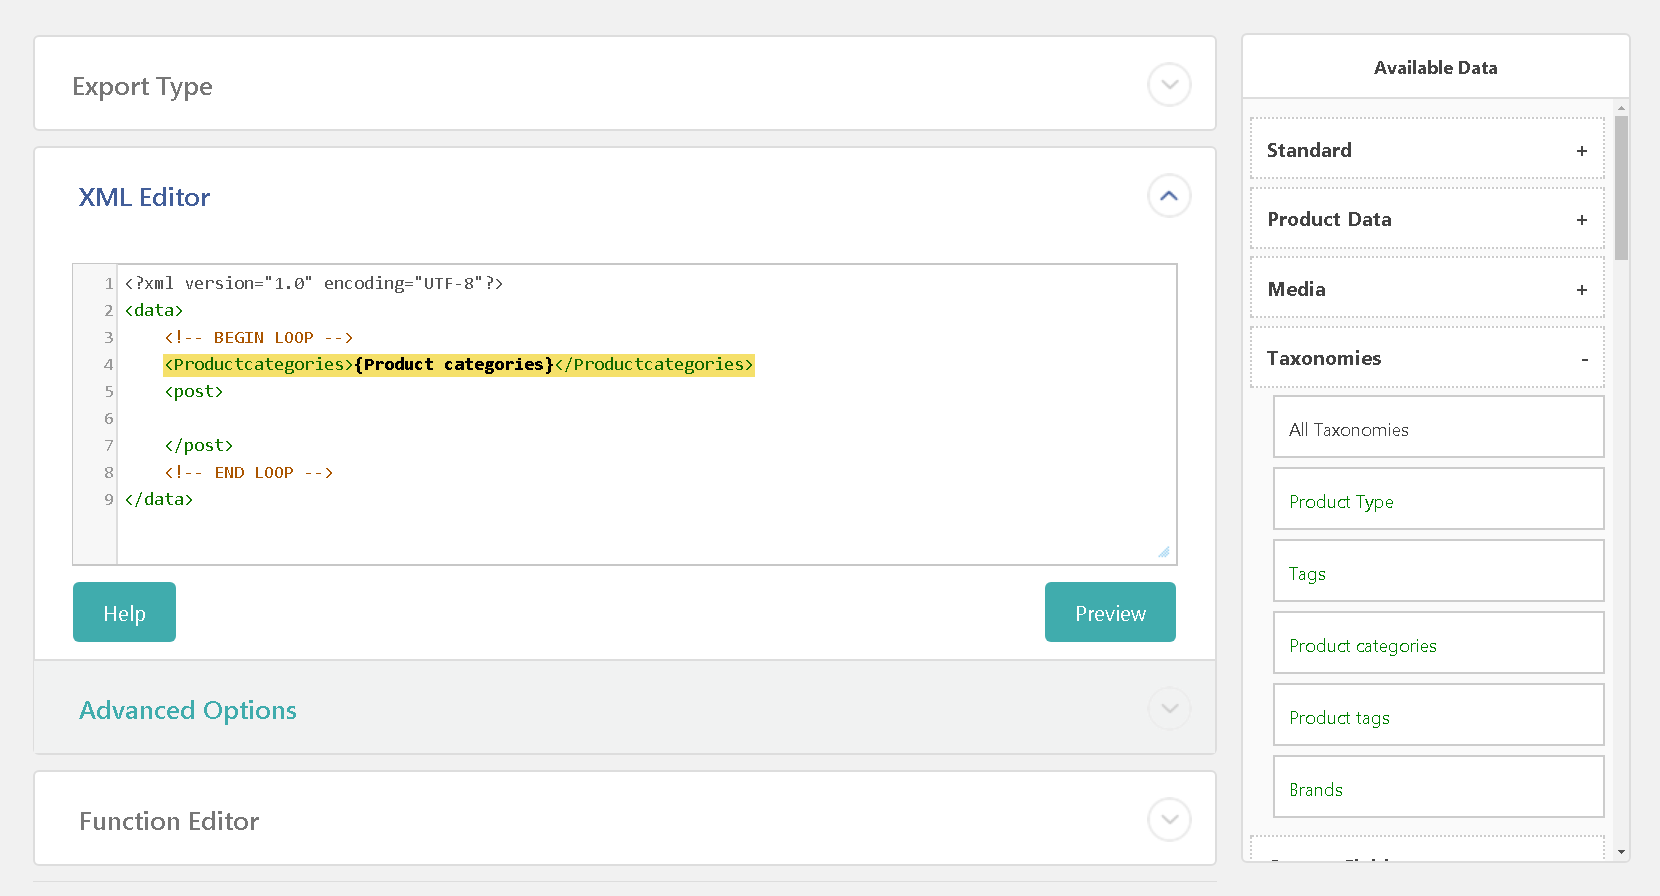
5.5. Export to ‘Custom XML Feed’ is the possibility to create your own structure of the data exporting XML file. You can drag & drop available for exporting data from the ‘Available Data’ block and this action is the same as in the previous exporting types.
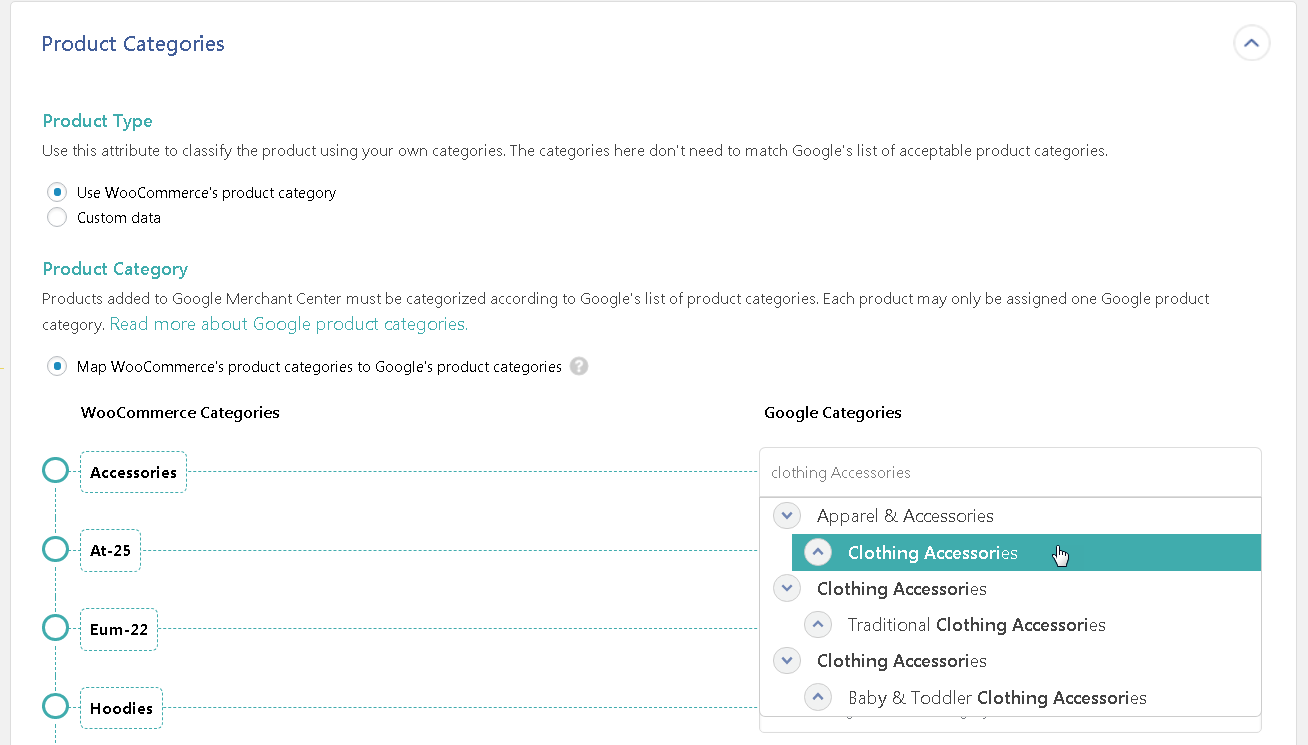
5.6. Export to ‘Google Merchant Center Product Feed’.
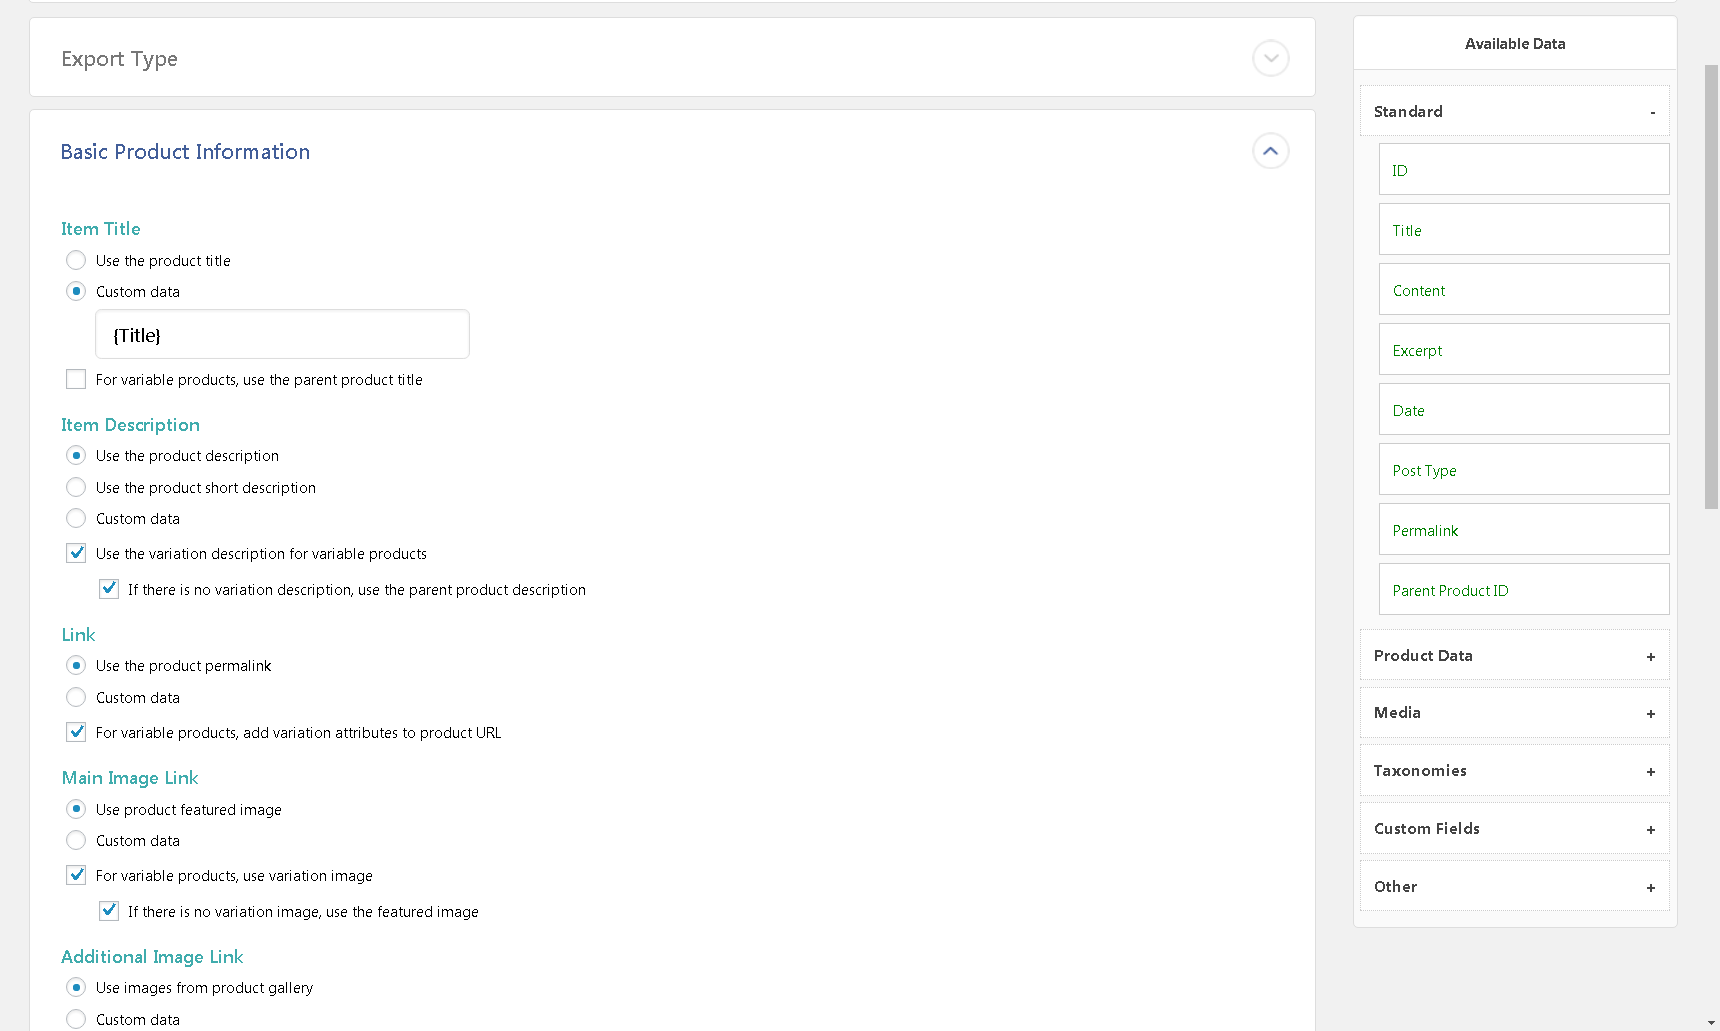
5.6.1. You can leave the default settings or set them manually. For manual setup, choose the radio button ‘Custom data’ in the needed section and drop & drag the needed field of data from ‘Available Data’ to the field that has appeared.
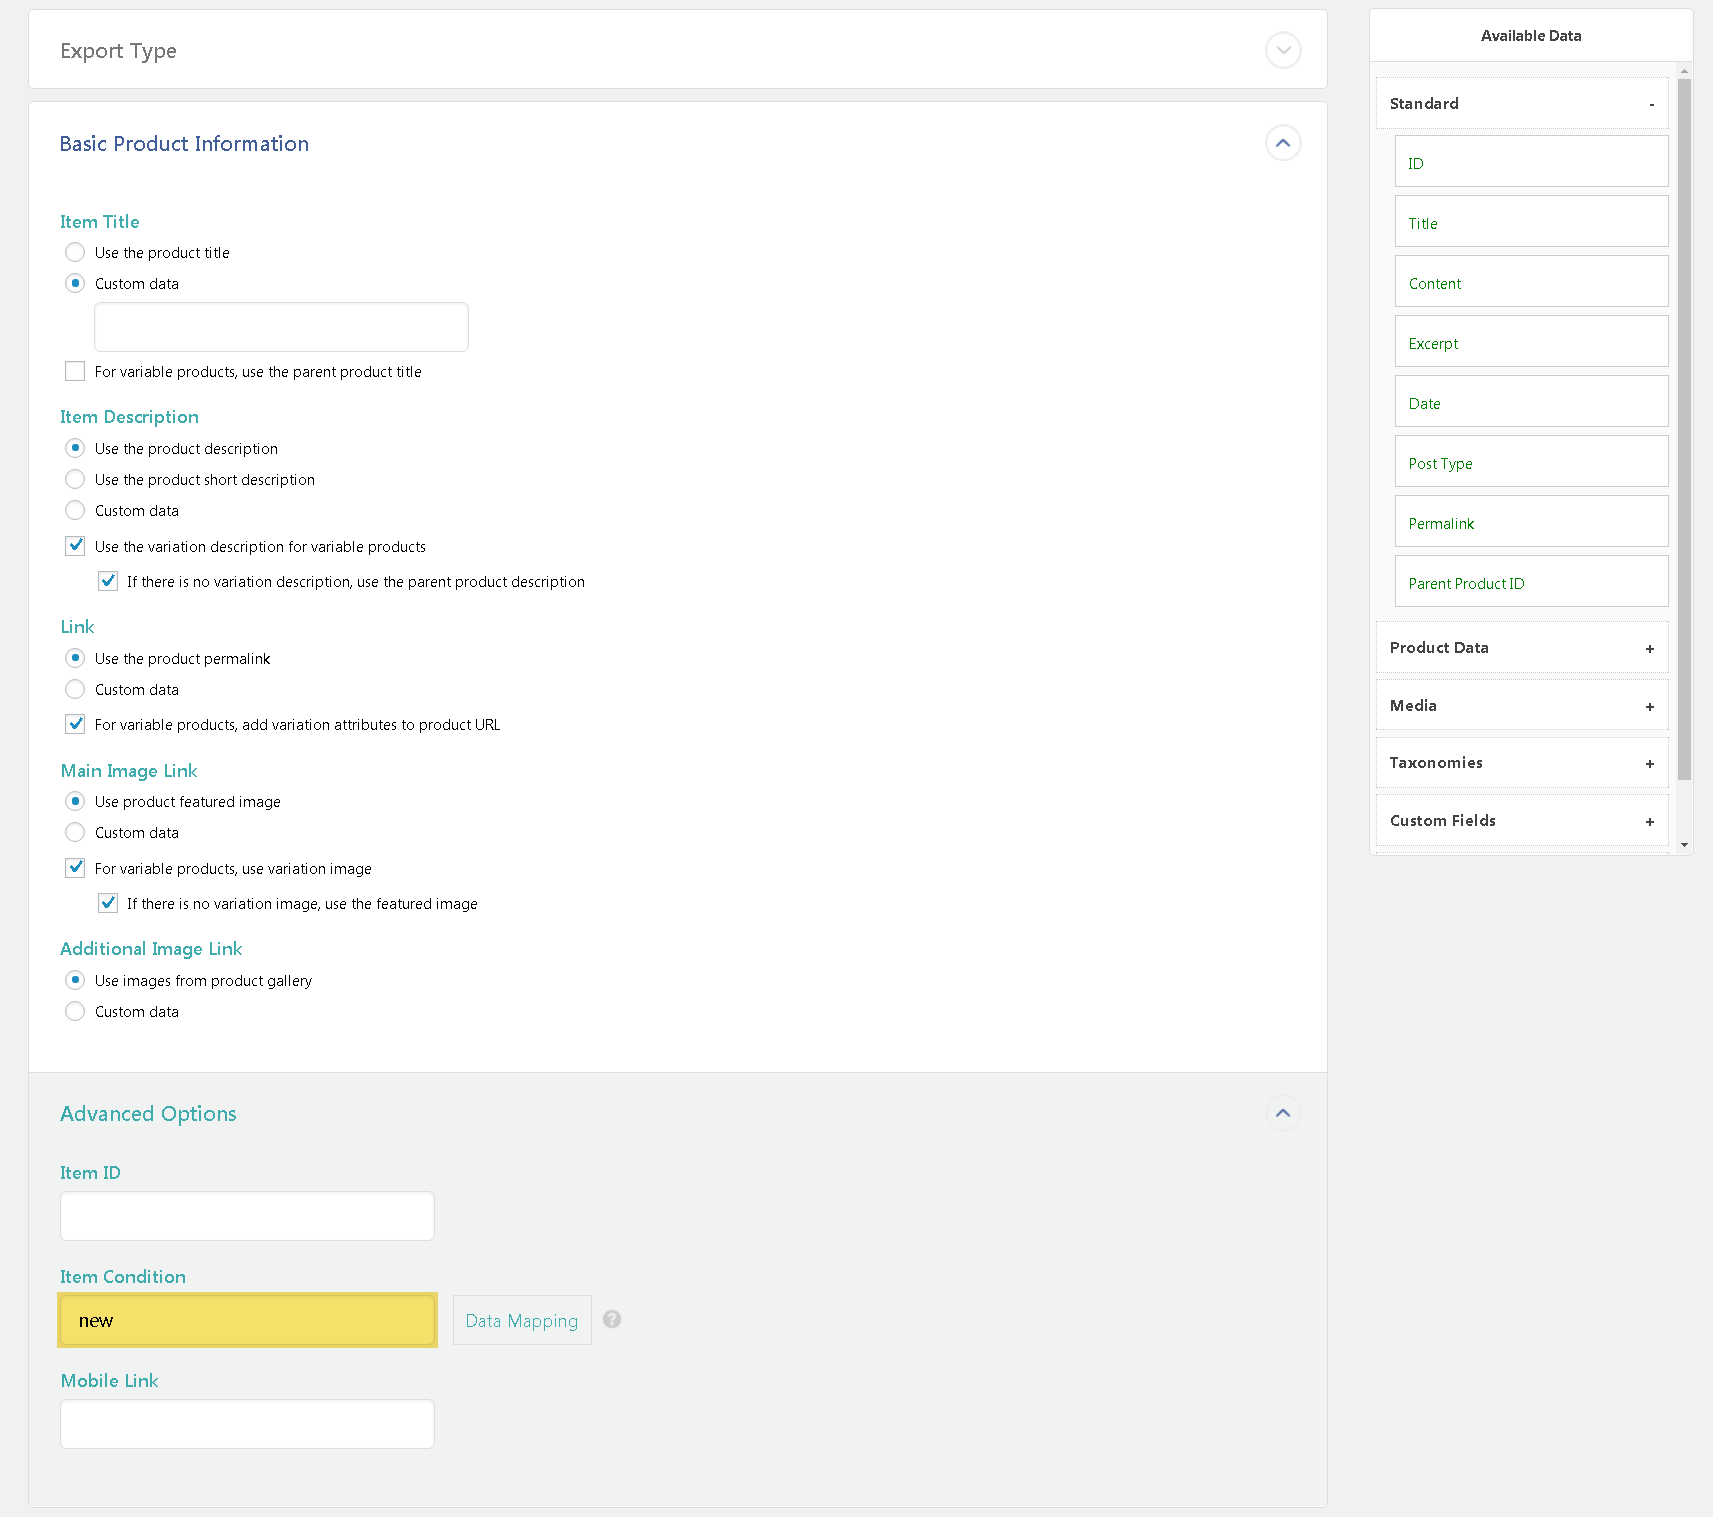
Pay attention to the ‘Item Conditions’ field as it accepts only three meanings: ‘new’, ‘refurbished’, and ‘used’, depending on what products you sell. It is in the content section ‘Basic Product Information – Advanced Options’.
We recommend that you choose the radio button ’Map WooCommerce’s product categories to Google’s product categories’ in the content section ‘Product categories’ and manually set the relevant categories of Google products for the categories of products in your online store.
In the content section ‘Unique Identifiers’ drag & drop the field that is responsible for the product SKU from ‘Available Data’ to the MPN field.
5.7. You can add functions and scripts that will be performed during export to each export type.
5.8. After all settings are completed we recommend that you save them like a template. To do this you need to activate the checkbox ‘Save settings as a template’ and enter the name in the ‘Template name’ field.

Template is also downloaded in this block from the ‘Load Template’ drop-down list.
5.9. Click ‘Continue’.
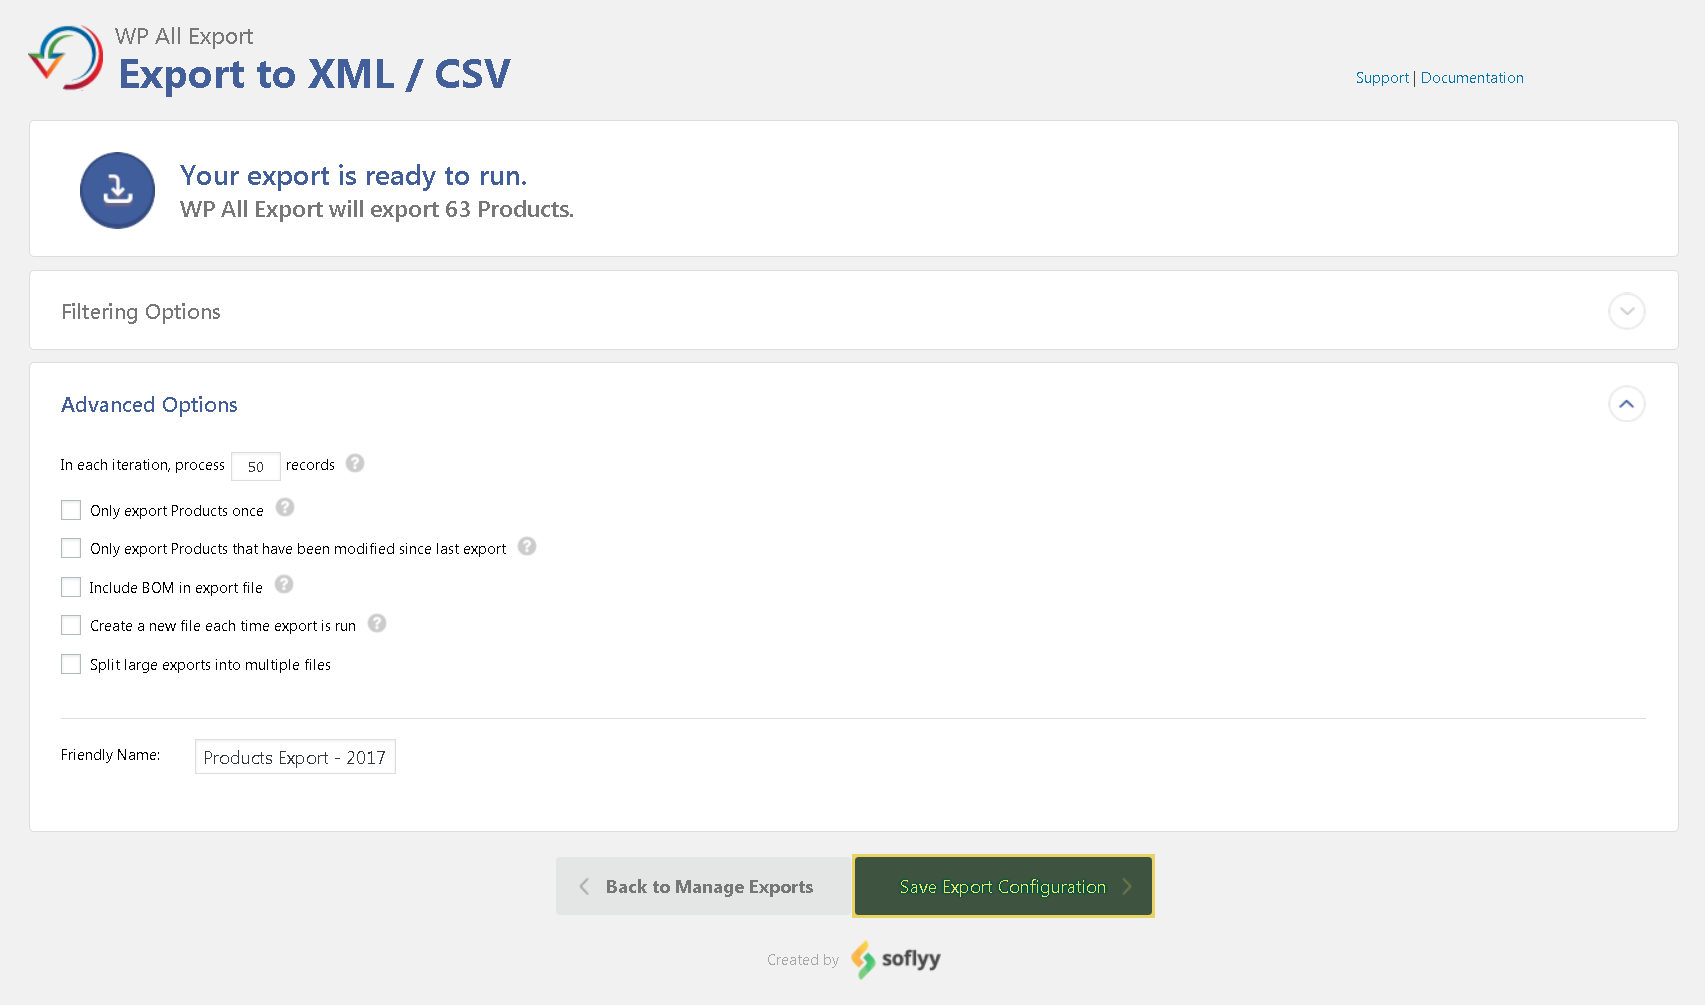
6. Make all needed settings and click ‘Confirm & Run Export’.
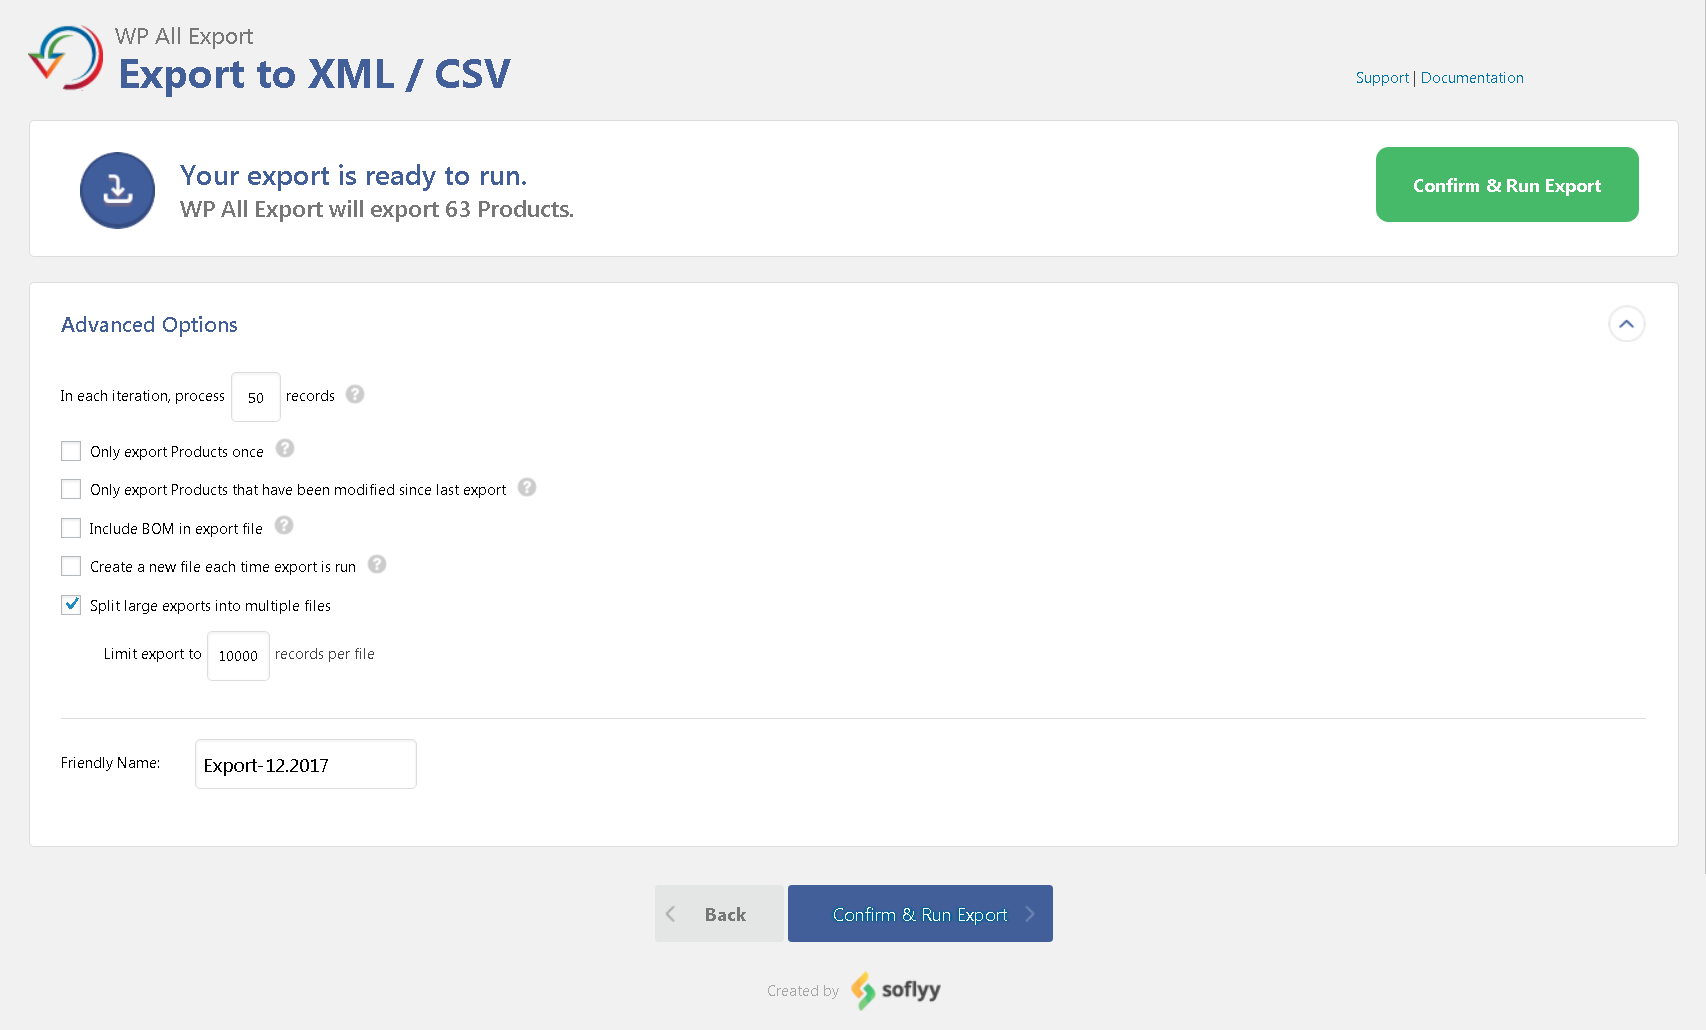
- Export Products once only – If re-run, this export will only include records that have not been previously exported.
- Include BOM in export file – The BOM will help some programs like Microsoft Excel read your export file if it includes non-English characters.
- Friendly Name is a file name to which the data is exported.
7. Wait until the product export is completed.
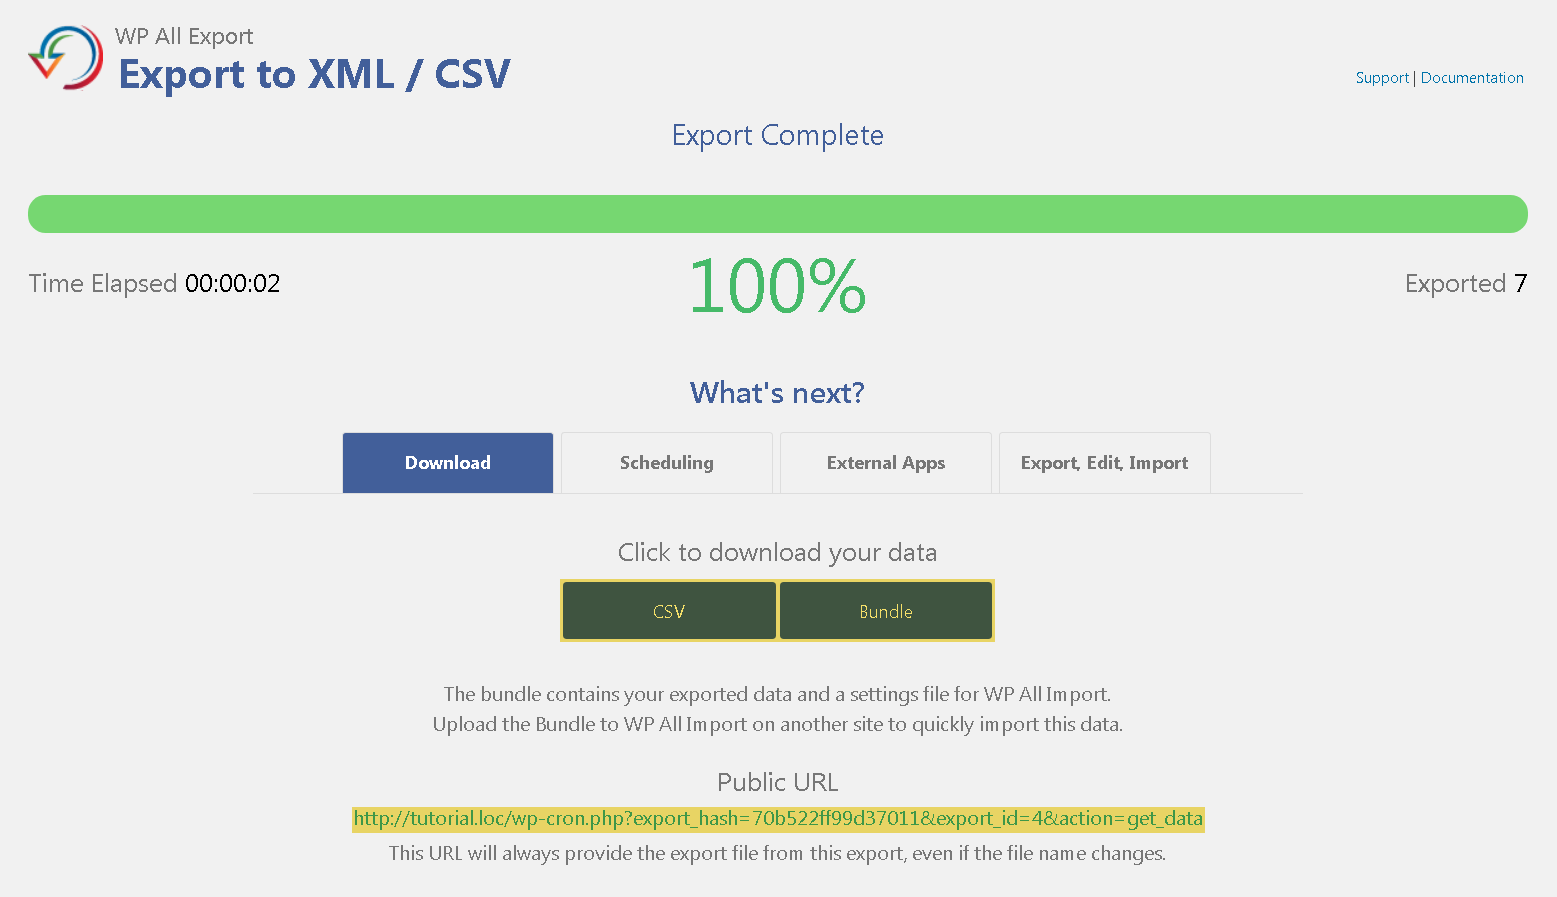
7.1. On this page you can download the exported CSV file – click the CSV button (the button will change to XLS, XLSX or XML depending on the type of data exporting).
7.2. If you migrate products to another online store, you can download a zip file that contains the exported CSV file and the import template for WP All Import by clicking the ‘Bundle’ button. To import this data create a new import with WP All Import and upload this zip file.
7.3. You’ll also have URL for downloading the exported CSV file.
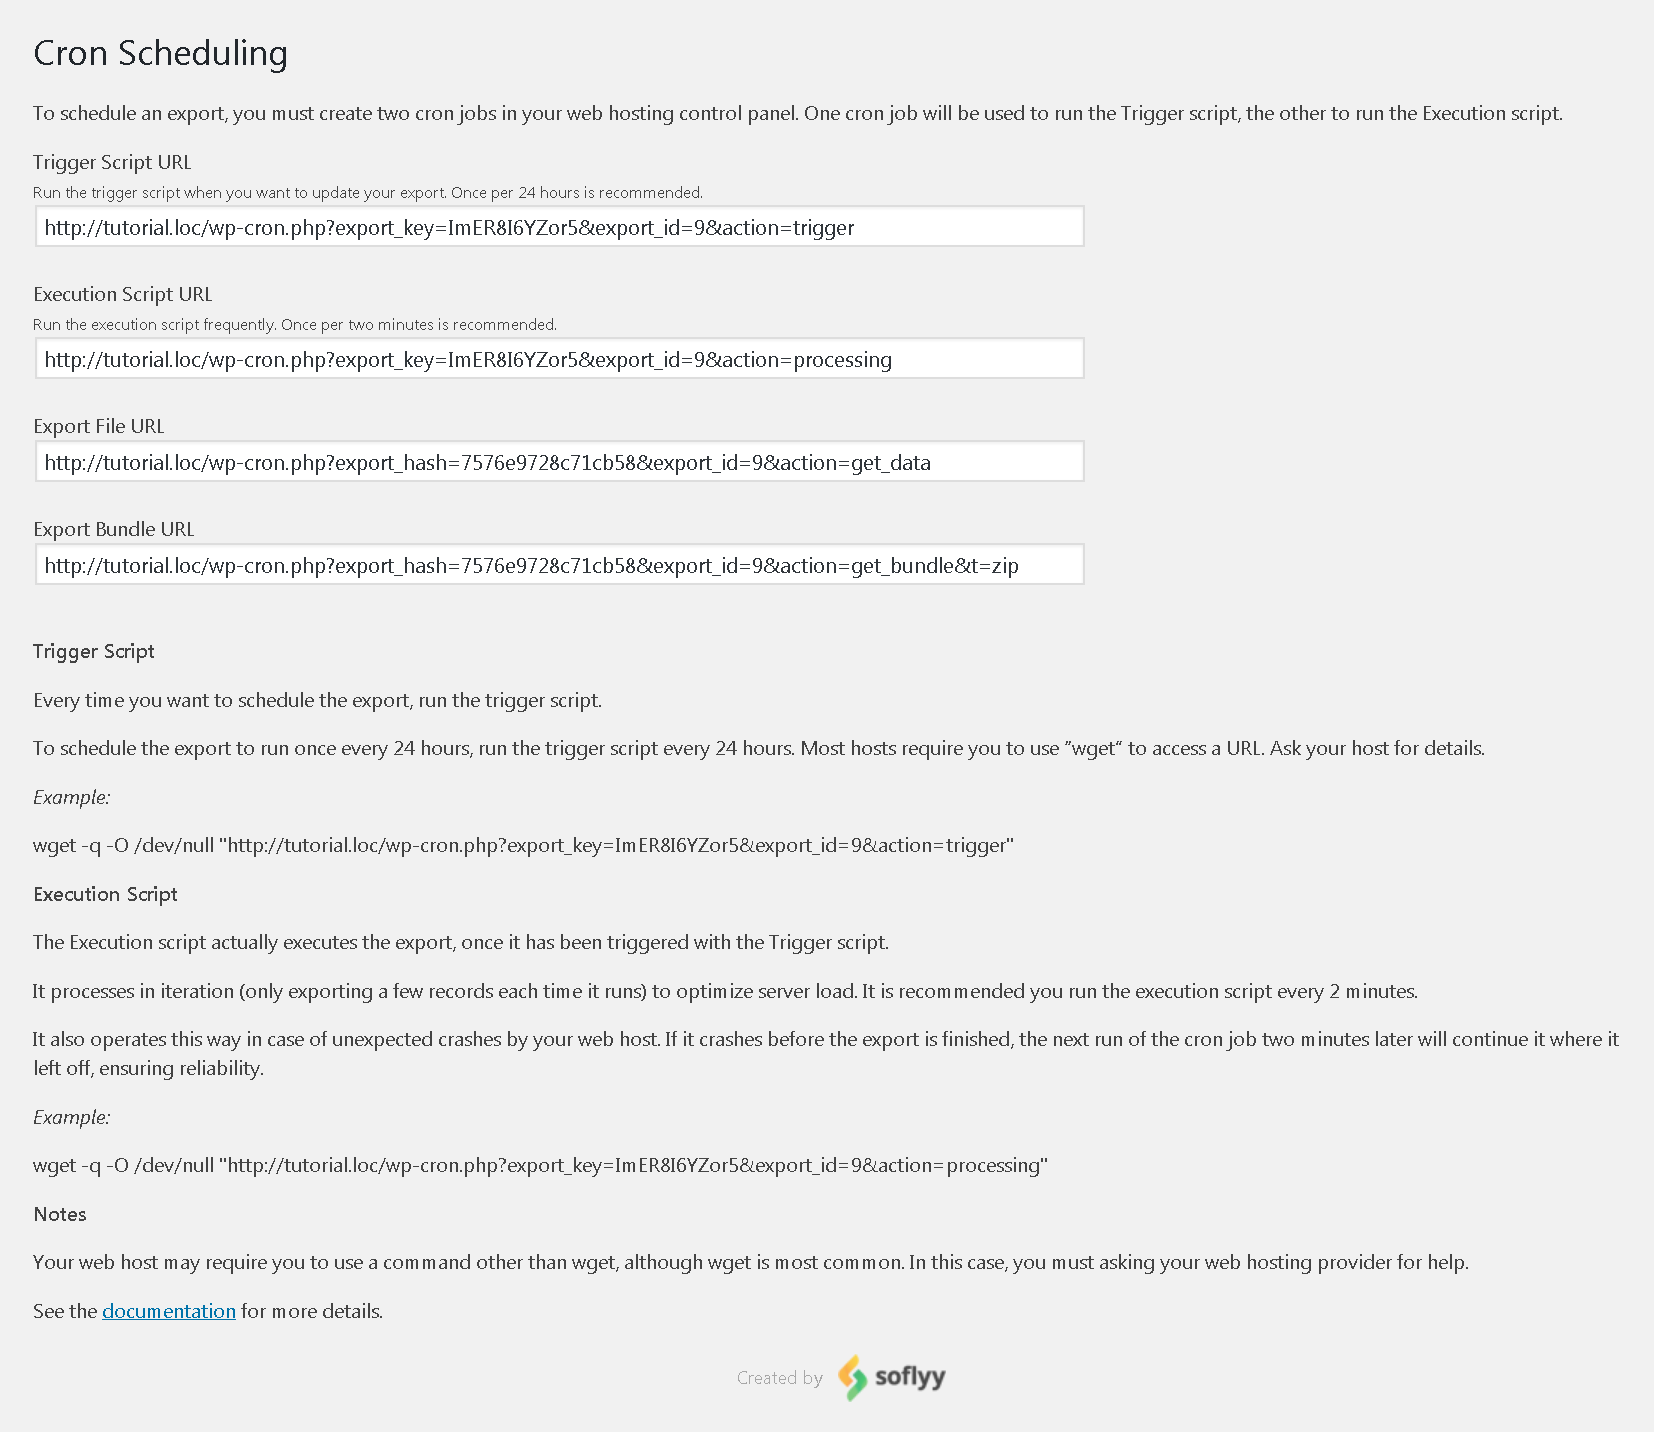
7.4. To plan re-export of products click the ‘Scheduling’ button.

Automatic data exporting can be done using CRON JOB. It has to be set up by your web hoster. For doing this two links have to be available: Trigger Script URL (this script is usually executed once a day) and Execution Script URL (this script is installed as often as you need to export data). Read more here.
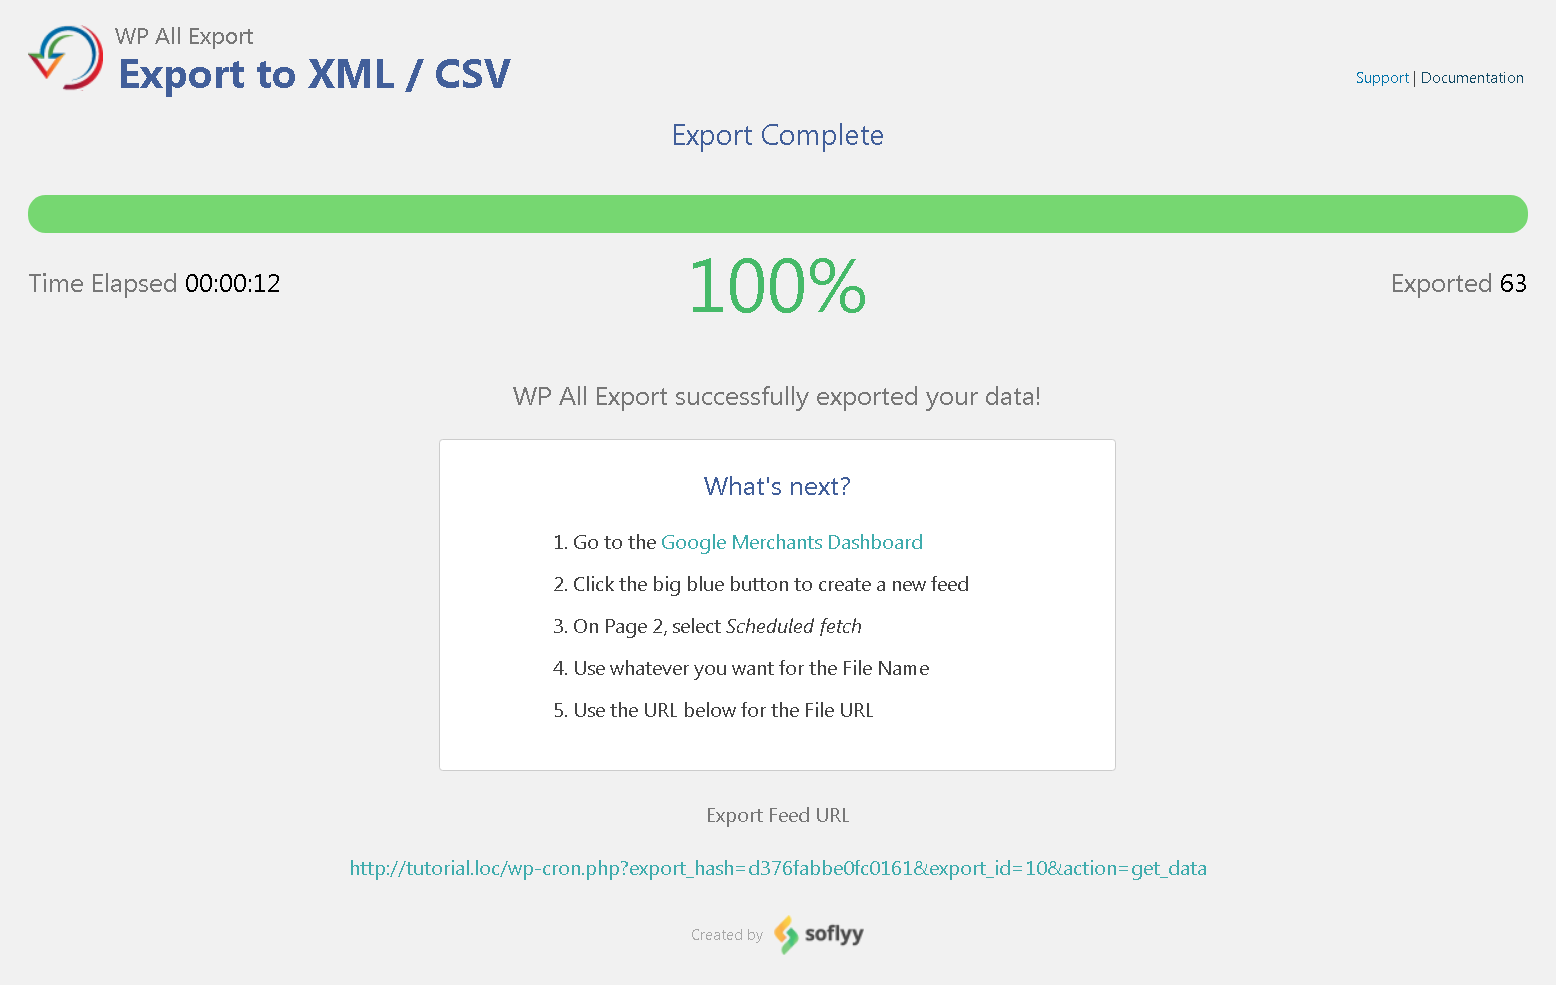
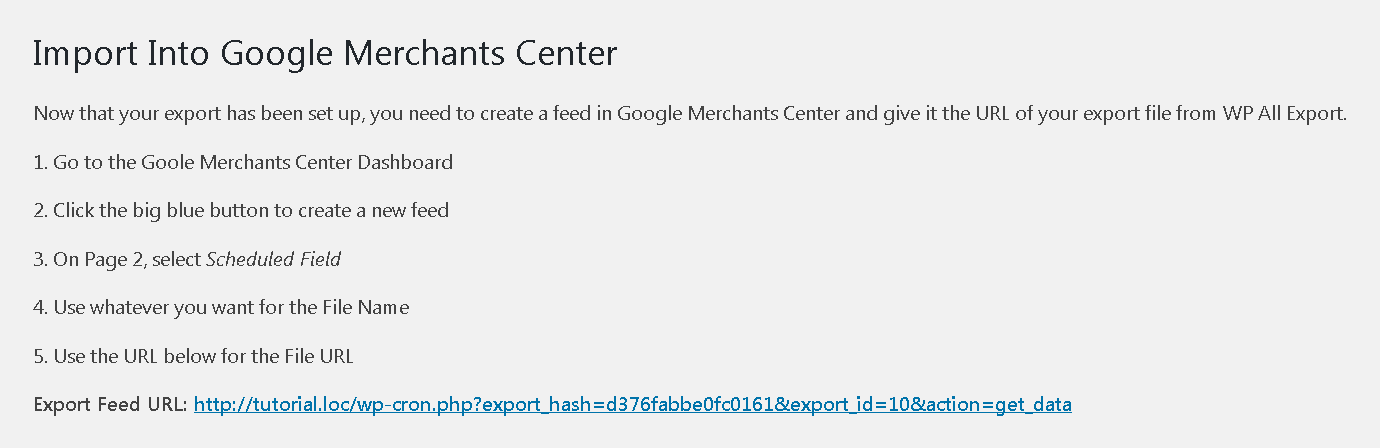
7.5. If you have exported a file like Google Merchant Center Product Feed, you will receive a short instruction and Export Feed URL for the Merchant Center.
Managing Product Export
This is a separate page which displays all exports that have been executed earlier.
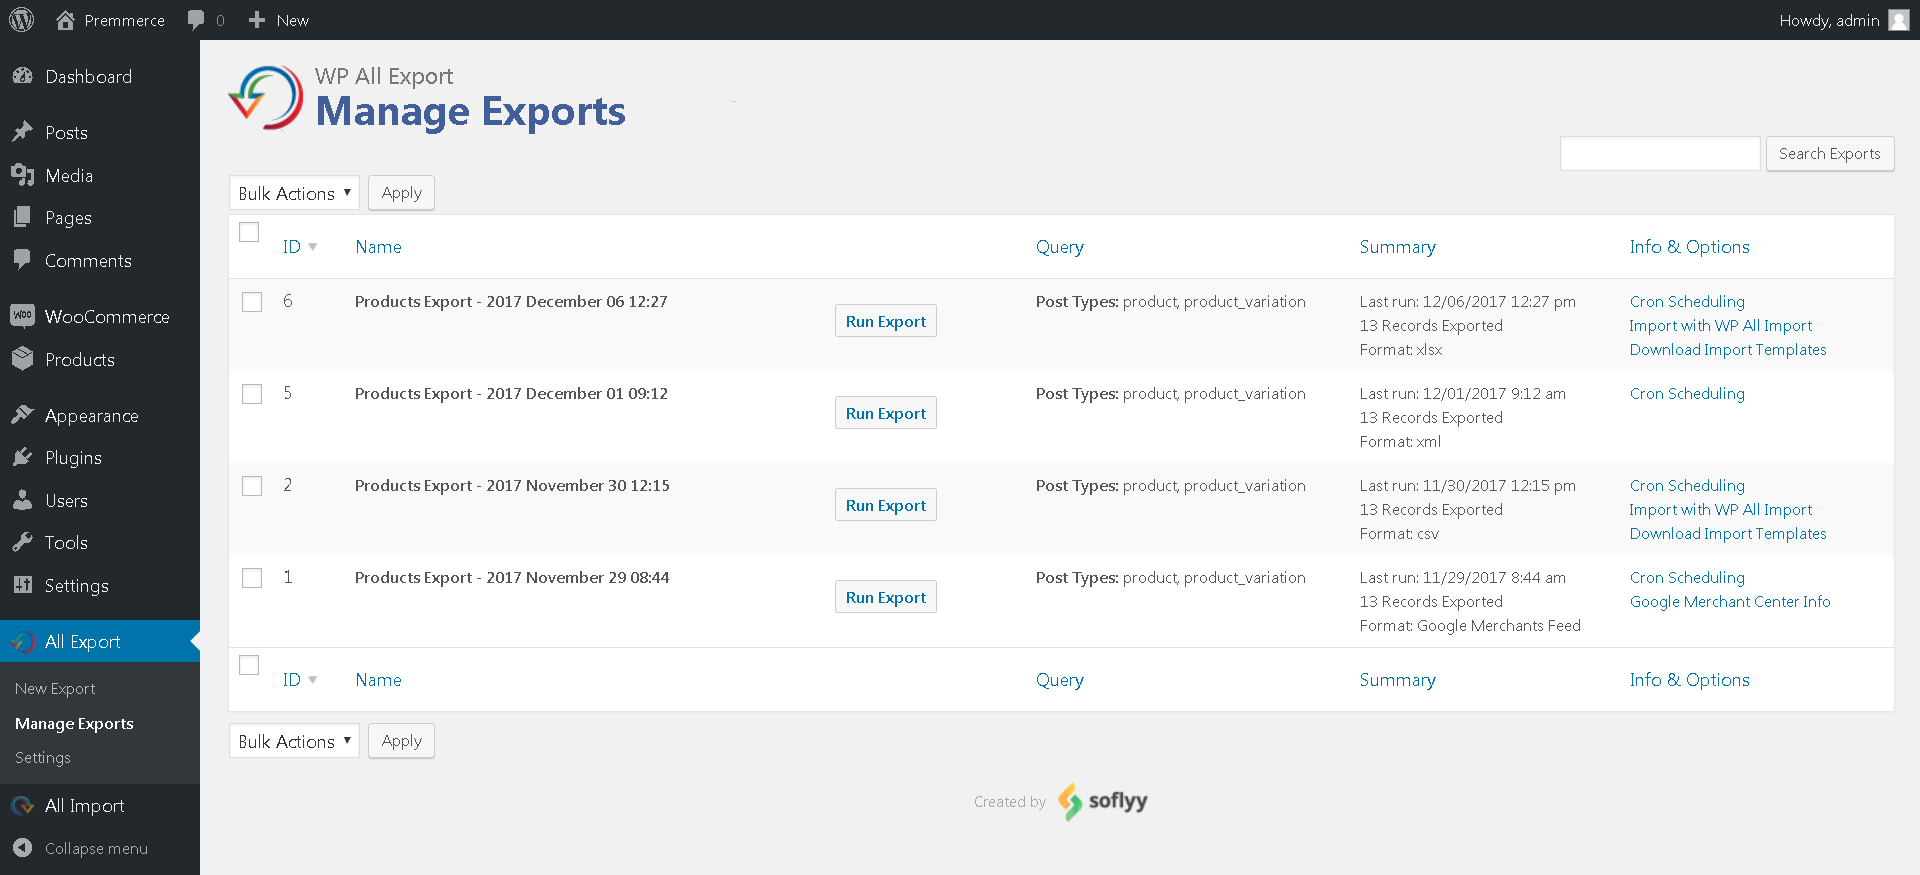
Here you can do the following actions:
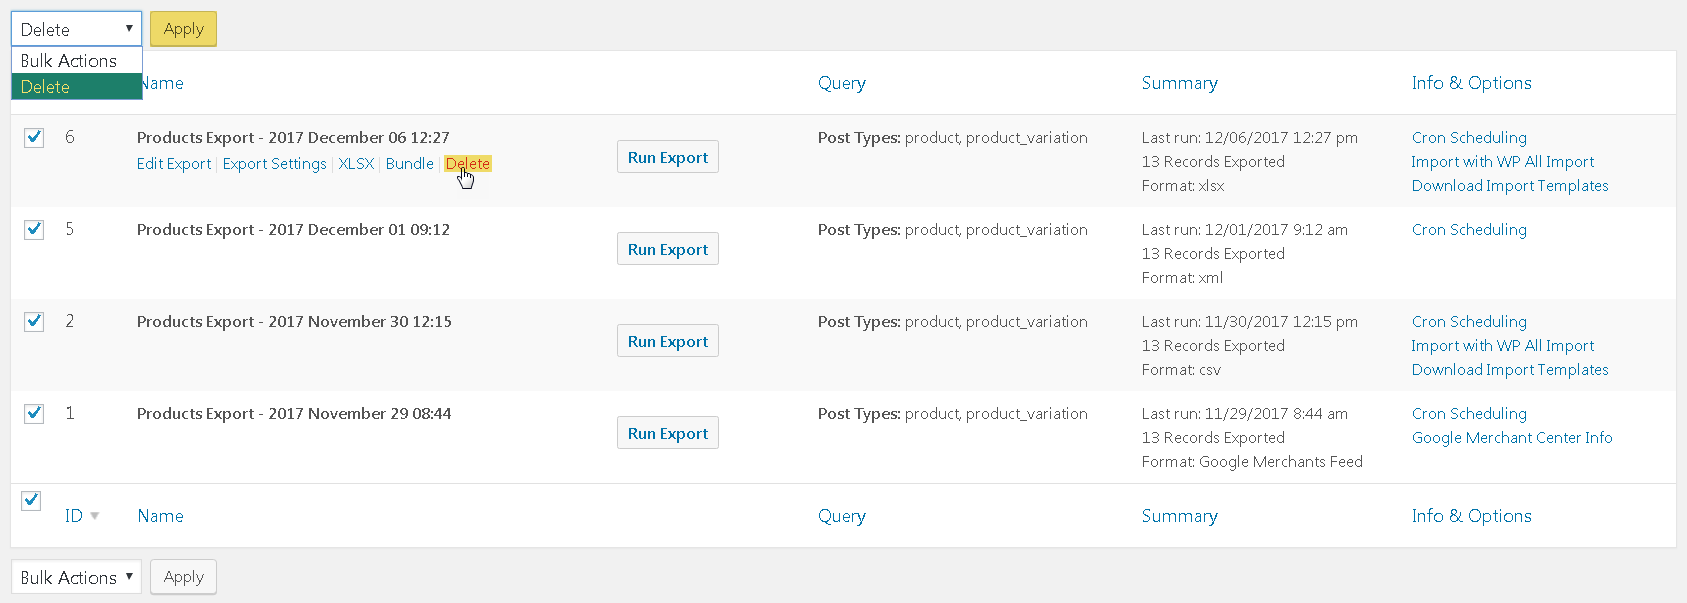
1. To delete the exported files using Bulk Actions or by clicking on the Delete button below the export name.
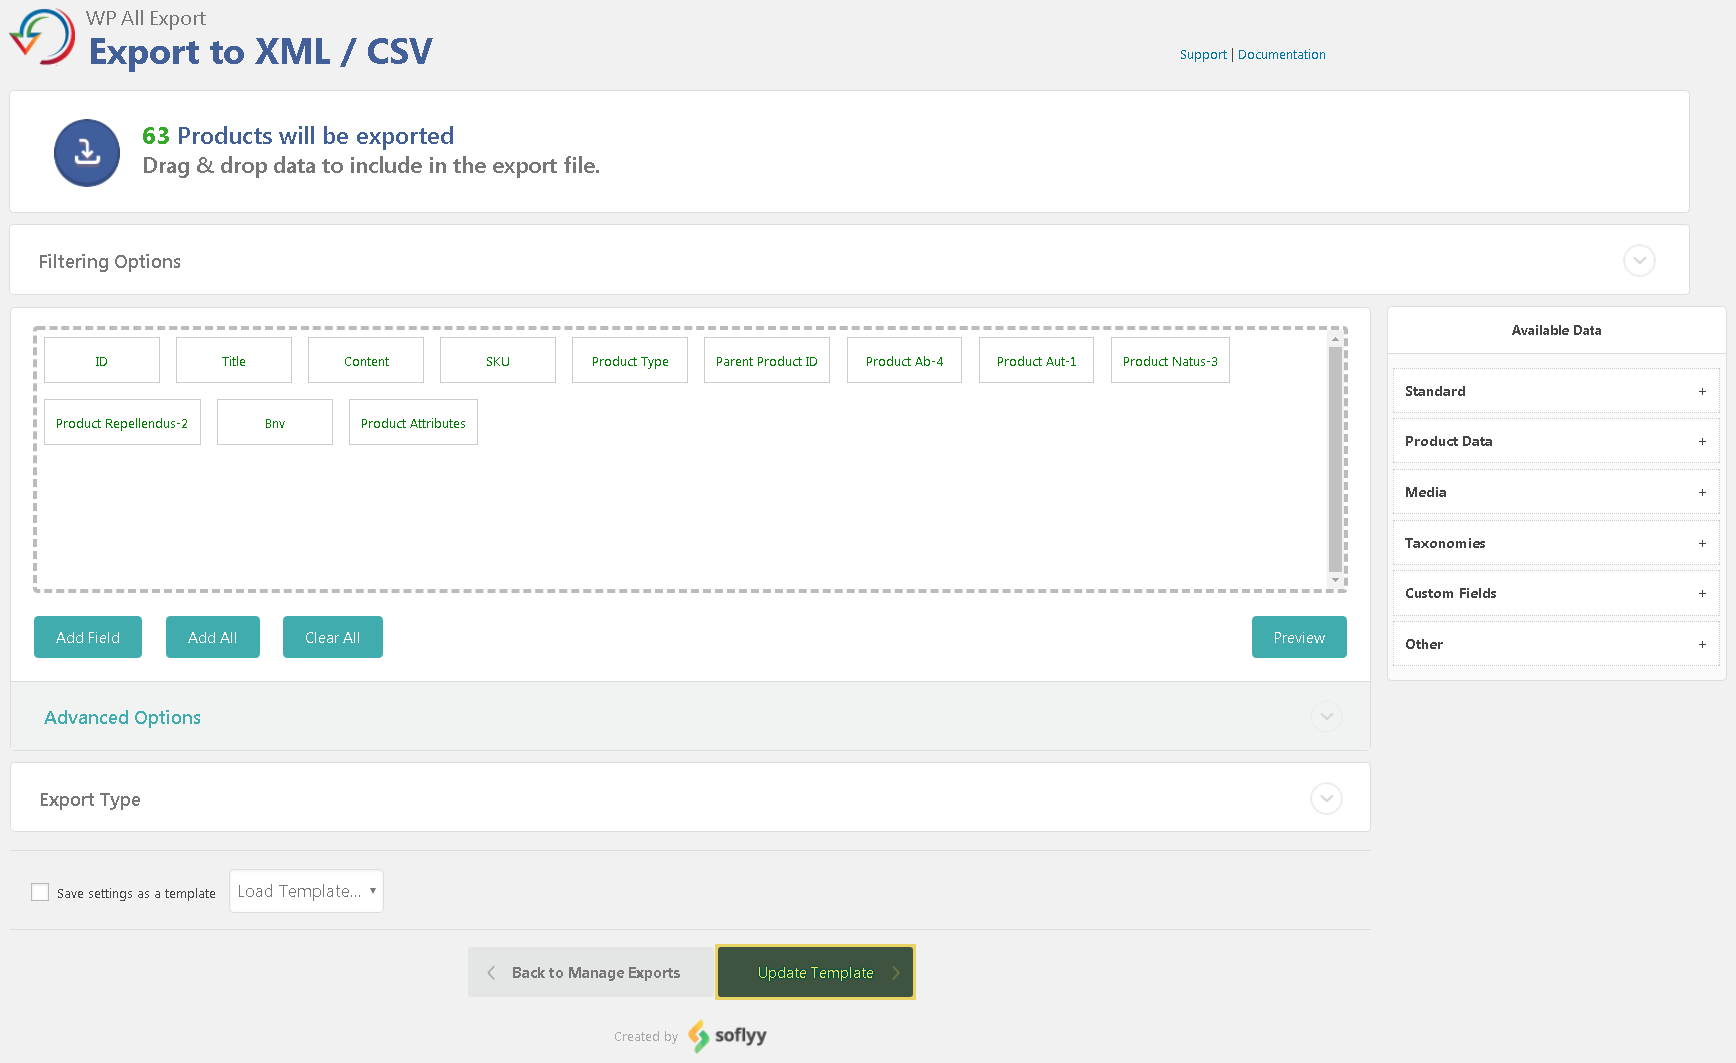
2. Edit Export – editing the export template. See item 5 of product exporting.To save changes click the ‘Update Template’ button.
3. Export Settings – a changing export settings. See item 6 of product exporting.
To download exported file click on the type name of the export file.
CSV:

Excel File (XLS):

Excel File (XLSX):

Simple XML Feed:

Custom XML Feed:

Google Merchant Center Product Feed:

5. To update the exported file click the ‘Run Export’ button. See items 6, 7 of product export.
6. Cron Scheduling is a page describing setup of automatic export.
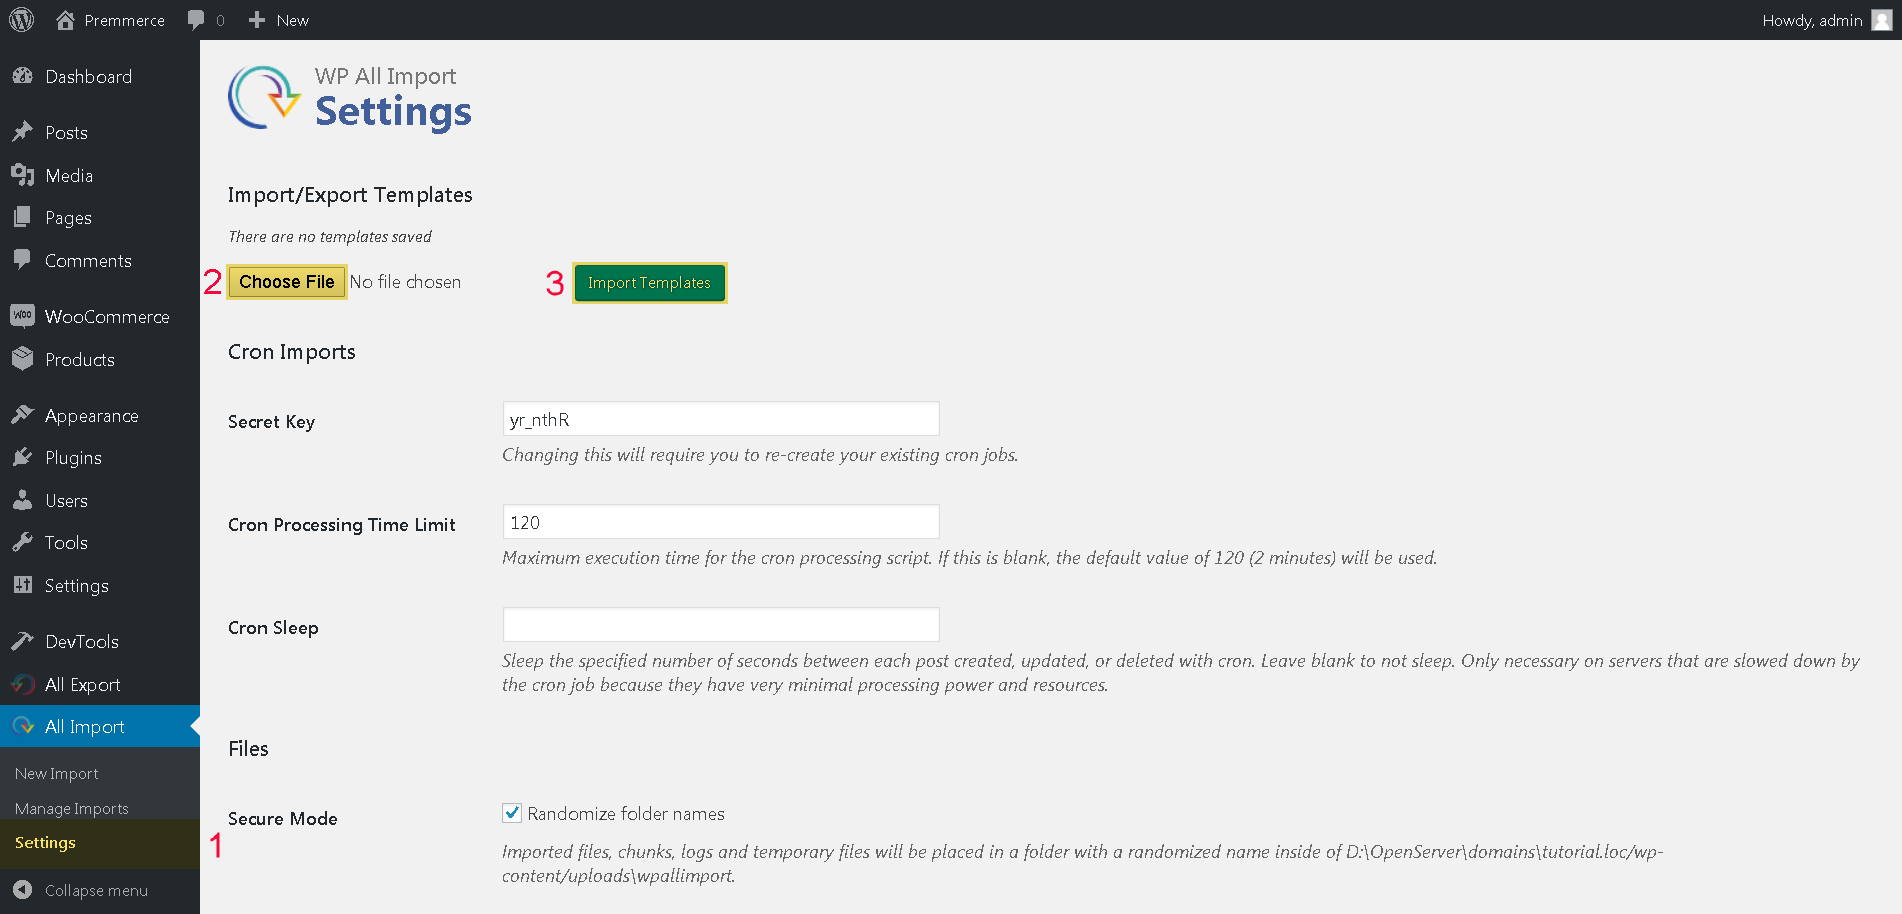
7. Download Import Templates is a template of the product import setup from the exporting file.
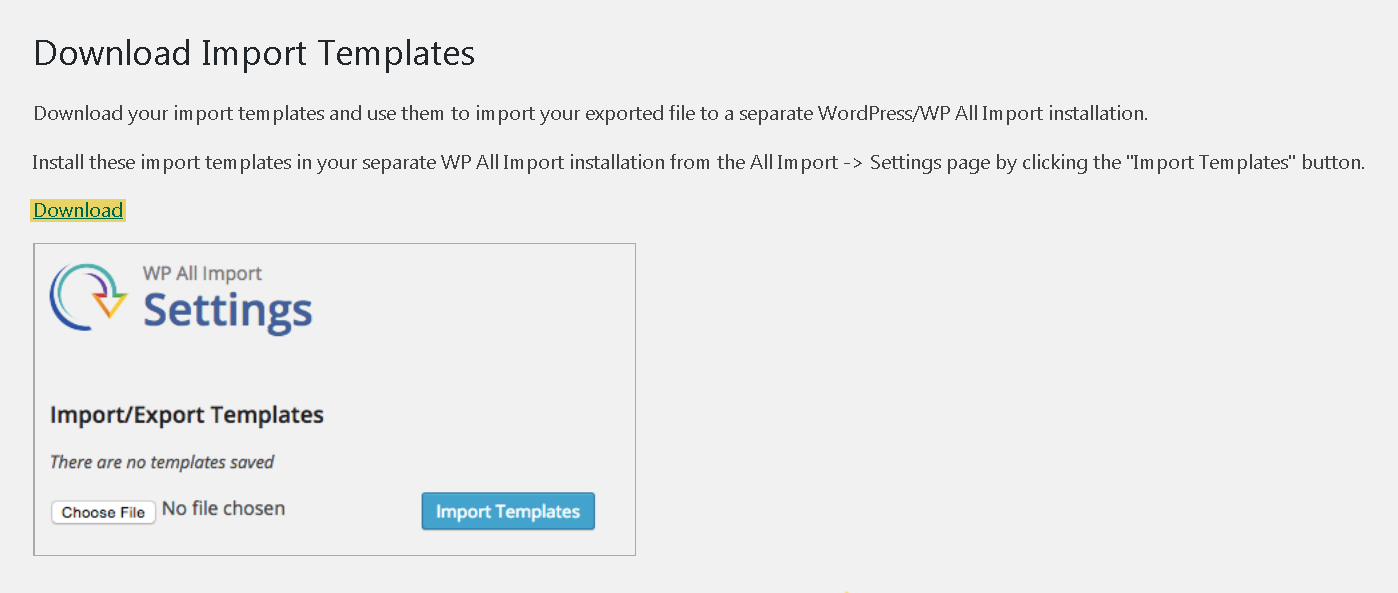
Before using it you need to install it in the settings of the WP All Import plugin.
8. Google Merchant Center Info
Comments

Ready to Get Started?
Join over 100,000 smart shop owners who use Premmerce plugins to power their WooCommerce stores.
Get started