How to Add a Product Filter To Your WooCommerce Elementor Store

Looking to improve your Elementor-built WooCommerce store? Adding a product filter can enhance your customers’ shopping experience.
In this guide, we’ll show you how to implement WooCommerce filters that work with Elementor. We’ll cover:
- Benefits of product filters
- How to manually add filters
- Recommended plugins for WooCommerce and Elementor
- How to set up produce filters using an Elementor-compatible plugin
Ready to learn how to effectively use filters with Elementor to organize your WooCommerce products by categories, tags, price, ratings, and improve your store’s usability? Let’s dive in!
How to manually add a product filter to your WooCommerce Elementor store?
There are several different options for adding product filters to your WooCommerce Elementor store: You have a few different options when it comes to adding product filters to your WooCommerce Elementor store – you can code your own product filters or use an all-in-one product filter plugin.
If you have basic coding knowledge, this section is for you. Follow these steps to add your own product filters using code:
Step 1: Create a custom product filter function
Add the following code to your theme’s functions.php file or a custom plugin:
function custom_product_filter() {
    $output = '<form class="custom-product-filter" method="get">';

    // Add category filter
    $output .= '<select name="product_cat">';
    $output .= '<option value="">Select Category</option>';
    $categories = get_terms('product_cat');
    foreach ($categories as $category) {
        $output .= '<option value="' . $category->slug . '">' . $category->name . '</option>';
    }
    $output .= '</select>';

    // Add price range filter
    $output .= '<input type="number" name="min_price" placeholder="Min Price">';
    $output .= '<input type="number" name="max_price" placeholder="Max Price">';

    // Add submit button
    $output .= '<button type="submit">Filter</button>';

    $output .= '</form>'
    return $output;
}
Step 2: Create a shortcode for the filter
Add this code to make the filter available as a shortcode:
function custom_product_filter_shortcode() {
    return custom_product_filter();
}
add_shortcode('custom_product_filter', 'custom_product_filter_shortcode');
Step 3: Modify the WooCommerce query
Add this code to apply the filter to the product query:
function apply_custom_product_filter($query) {
    if (!is_admin() && $query->is_main_query() && is_shop()) {
        if (isset($_GET['product_cat']) && !empty($_GET['product_cat'])) {
            $query->set('product_cat', $_GET['product_cat']);
        }

        if (isset($_GET['min_price']) && !empty($_GET['min_price'])) {
            $query->set('meta_query', array(
                array(
                    'key' => '_price',
                    'value' => $_GET['min_price'],
                    'compare' => '>=',
                    'type' => 'NUMERIC'
                )
            ));
        }

        if (isset($_GET['max_price']) && !empty($_GET['max_price'])) {
            $query->set('meta_query', array(
                array(
                    'key' => '_price',
                    'value' => $_GET['max_price'],
                    'compare' => '<=',
                    'type' => 'NUMERIC'
                )
            ));
        }
    }
}
add_action('pre_get_posts', 'apply_custom_product_filter');
Step 4: Add the filter to your Elementor page
- Edit your shop page with Elementor
- Add a new “Shortcode” widget to your desired location
- In the widget settings, enter the shortcode: [custom_product_filter]
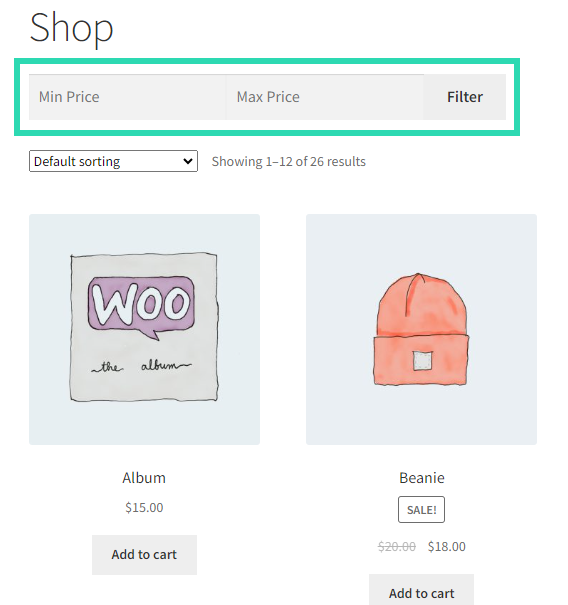
Step 5: Test your filter
Visit your shop page and test the filter to ensure it’s working correctly. You should be able to filter products by category and price range.
How to set up WooCommerce Product Filter in Elementor
Premmerce’s WooCommerce Product Filter is a powerful tool for adding advanced filtering to your WooCommerce Elementor store. Key features include:
- Advanced filtering: Stock status, ratings, discounts, brands, custom taxonomies, tags, colors, sizes, and prices
- Display options: Dropdown, scroll, and hoverable dropdown
- AJAX support: Instant updates without page reloads
- High flexibility: Customizable filter options and placement
- Compatibility: Works with popular WordPress themes, page builders (including Elementor), and plugins
- SEO optimization: Clean URLs for filtered results and bulk landing page generation

In addition to its versatility, it is also very easy to set up, as demonstrated below:
Step 1: Download and install the plugin
Download WooCommerce Product Filter directly from the Premmerce website.
Once you have downloaded and unzipped the file, copy the plugin folder into your WordPress folder’s “/wp-content/plugins/directory” folder.
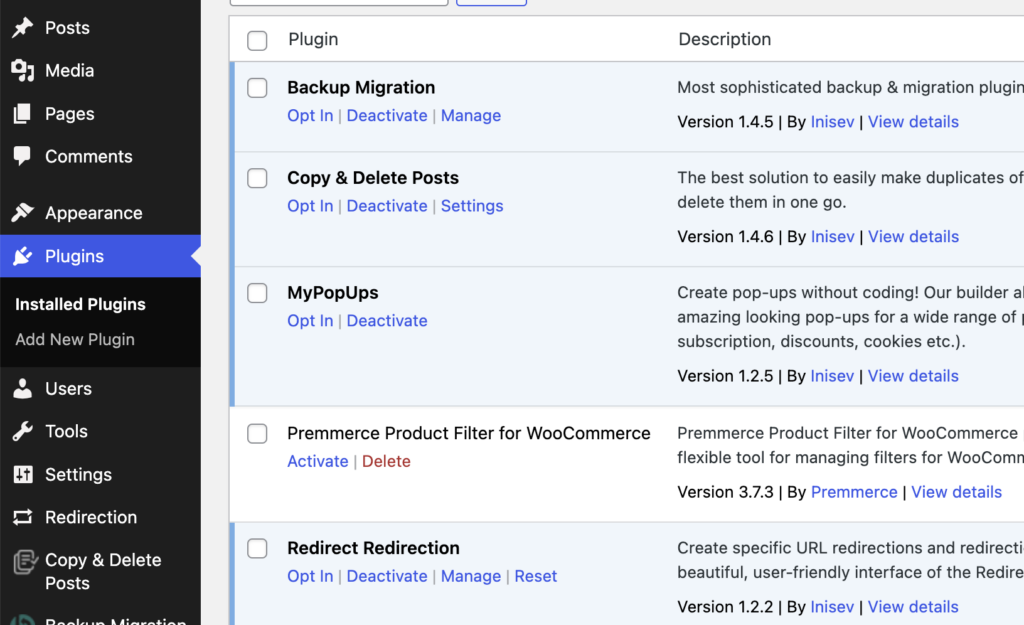
Then, activate the product filter from the Plugin menu in the WordPress Dashboard.
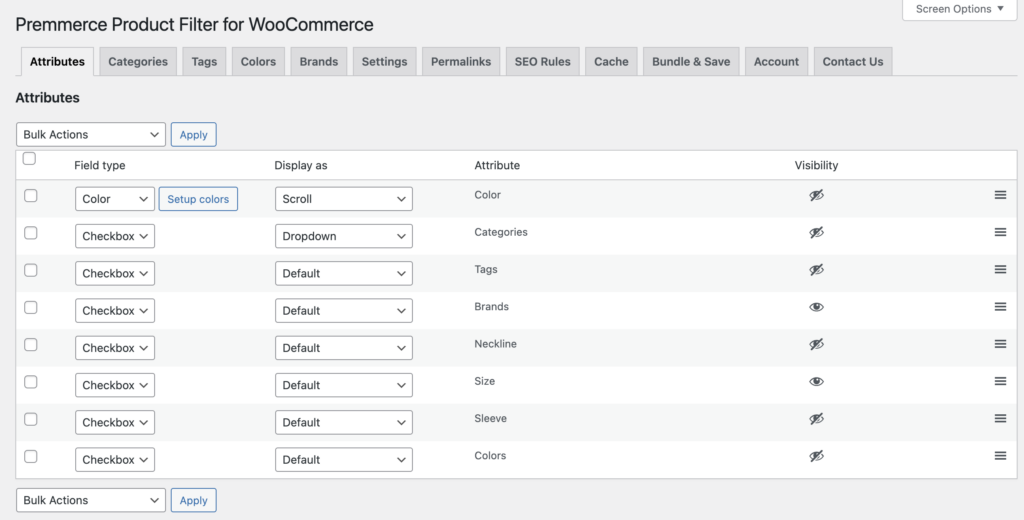
Step 2: Set up your preferred filters
To adjust your settings, go to “Premmerce” > “Product Filter” in your WordPress dashboard. Configure which taxonomies will appear on your filter widgets from the “Attributes” and “Settings” tab.
For more control over your filters, WooCommerce Product Filter lets you select which categories and tags appear as filtering options on the store front end. Just go to the “Categories” or “Tags” tabs and toggle the visibility of the categories you want to display.

Step 3: Configure your filter display options
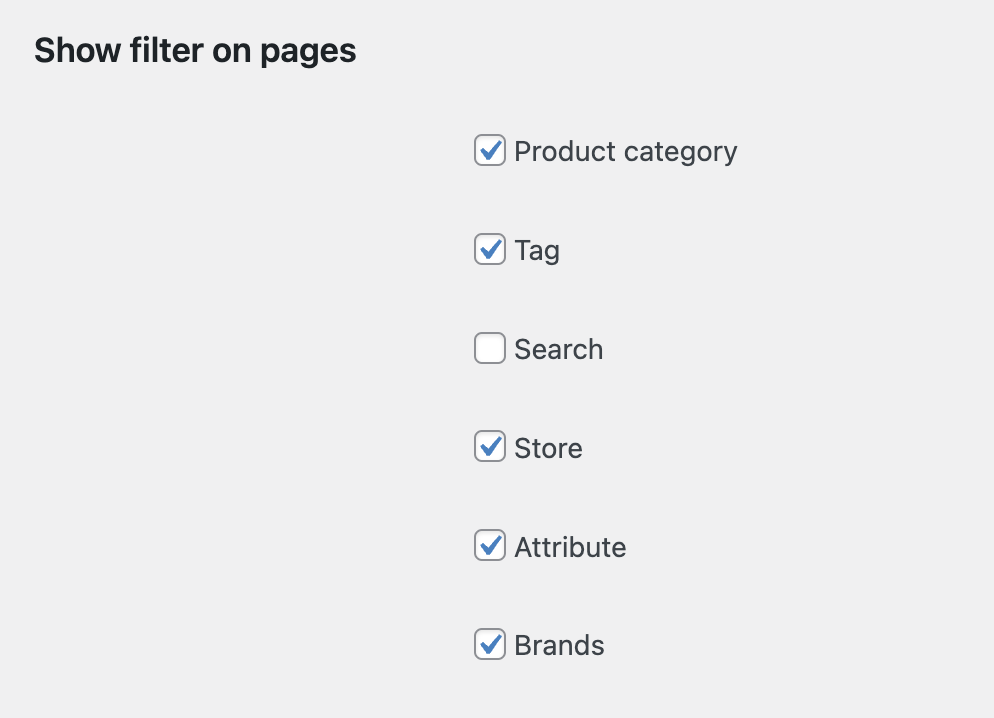
From the “Settings” tab, you can also configure several more options to optimize your customers’ search experience. You can also choose which pages your product filters will be displayed on.
Set up AJAX settings for your product filters. Check the box next to “Enable AJAX” to set up AJAX for your filters across your store. You can also enable deferred loading to optimize your page load speed.
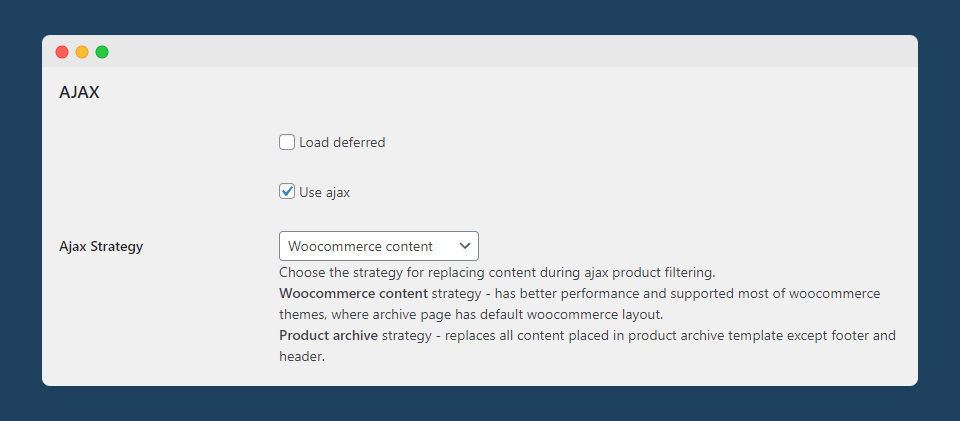
From this page, you can also customize the appearance of your filter widget using custom CSS code.
Step 4: Display your filters with Elementor
Once you have finished customizing your filters and settings, they will be ready for display on your store’s front end.
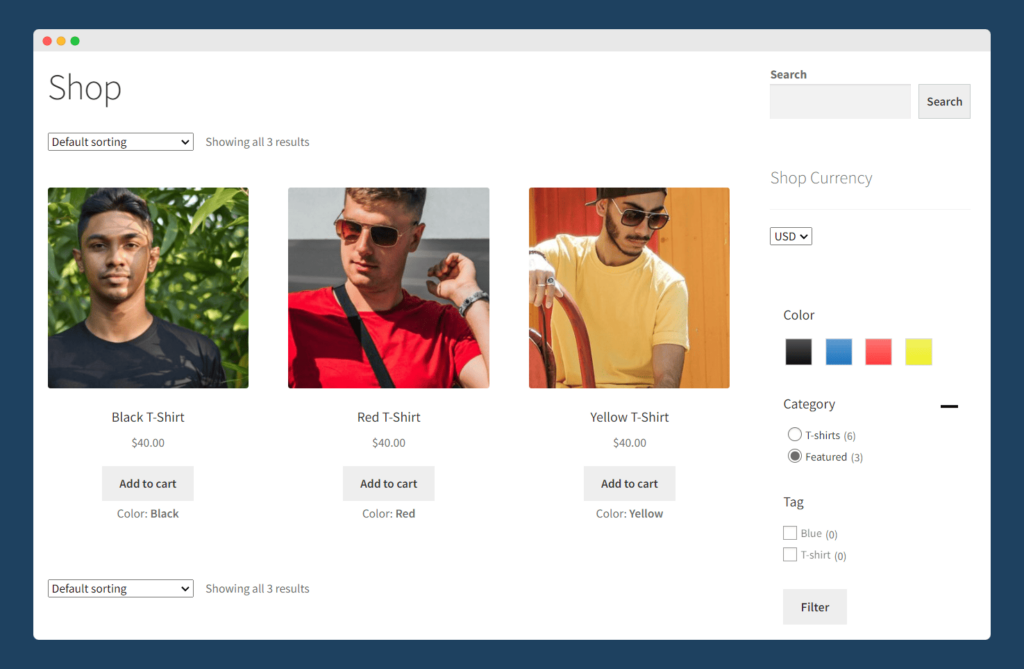
If you want even more control over where you display your filters on your WooCommerce Elementor store, you can use the product filter shortcodes with the dedicated Elementor widget to place your filters wherever you want on your storefront.
To do this, go to the page you want to display the filter on, click “Edit with Elementor,” find the “Shortcode” widget under the “Elements” tab. Drag and drop the widget where you want it on the page, then paste in the WooCommerce Product Filter shortcode to embed the product filter on the page.
And that’s it. You have now added product filters to your Elementor WooCommerce store.
Maximize conversions with WooCommerce Product Filters
Adding a product filter to your Elementor-built WooCommerce store can significantly improve customer experience and, product discoverability while potentially boosting conversions and SEO performance.
Premmerce WooCommerce Product Filter
Get started giving your customers a better way to filter your products to increase site usability and revenue.
While there are various implementation methods, dedicated plugins like the Premmerce WooCommerce Product Filter offer easy integration withwith Elementor. This plugin offers:
- Advanced filtering options
- Customizable settings
- SEO-friendly features
Consider exploring such solutions to enhance your store’s usability. Remember, the best choice depends on your specific needs and customer preferences.
Implementing a product filter is a valuable step towards creating a more efficient and user-friendly WooCommerce store.Try WooCommerce Product Filter today!
Comments

Ready to Get Started?
Join over 100,000 smart shop owners who use Premmerce plugins to power their WooCommerce stores.
Get started