Woocommerce Import Products Guide
Importing huge amount of product items to your website has always been such a pain in… But there are much easier ways to maintain the bulk product importing into your online store with XML/CSV. This problem is common, especially for those shops that sell over 100 items. After the first product import there is often a necessity of fast price or attribute change and these changes are more effectively done with the bulk product import feature from WooCommerce. In this WooCommerce import products guide we will describe the best way to do this with different WooCommerce plugins.
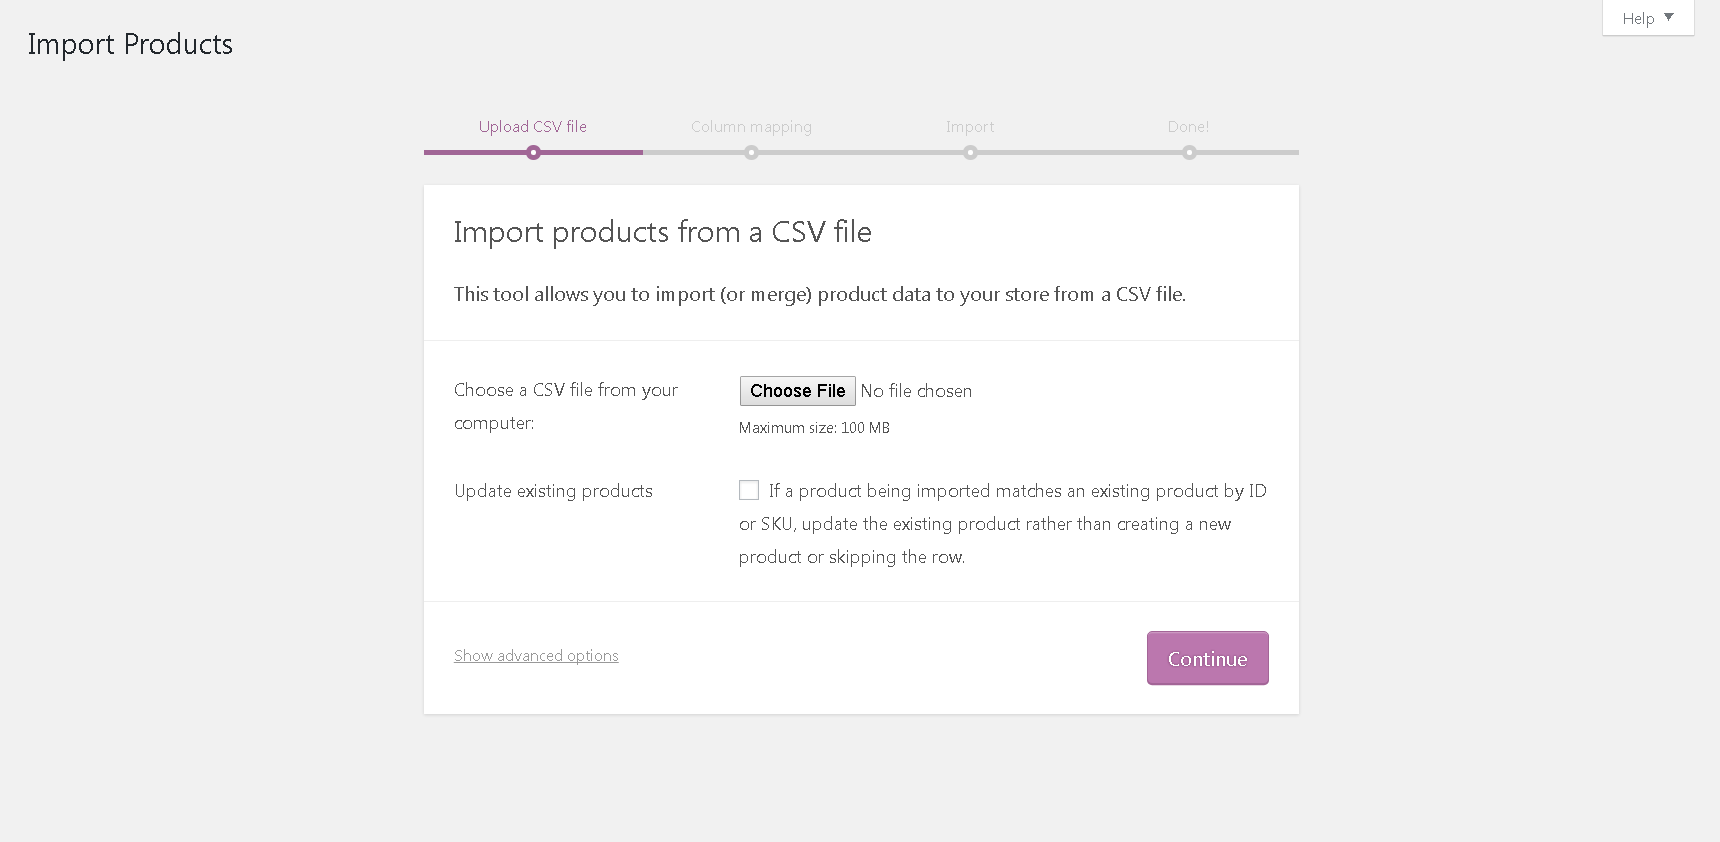
WooCommerce Standard Import Products Capabilities
WooCommerce Import is suitable for the importing of little amounts of products. It can not be applied in case you migrate your store from a different platform.
The advantages:
- Importing has several stages
- It is a part of the WooCommerce plugin, that’s why you don’t need to install additional plugins
The disadvantages:
- maximum size is 100 MB
- it supports only CSV files
- there are no flexible settings
- it imports only products and the taxonomies (tags, categories and attributes) that are connected with them
The Import of Products Using the WP All Import Pro Plugin
After the research of solutions existing on the market that are aimed at standard importing improvement, we’ve pointed out the WP All Import Pro plugin.
Besides the regular product importing that the WooCommerce importing provides , it has even more opportunities:
- import of posts, pages, taxonomies, users, orders, coupons and additional fields
- import in the second language (using add-on designed by WPML)
- automatic, scheduled import updates
- import of new data to existing content
- import of images
- API hooks & PHP execution for developers
Product Importing Preparation
For the specific product importing make sure that the following plugins have been installed and activated:
WooCommerce Import Products Guide
Here are the instructions on importing products with WP All Import. Look for more information on the official website.
1. Open the Import XML/CSV page

2. Choose the data importing option:
- To upload the XML/CSV file from a computer – “Upload a file”
- To download the XML/CSV file by the link – “Download from URL”
- To use the previously used imported file – “Use existing file”
3. Wait until the file is downloaded.
4. Choose the item “WooCommerce Products” from the Post drop-down list.
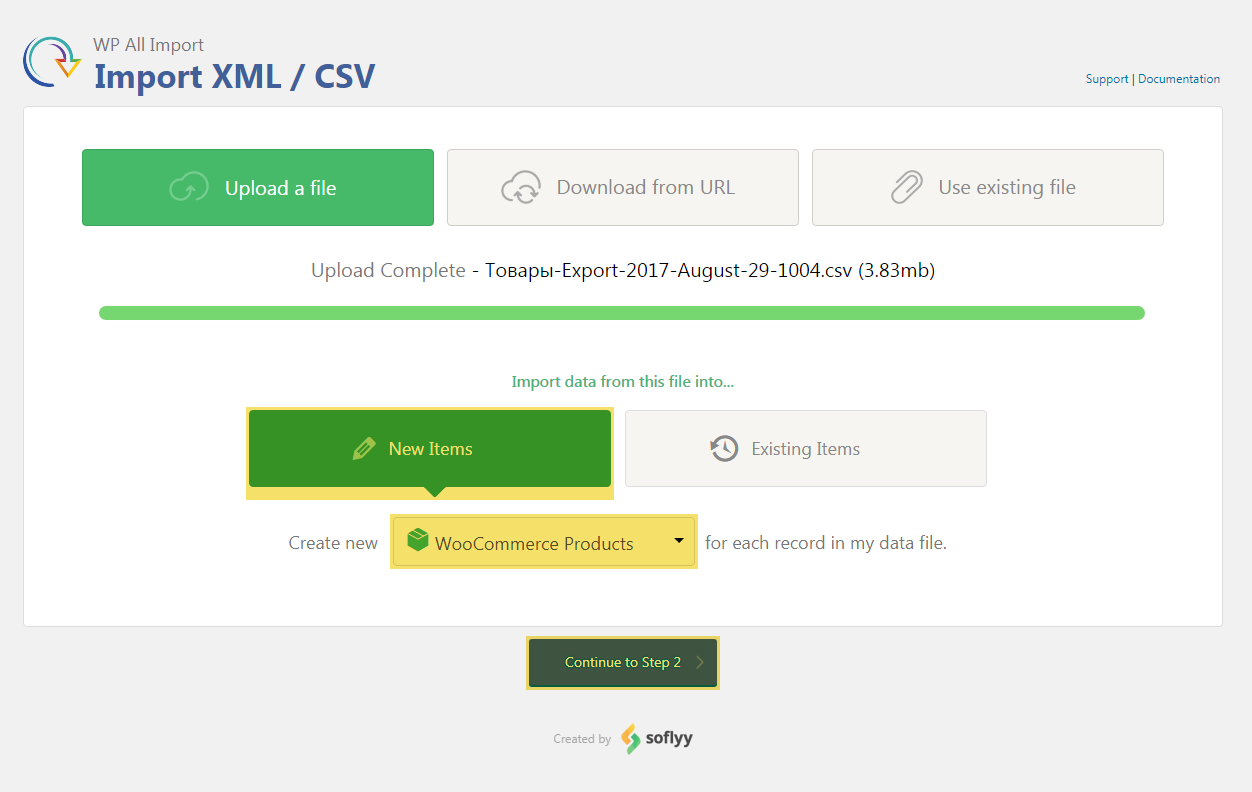 5. Click the Continue to Step 2 button.
6. If you have imported the CSV file:
- Make sure the system has determined a delimiter for CSV fields correctly. It is shown in the field “Set delimiter for CSV fields”. If it is not, enter the delimiter for CSV fields that has been used in the chosen CSV/XML file in item 2 and click ‘Apply’.

- Click the ‘Continue to Step 3’ button.
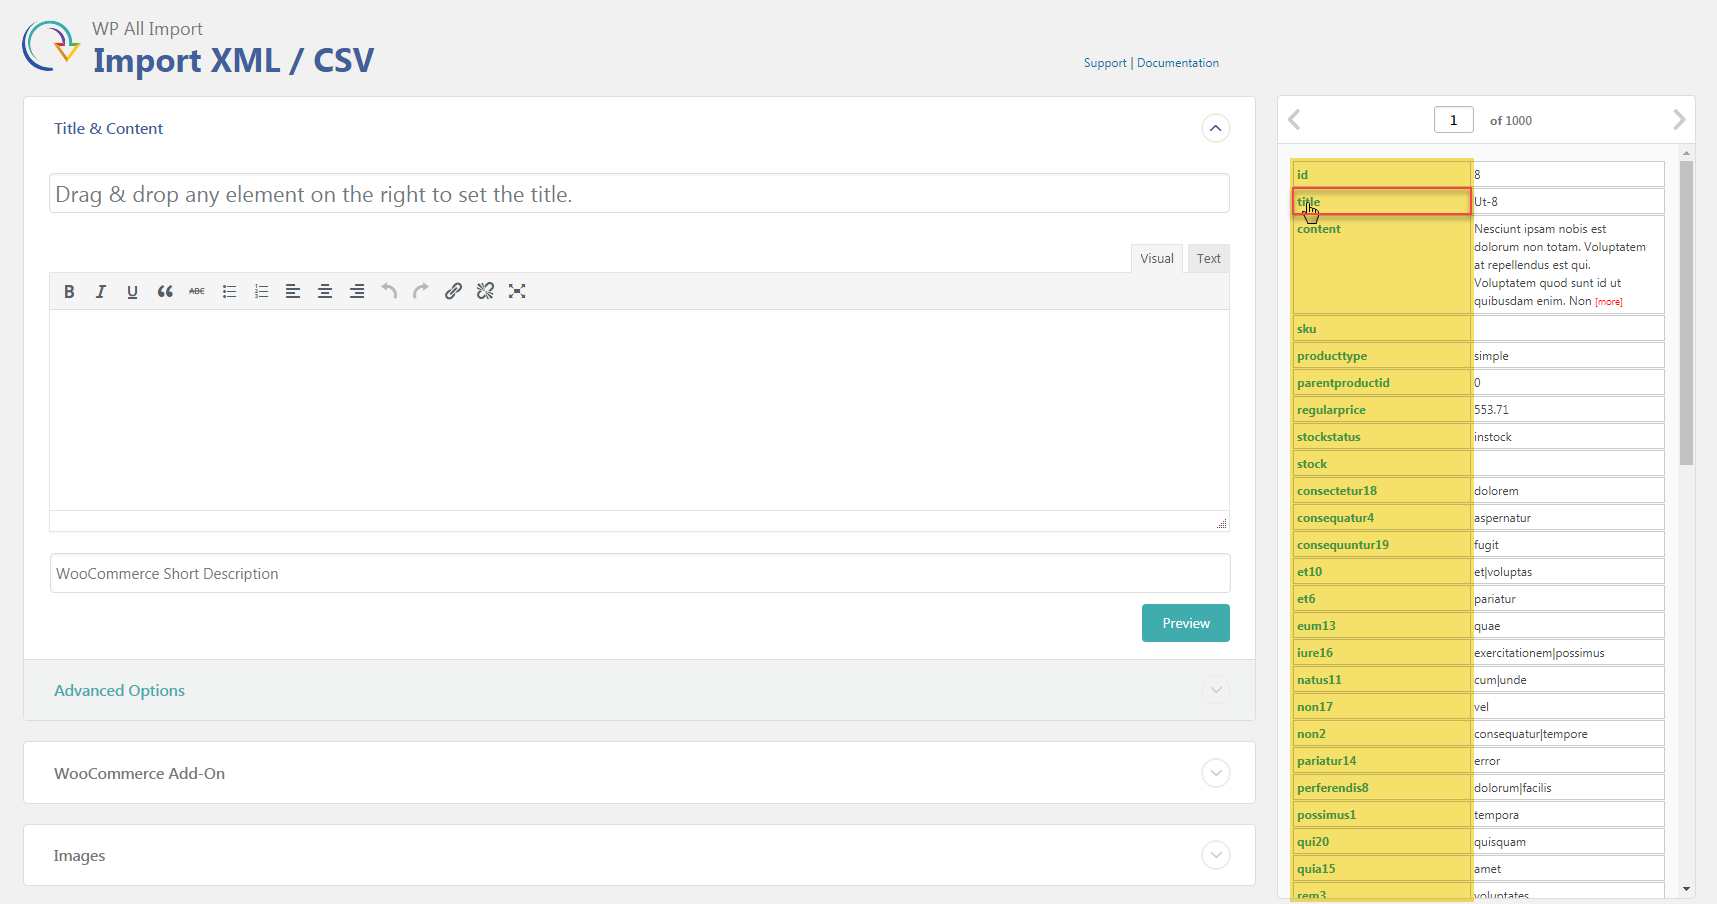
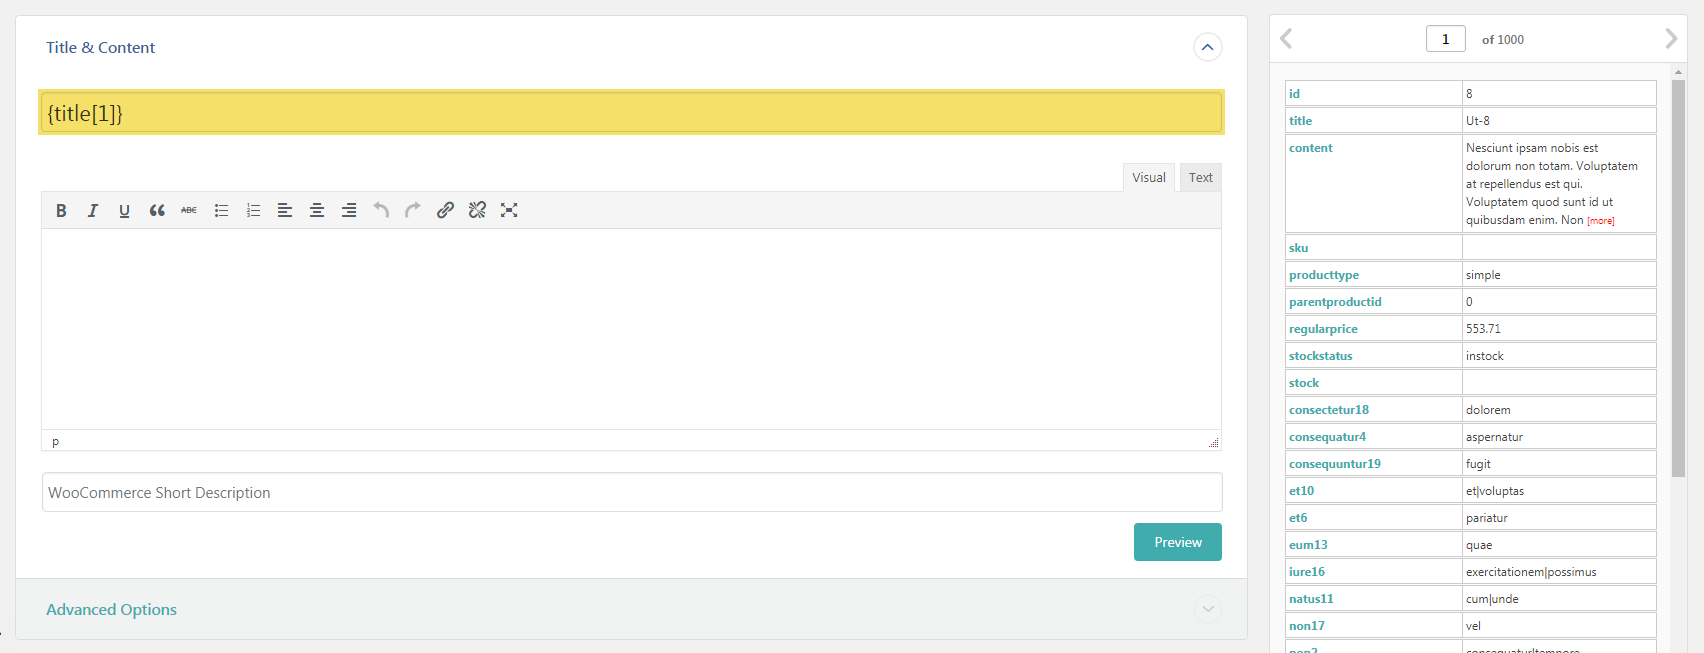
- The system automatically determines all available for import fields and will offer to choose the necessary ones. Drag & drop the fields’ names from the right table that displays information about products to the proper fields on the left for setting data which should be imported. Certainly move the Product Title. Read more detailed about bloсks here. Most settings are fulfilled by the system “move and admit ”.

- Click the Continue to Step 4 button.
- Go to item 8.
7. If you have imported the XML file:
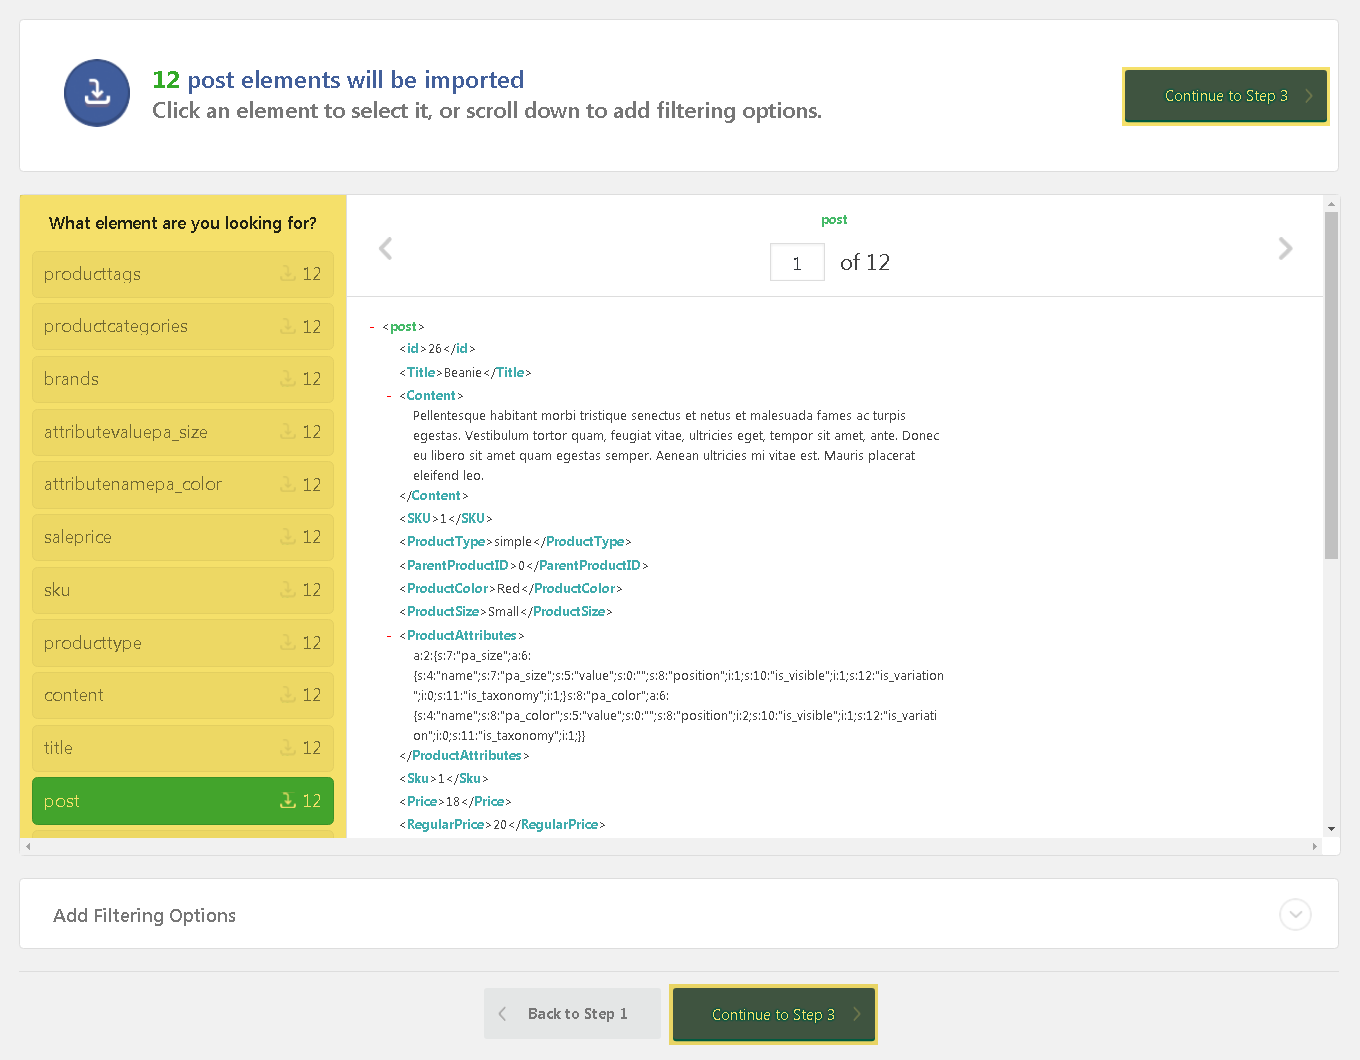
- The system automatically chooses a necessary element. If the operation wasn’t’ performed correctly incorrectly, choose the element that contains all information about one product. Its name can be Post, Product, etc.

- Click the ‘Continue to Step 3’ button.
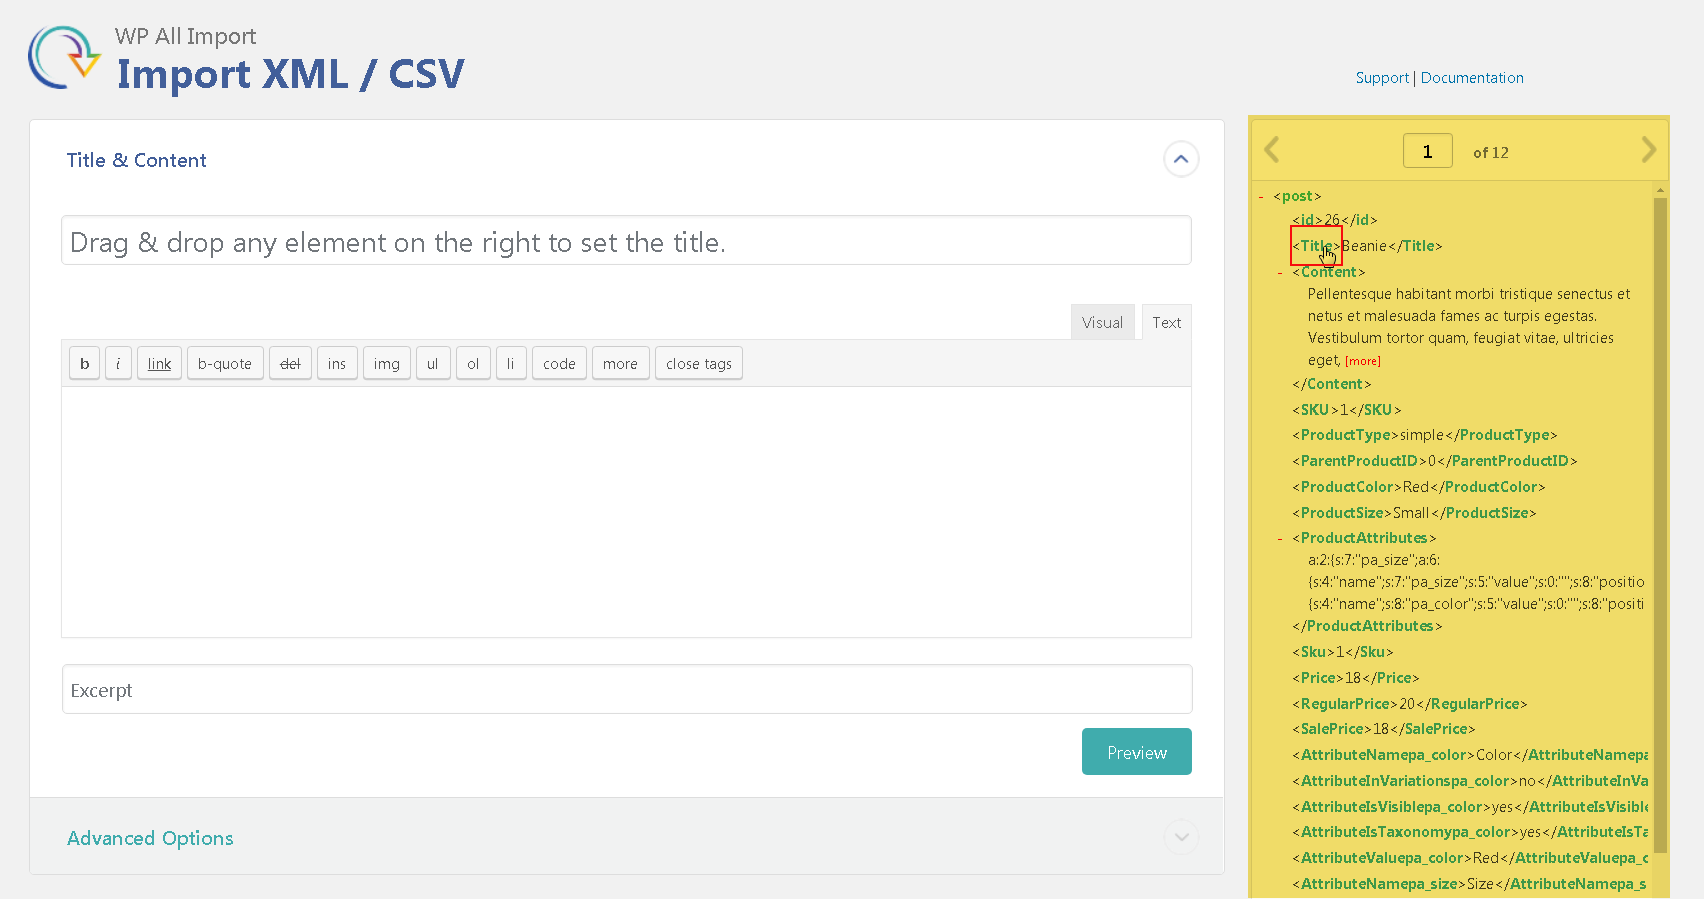
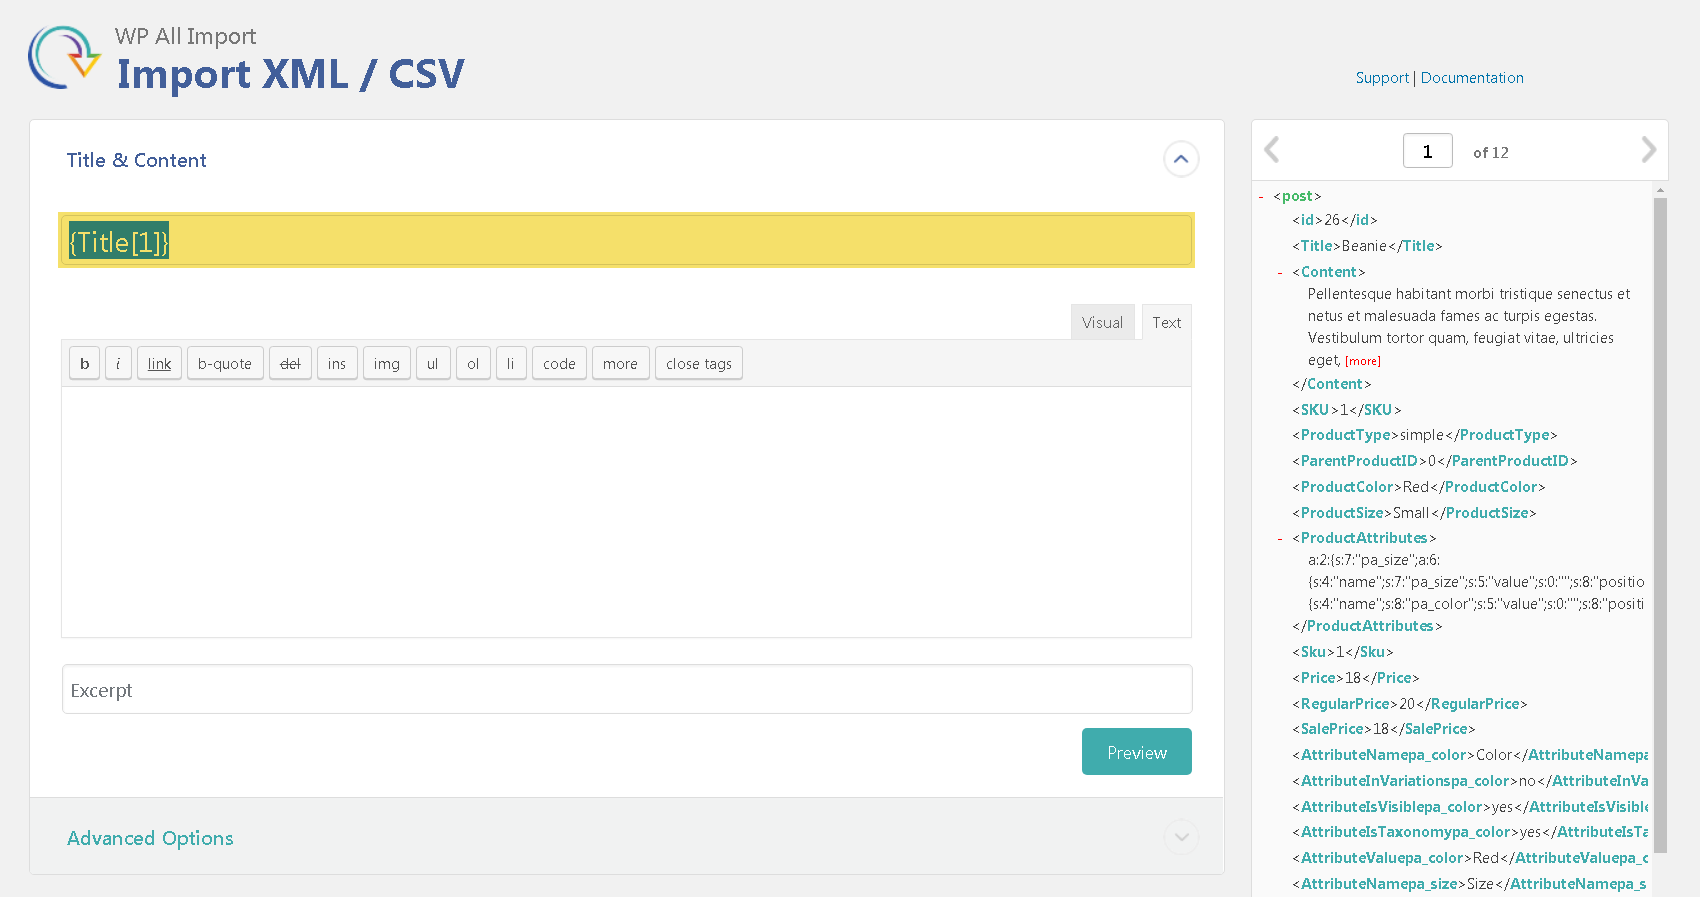
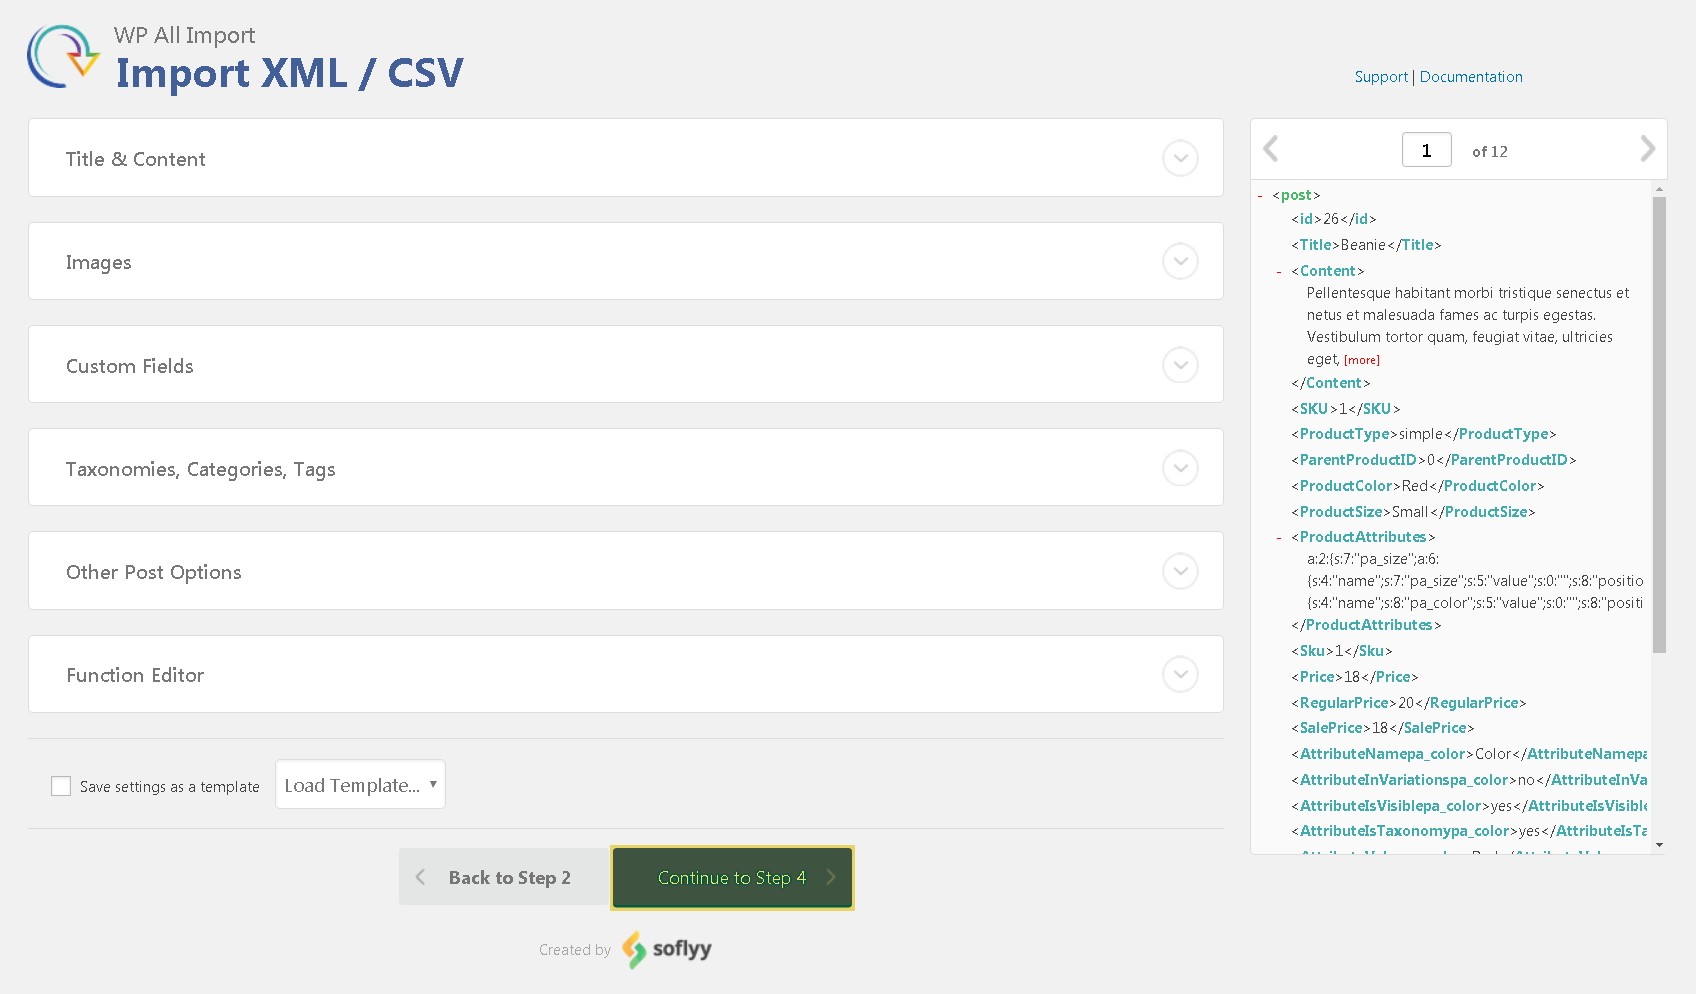
- The system automatically determines all available data for import and will offer to choose the specific piece that you need. Drag & drop the tags from the right table that displays information about products to the proper fields on the left for setting data which should be imported and of course, move the Product Title. Read more detailed about bloсks here (anchor on “Detailed block view of the third product import step”). Most settings are fulfilled by the system “move and admit ”.

- Click the ‘Continue to Step 4’ button.
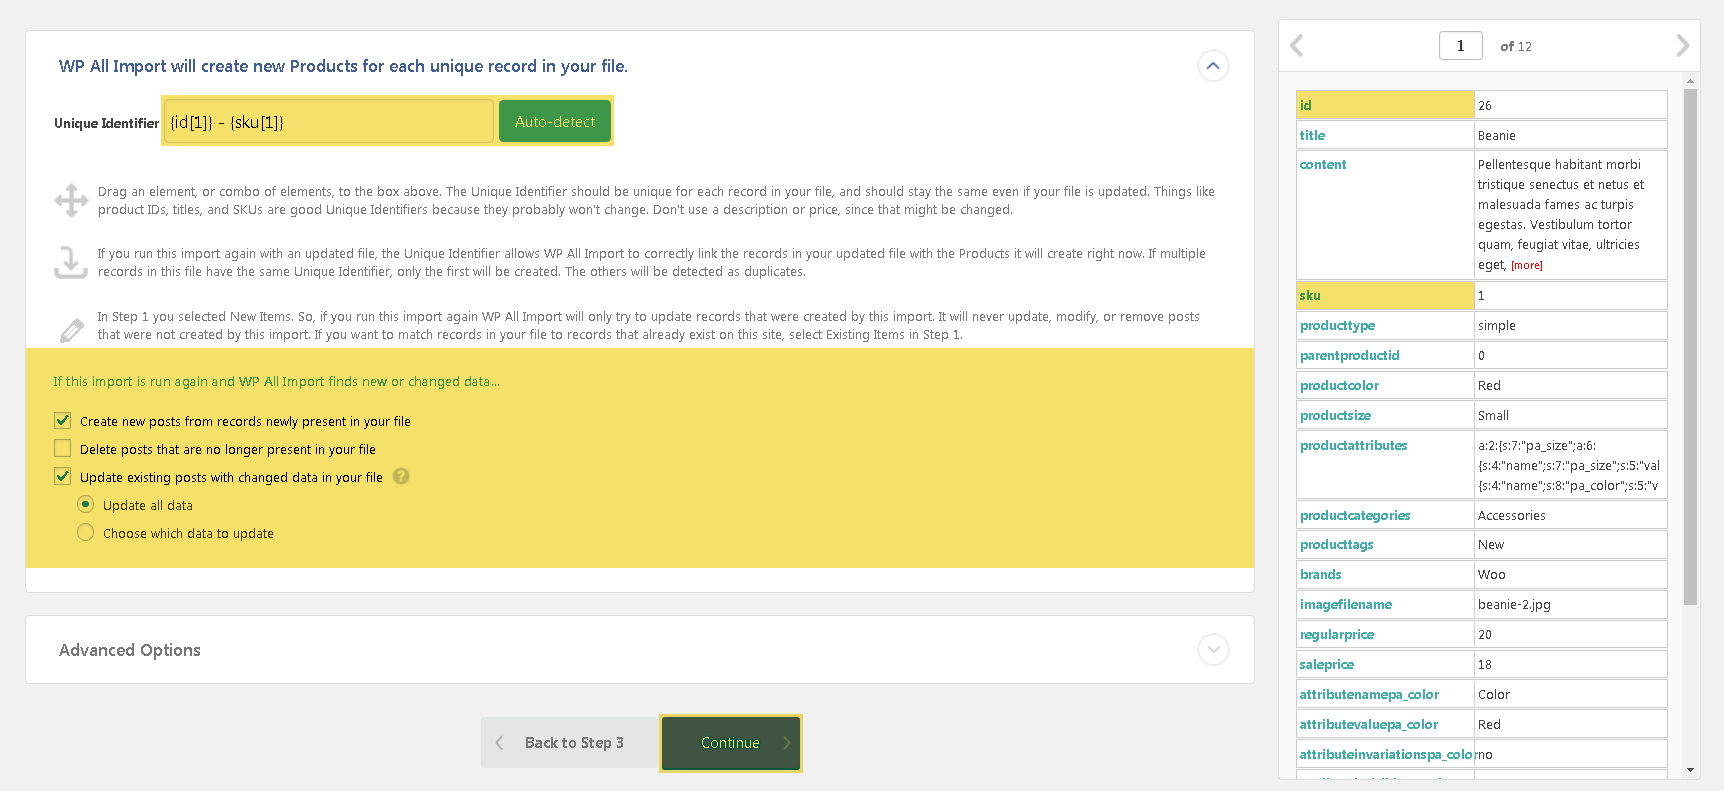
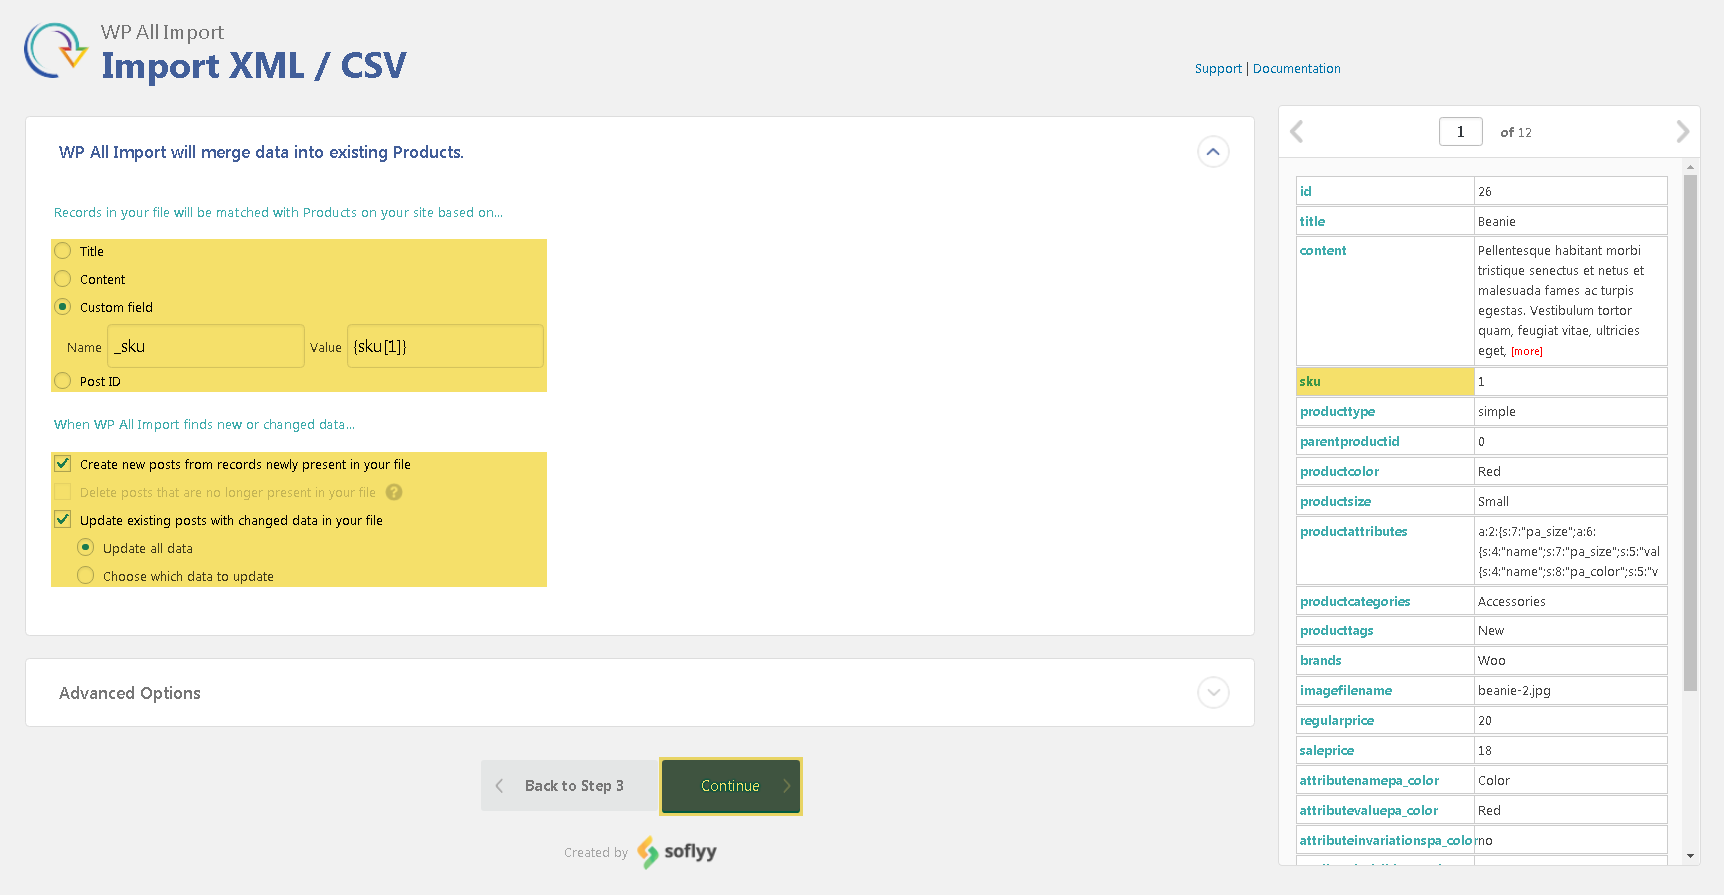
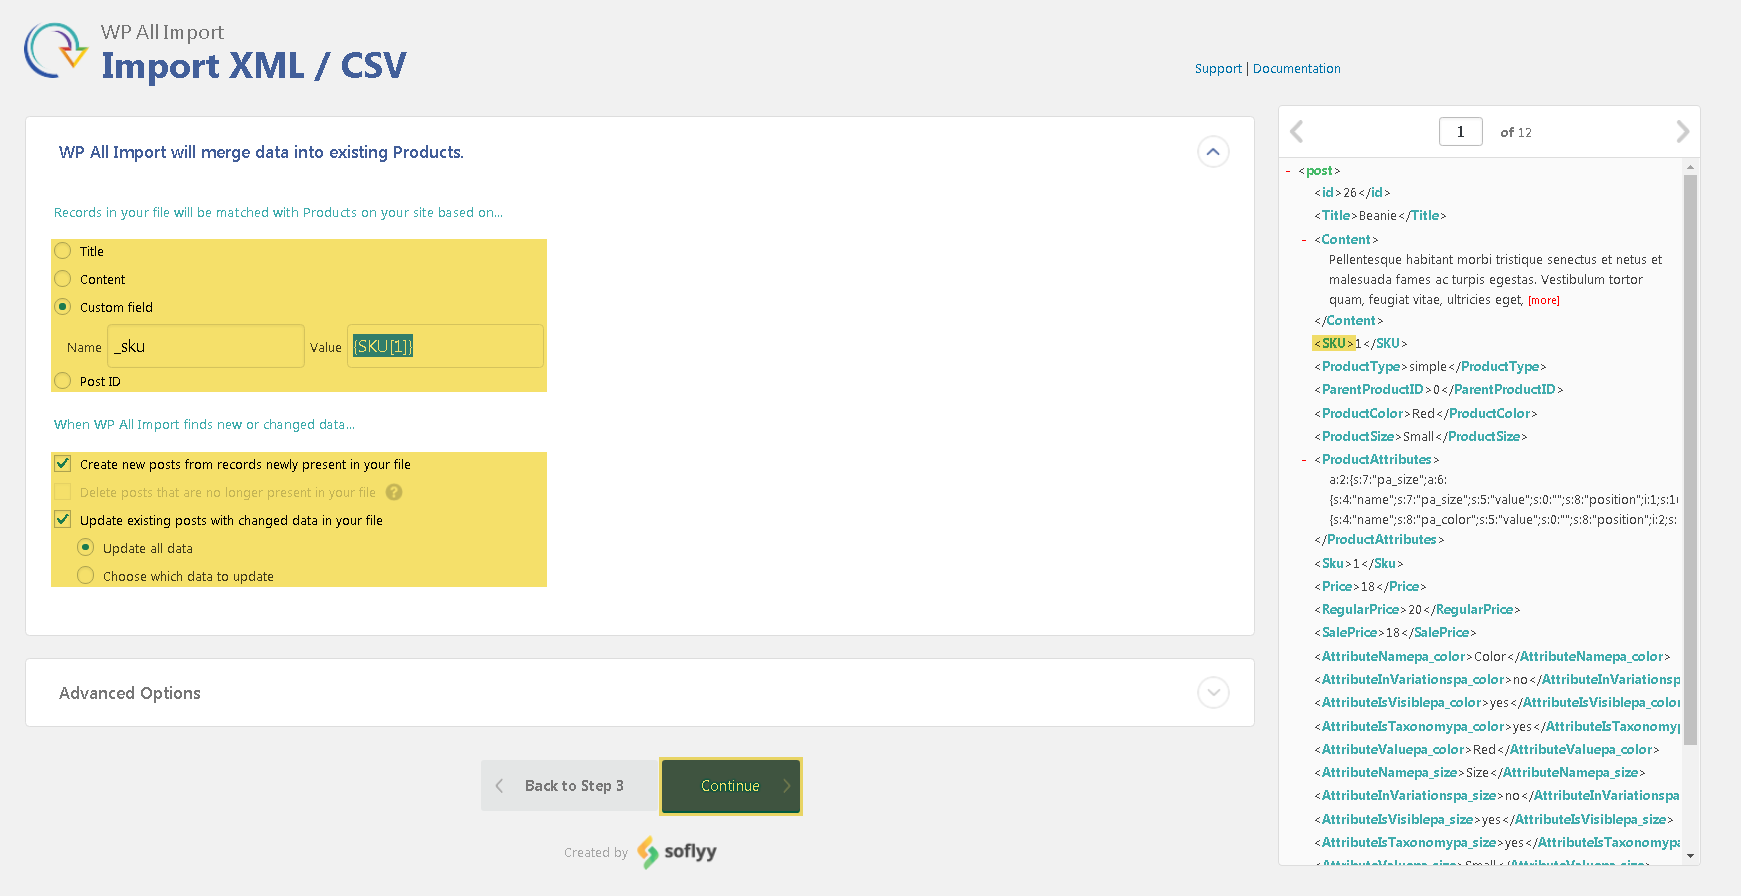
8. Click the ‘Auto-detect’ for automatic creation of the unique product identifier or move needed fields’ names or tags dividing them by a hyphen to the Unique Identifier field. This action is necessary for preventing mistakes during the products importing.
SKU:
XML:
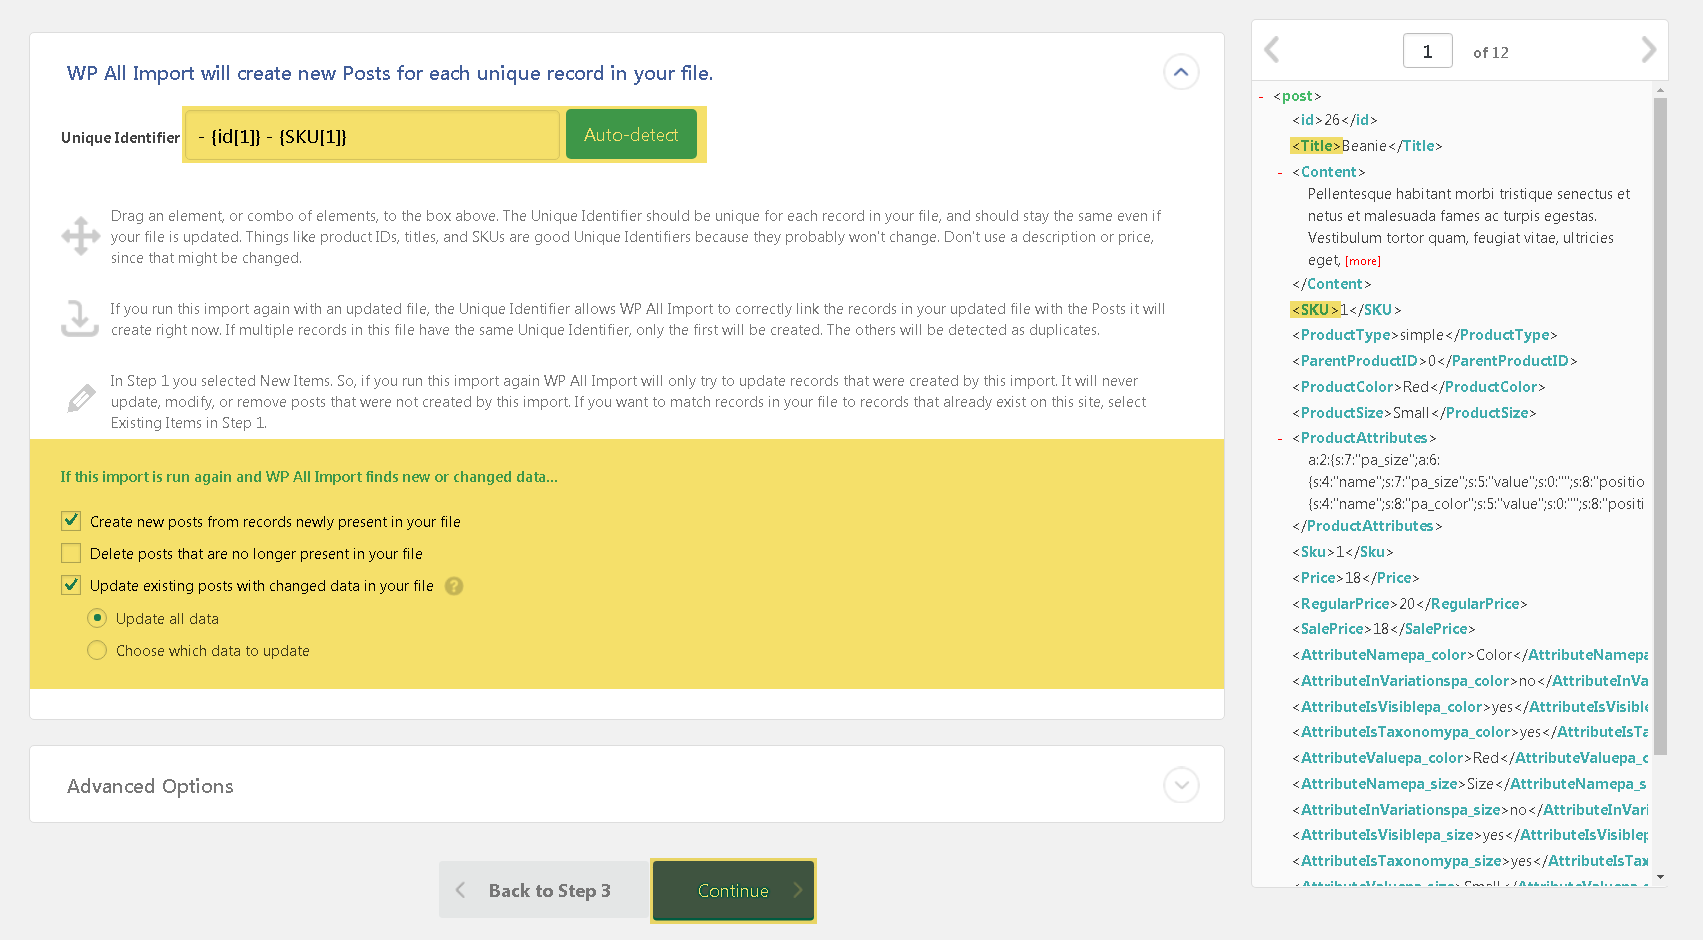
The settings on this page refer only to product importing from the downloaded file. If you import from this file for the first time, make sure the checkbox ‘Create new posts from records newly present in your file’ is activated, otherwise products will be not imported. Two following parameters ‘Delete posts that are no longer present in your file’ and ‘Update existing posts with changed data in your file’ will be used at the next startup of this import.
9. Click the ‘Continue’ button.
10. Check all settings on the page, if they are correct, click the ‘Confirm & Run Import’ button.
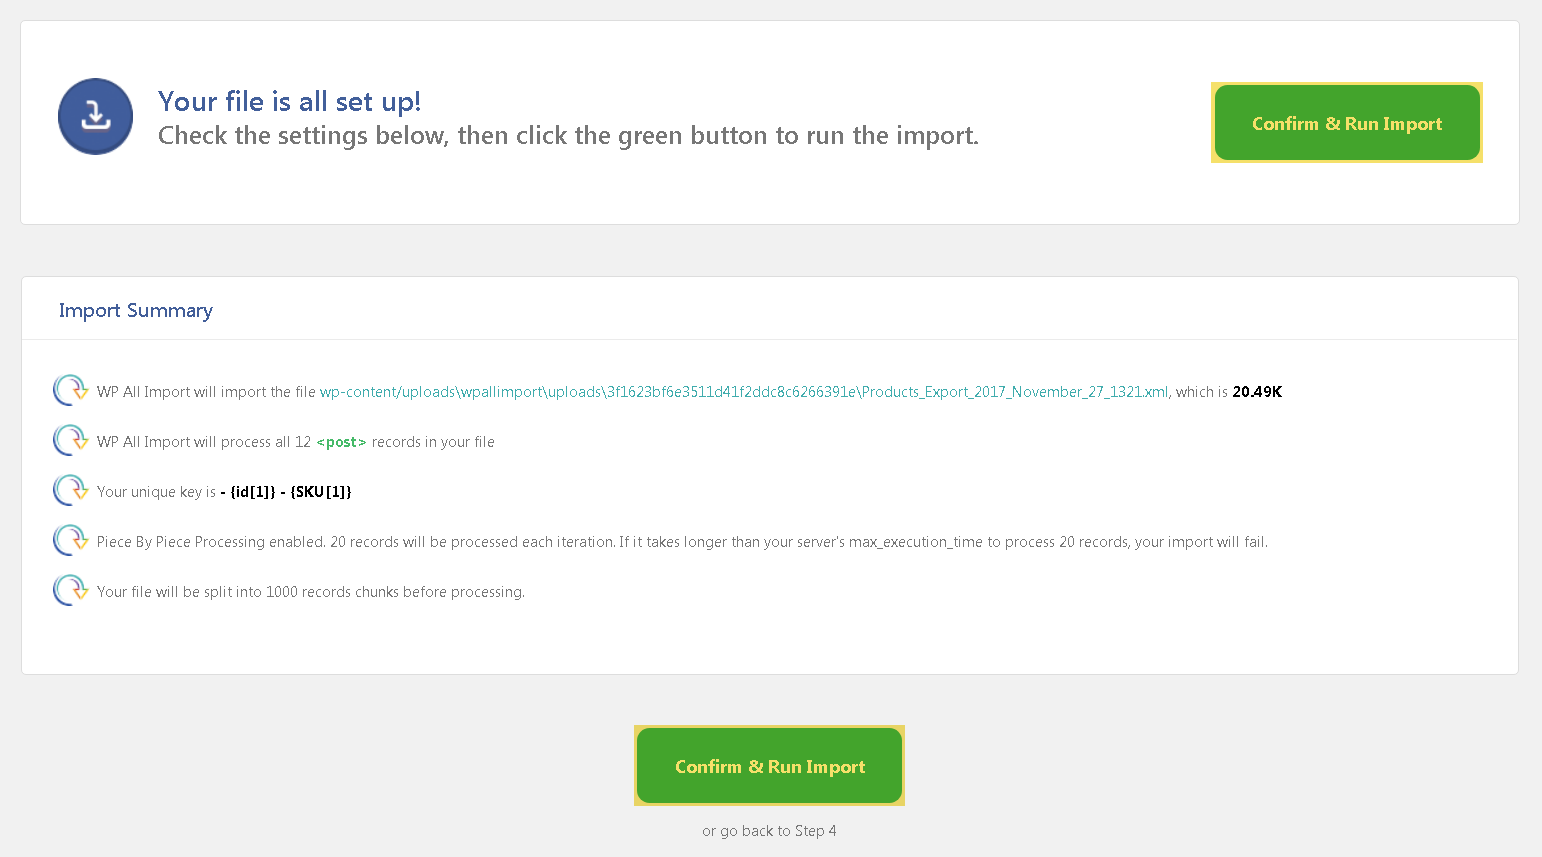
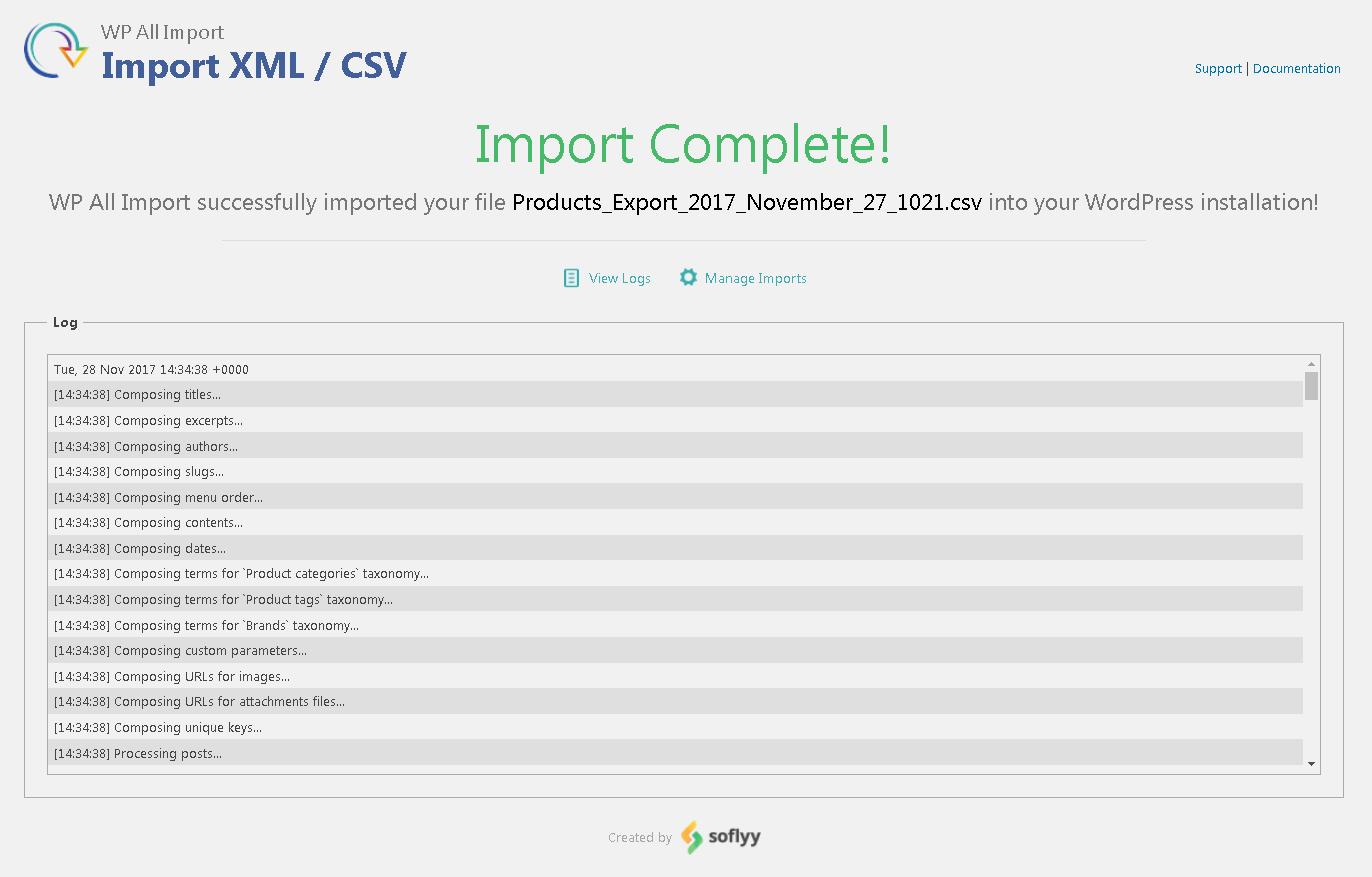
11. Wait until the product import is completed.
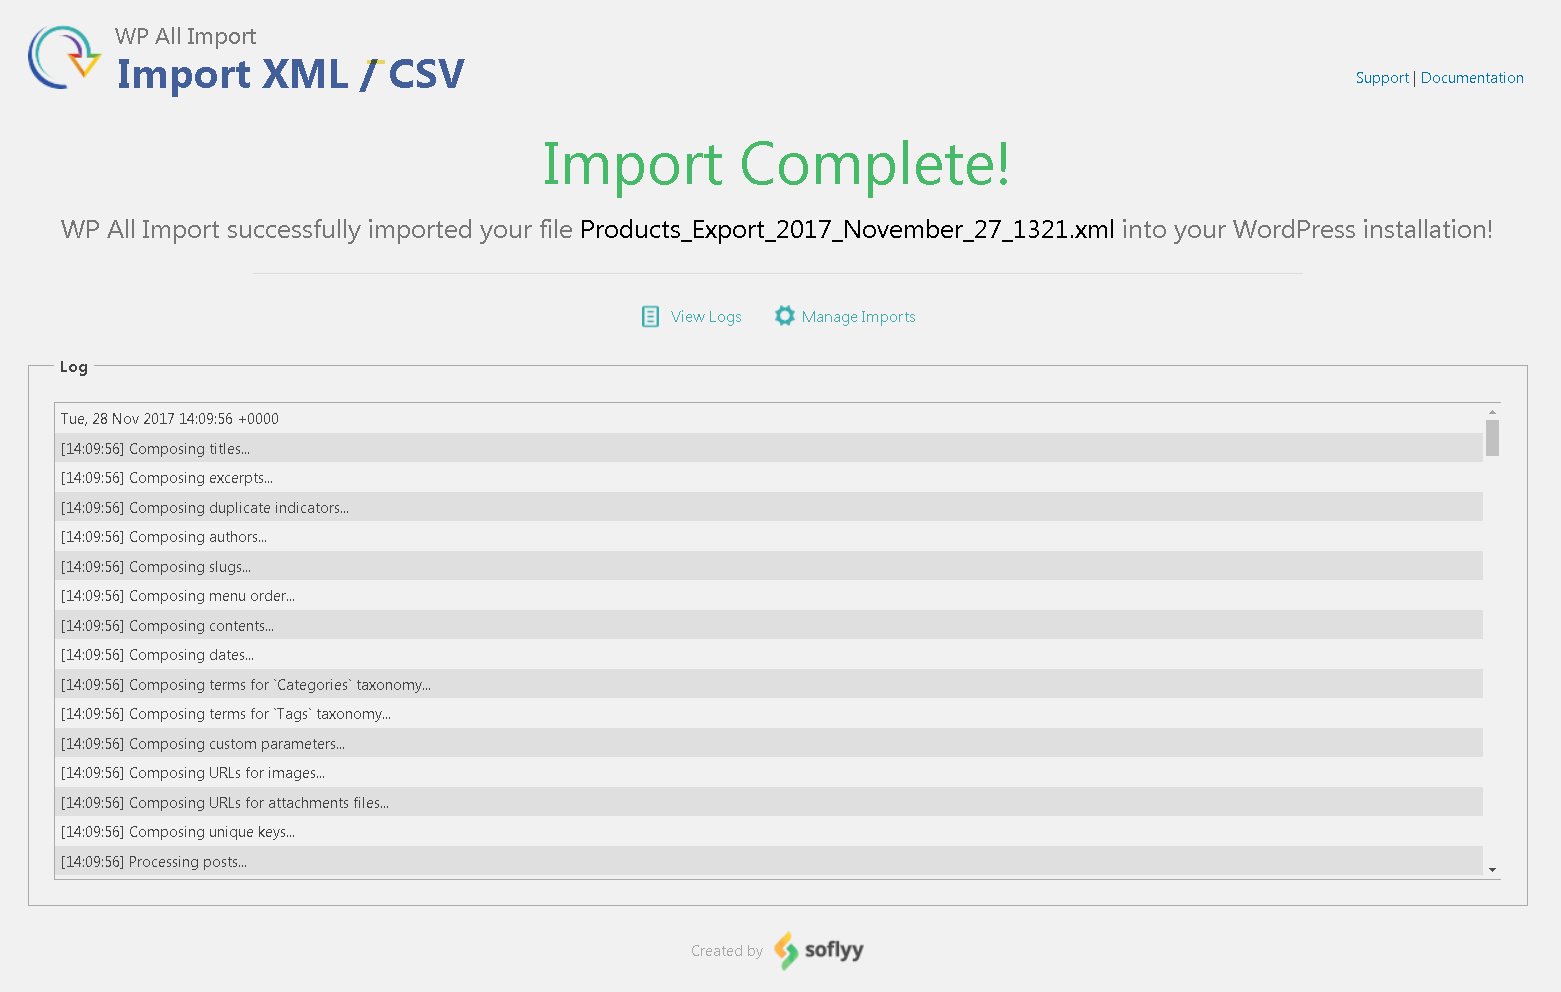
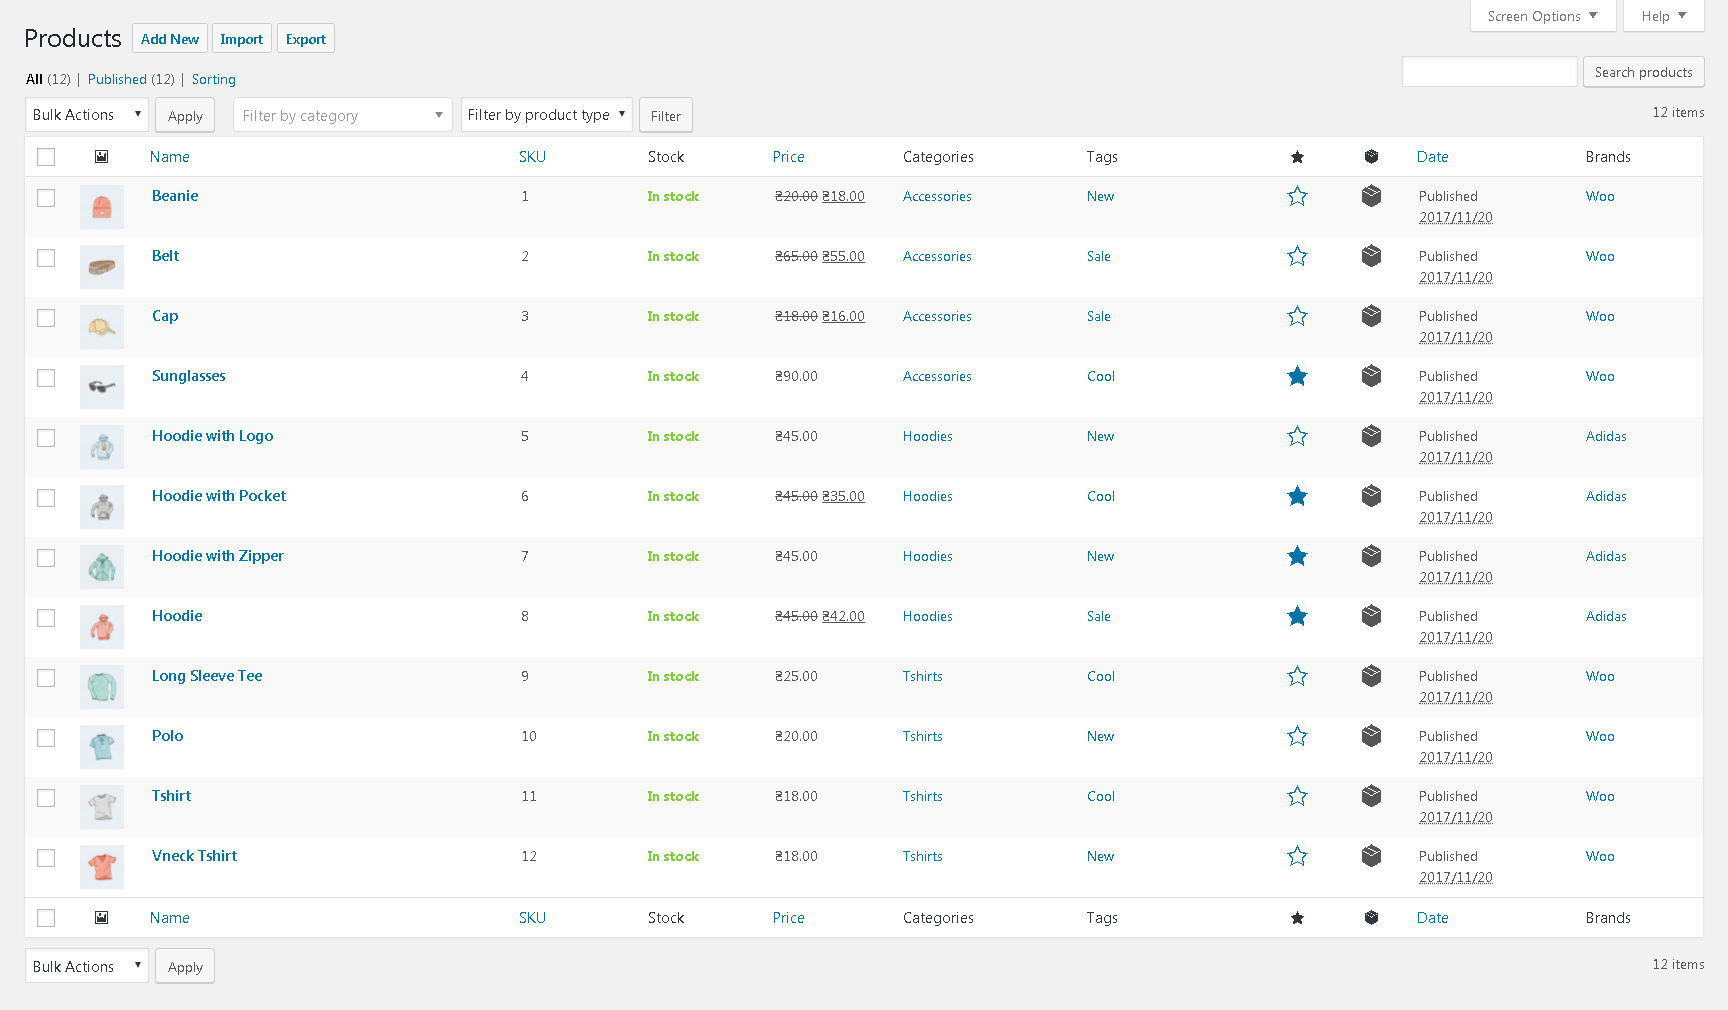
12. The result of the import:
Updating the existing products:
1. Open the Import XML/CSV page.

2. Choose the data import option:
- To upload the XML/CSV file from a computer – “Upload a file”
- To download the XML/CSV file by the link – “Download from URL”
- To use the previously used imported file – “Use existing file”
3. Wait until the file is downloaded.
4. Click on the “Existing Items” button.
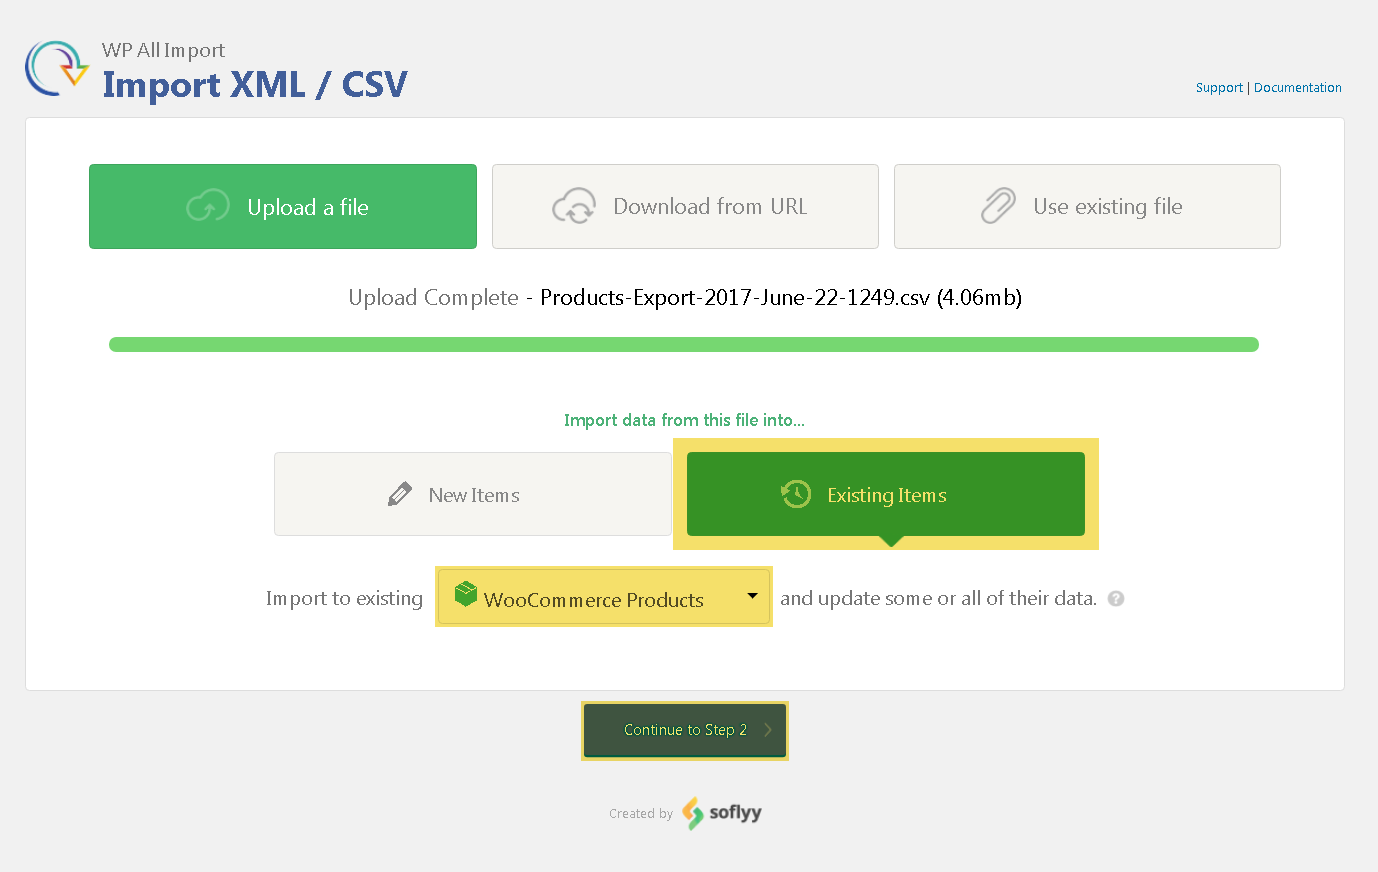
5. Choose the WooCommerce Products item from the Post drop-down list.
6. Click the ‘Continue to Step 2’ button.
7. If you have downloaded the CSV file:
- Make sure the system has determined a delimiter for CSV fields correctly. It is shown in the field “Set delimiter for CSV fields”. If it is not, enter the delimiter for CSV fields that has been used in the chosen CSV/XML file in item 2 and click on Apply.
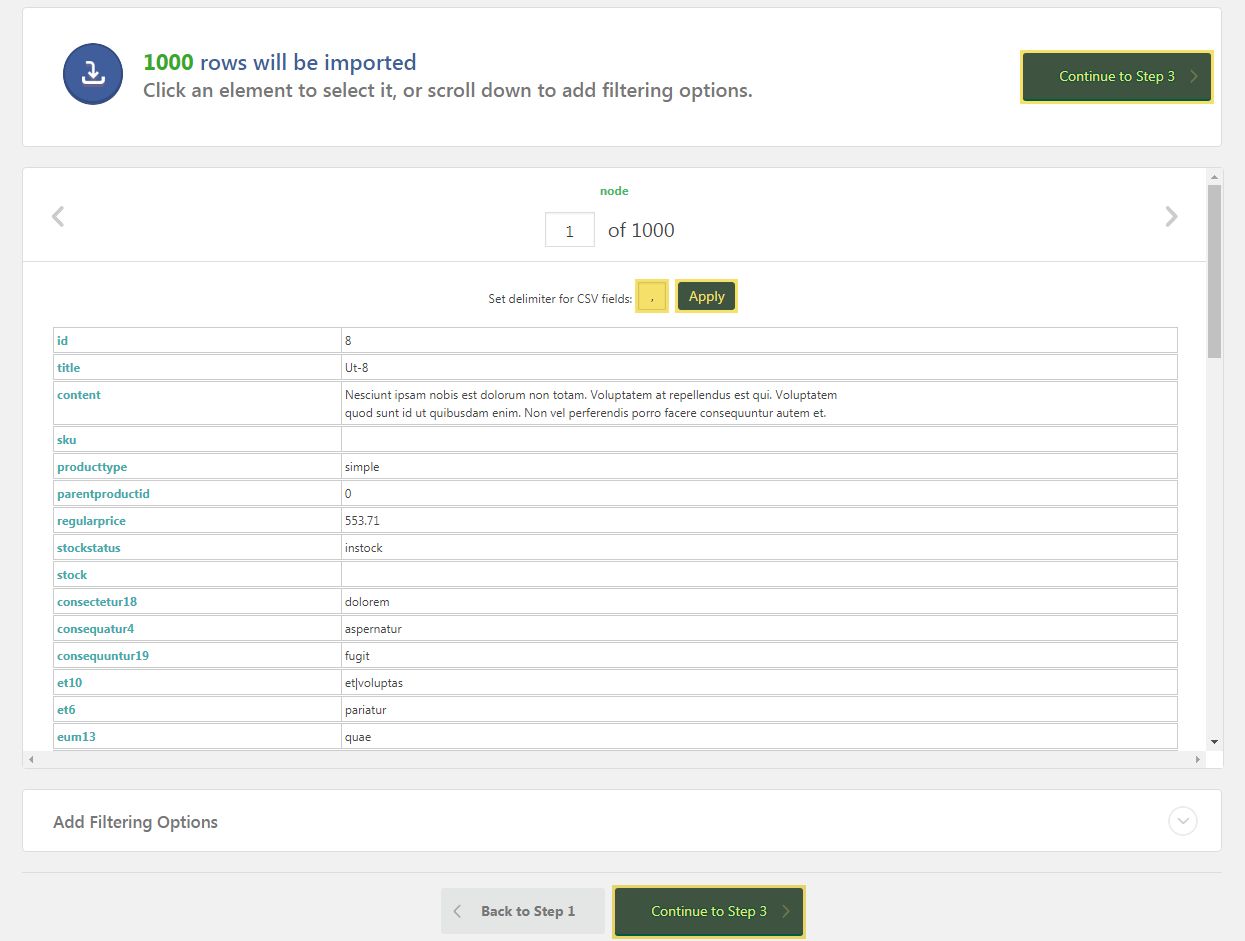
- Click the ‘Continue to Step 3’ button.
- The system automatically determines all available data for import and will offer to choose the specific need piece. . Drag & drop the fields’ names from the right table that displays information about products to the proper fields on the left for showing what data should be updated. Don’t forget to move the Product Title. Read more detailed information about bloсks here. Most settings are fulfilled by the system “move and admit ”.


- Click the ‘Continue to Step 4’ button.
8. For the XML file follow the steps below:
- The system automatically chooses a necessary element. If the operation was performed incorrectly, choose the element that contains all necessary information about the product.
- Click the ‘Continue to Step 3’ button.
- The system automatically determines all available data for import and will offer to choose the necessary piece. Drag & Drop the tags from the right table that displays information about products to the proper fields on the left for showing what data should be updated. Don’t forget to move the Product Title. Read more detailed information about bloсks here. Most settings are fulfilled by the system “move and admit ”.
- Click the ‘Continue to Step 4’ button.
9. Click the ‘Auto-detect’ for automatic creation of the unique product identifier or move needed fields’ names or tags dividing them by a hyphen to the Unique Identifier field. This action is necessary for preventing mistakes during products importing.
SKU:
XML:
The settings on this page refer to all the products which already exist and will be imported.
10. Click the ‘Continue button’.
11. Check all settings on the page, if they are correct, click the ‘Confirm & Run Import’ button.

12. Wait until the product import is completed.
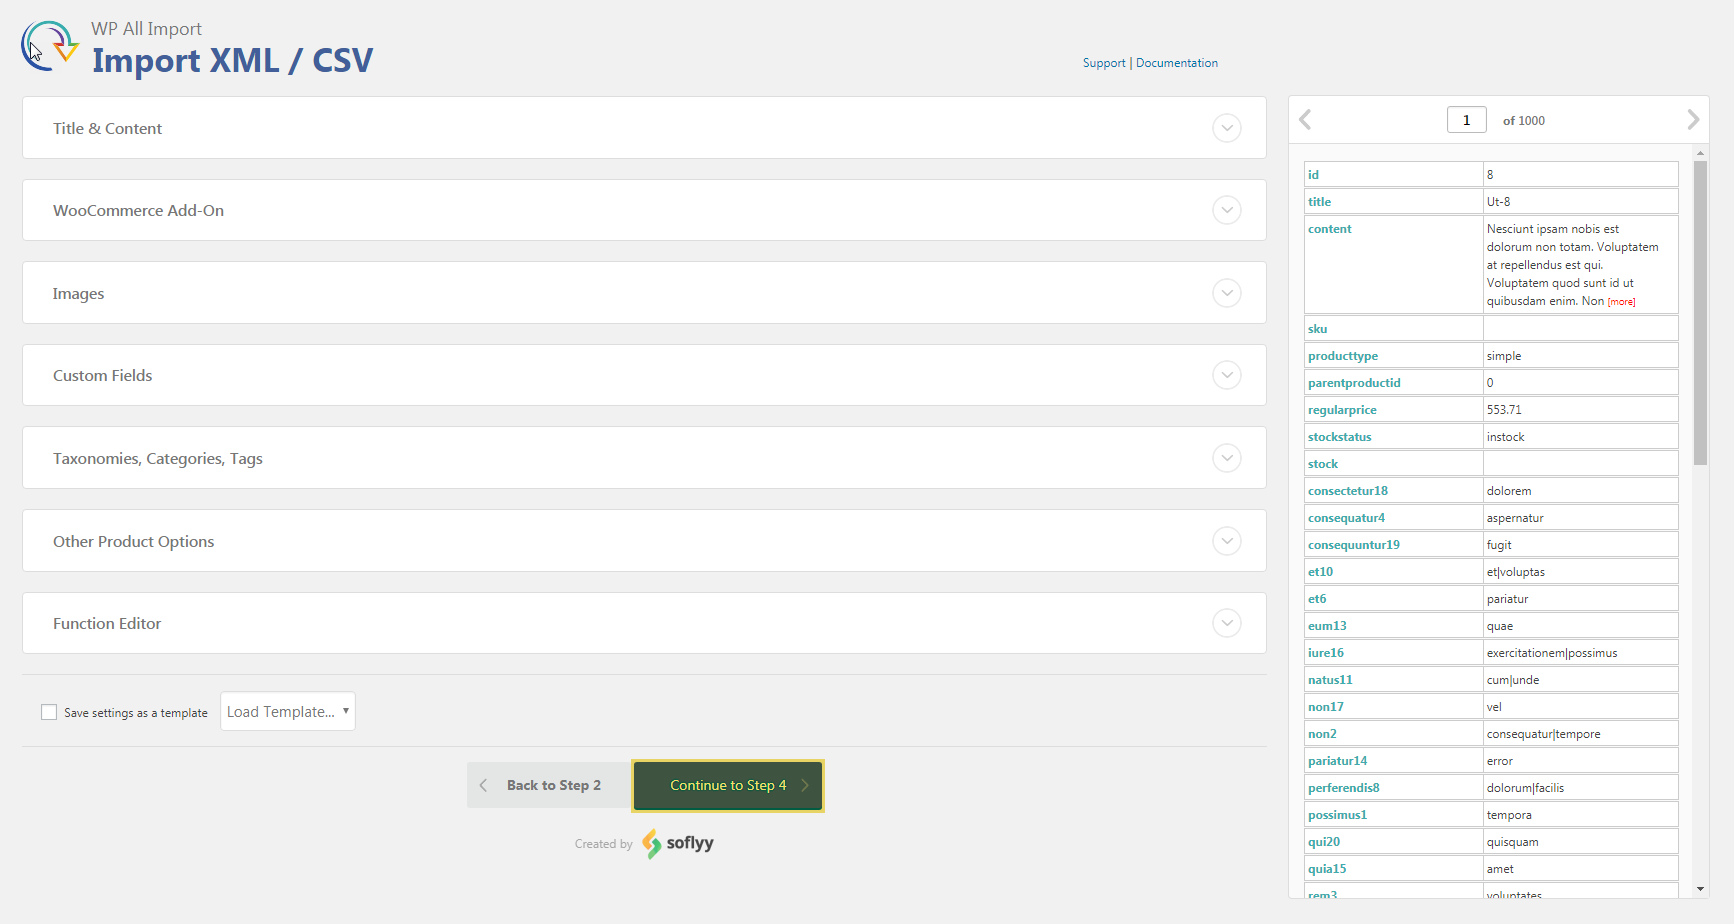
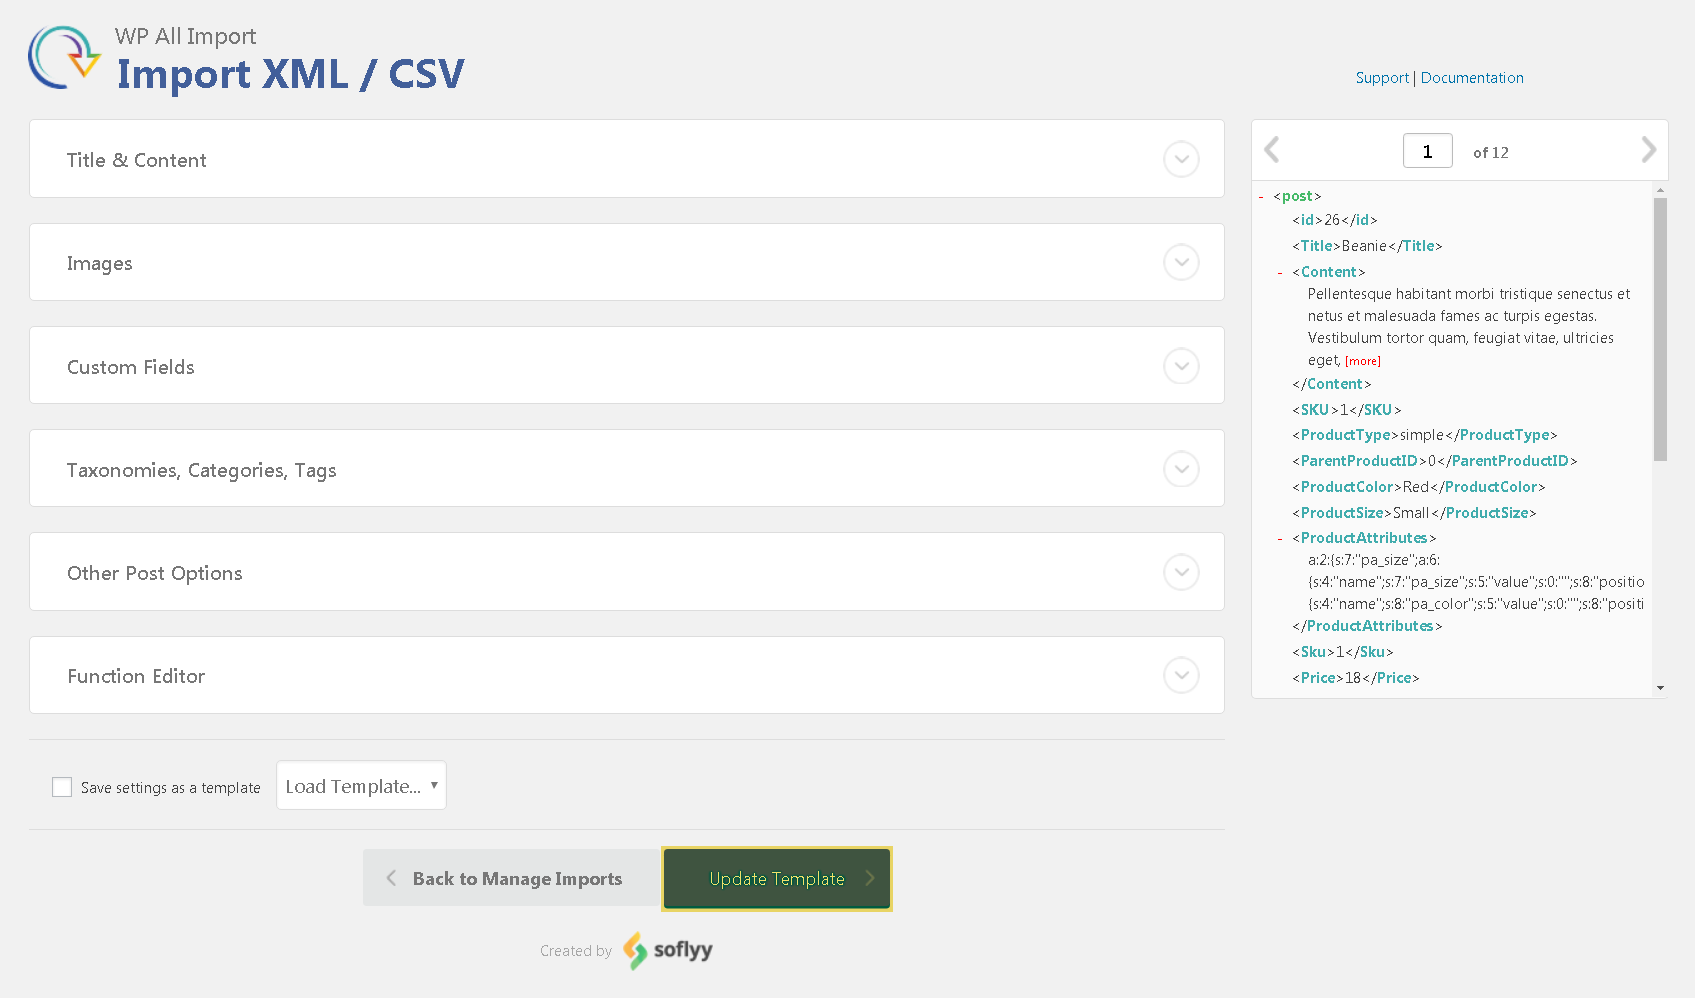
The Detailed Blocks’ Review of the Third Step of the Product Importing
All data entered manually will be used for each product.
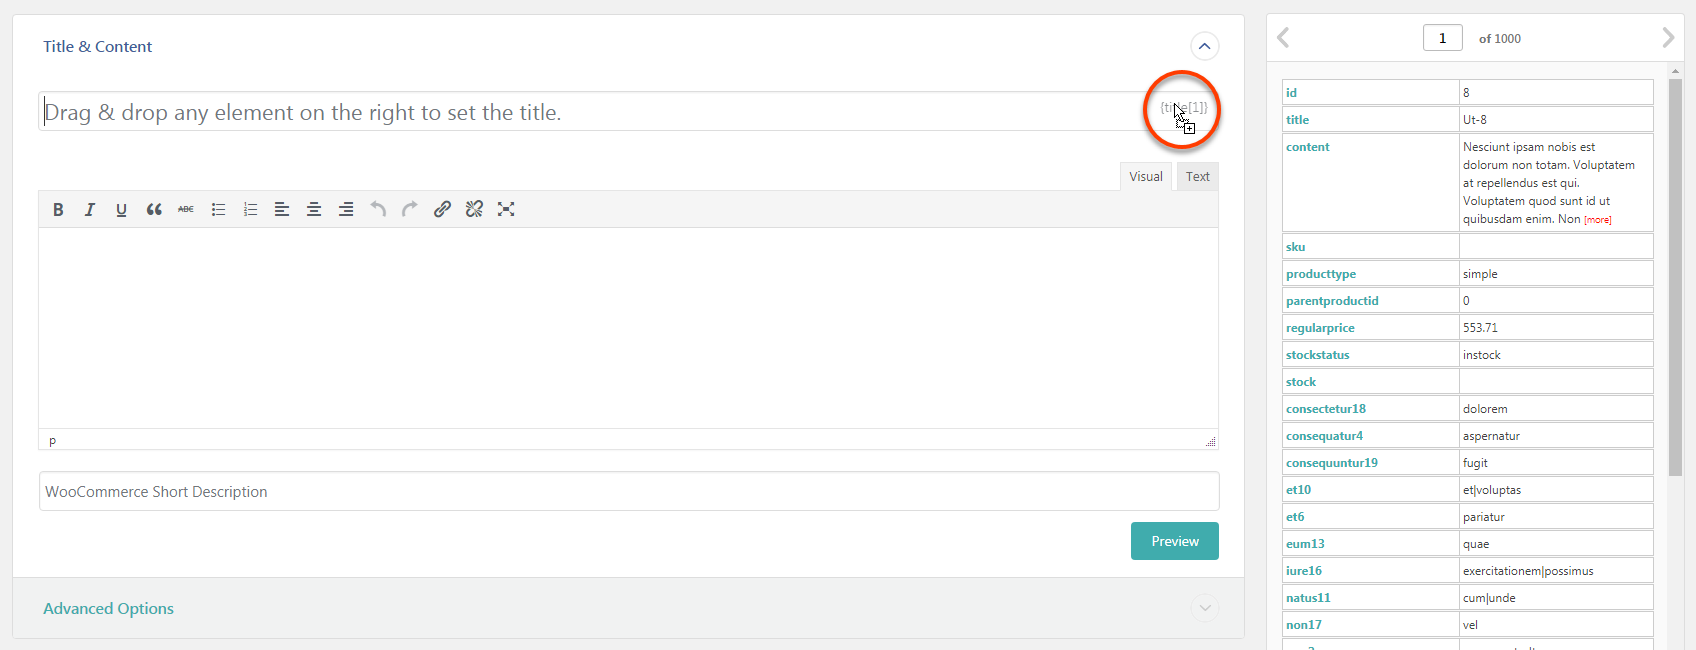
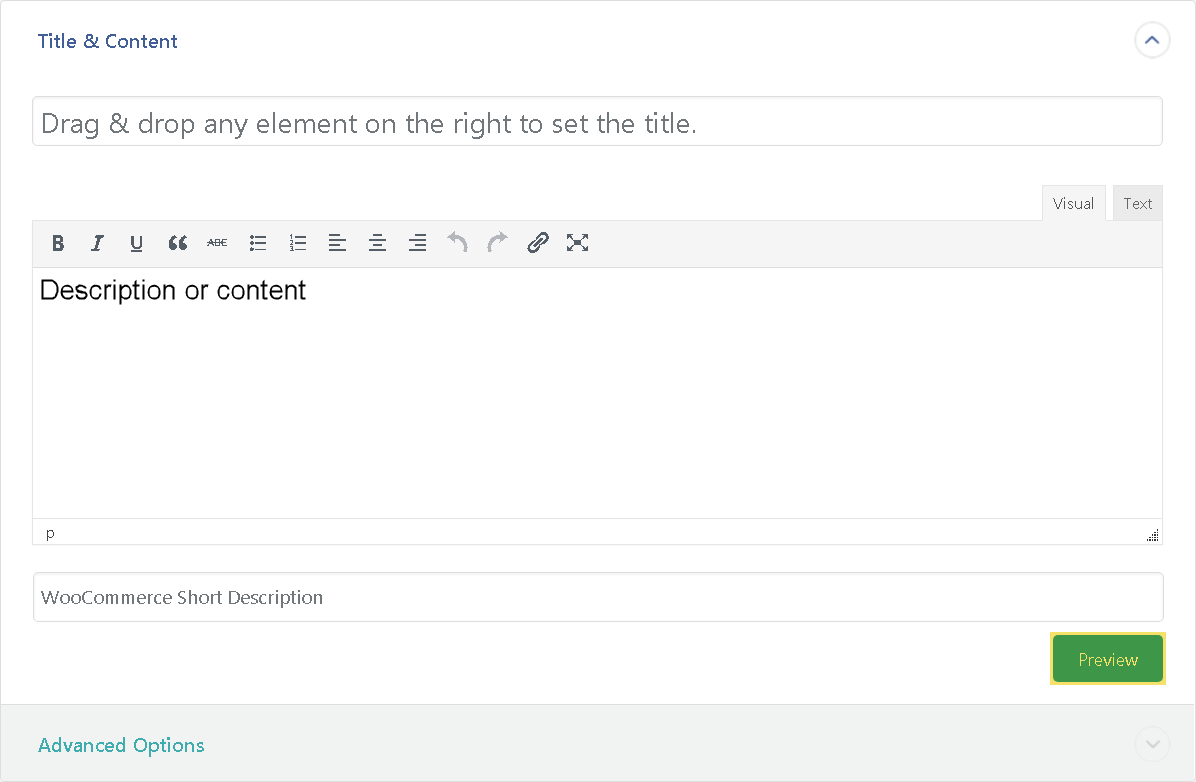
1. Everything is very simple here: a product name, a description and a short description. Product description editor has two modes: Visual (it works like a regular text editor) and Text (it is for HTML і CSS code). There is the possibility of preview in this block: click the ‘Preview’ button to see the result of this data import.
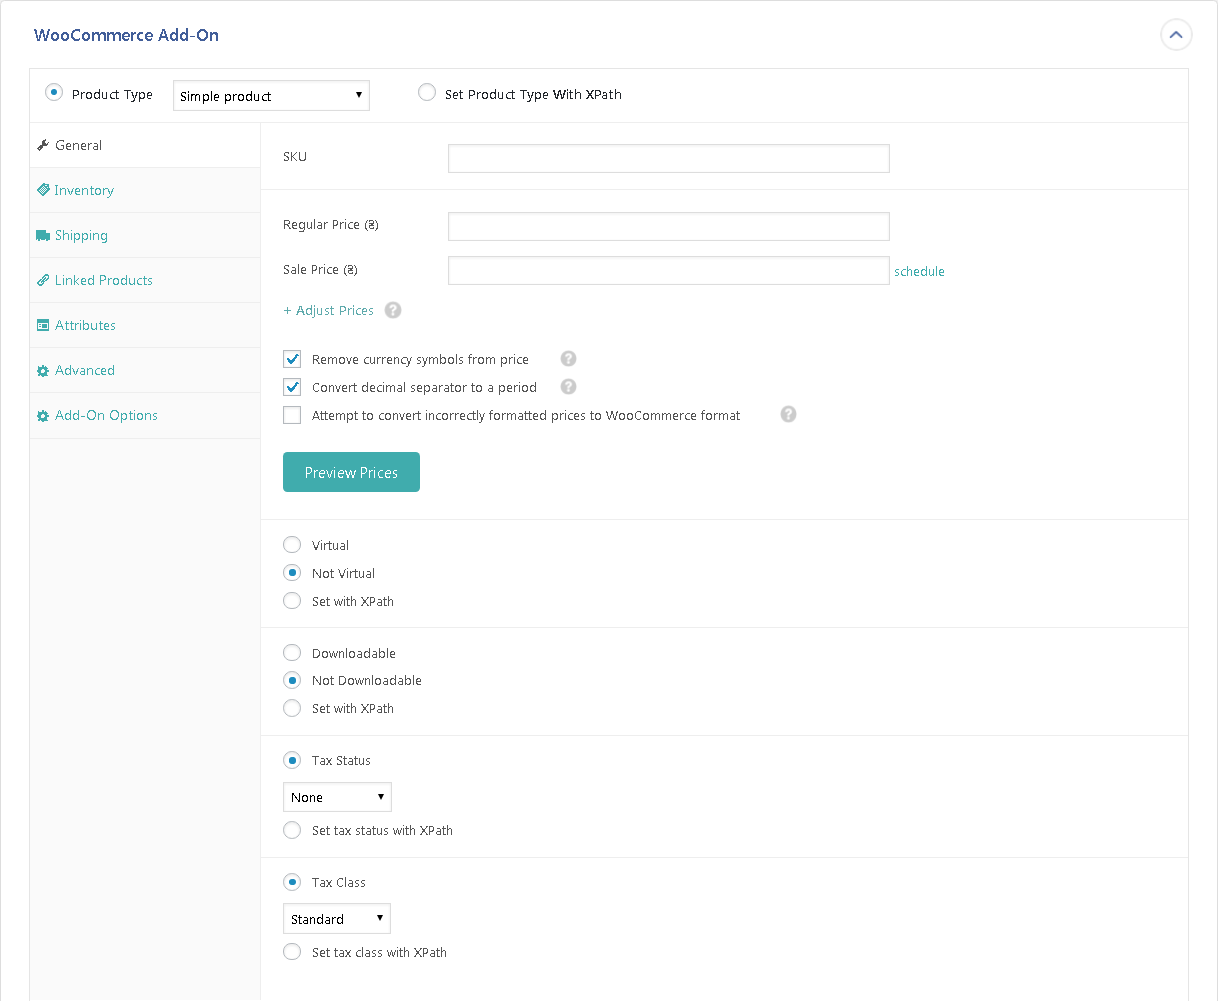
2. In this block you can make settings of the import of the main product data.
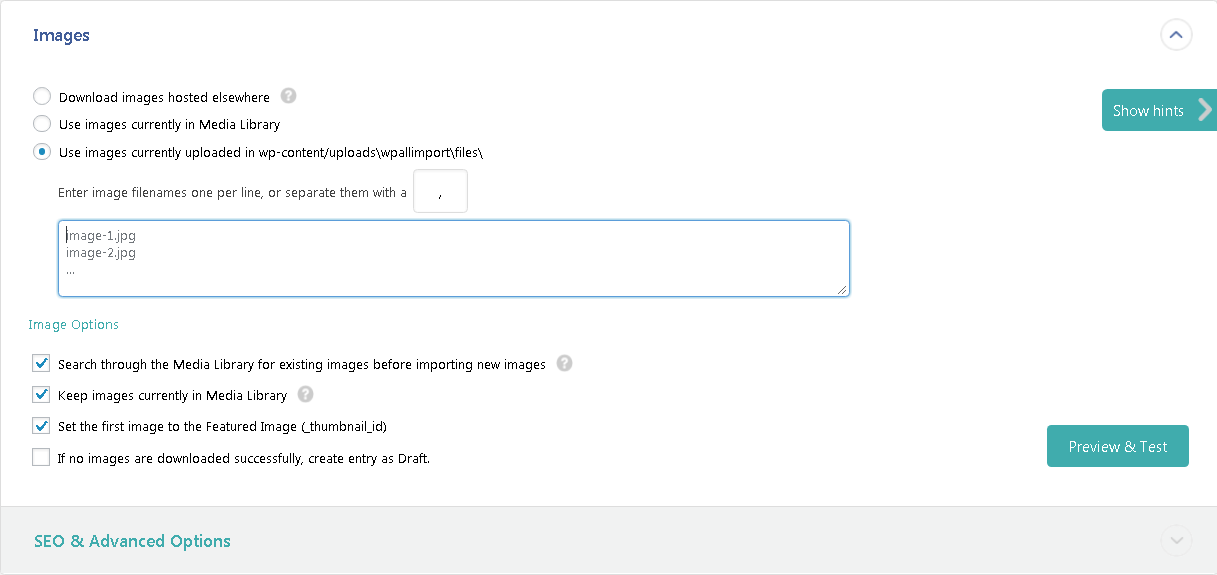
3. In the Image block you can import images in three different ways:
- to download an image from the Internet
- to use the images that have been previously downloaded to the website library
- to use the images that have been previously uploaded to the folder on the server: wp-content/uploads\wpallimport\files\
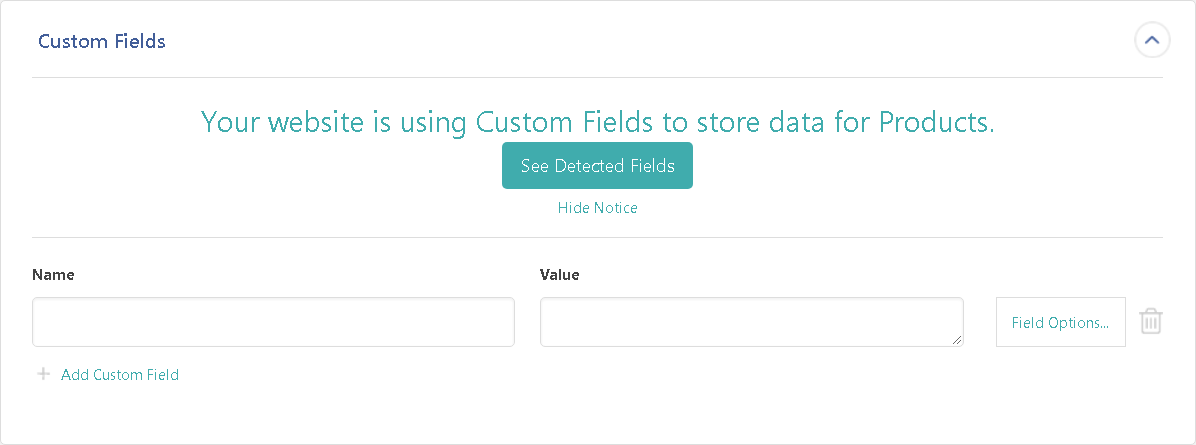
4. If you haven’t found an appropriate field for the data from the imported file, please, create it. You can use the ACF Pro plugin and the add-on for WP AI for more flexible settings of the additional fields.
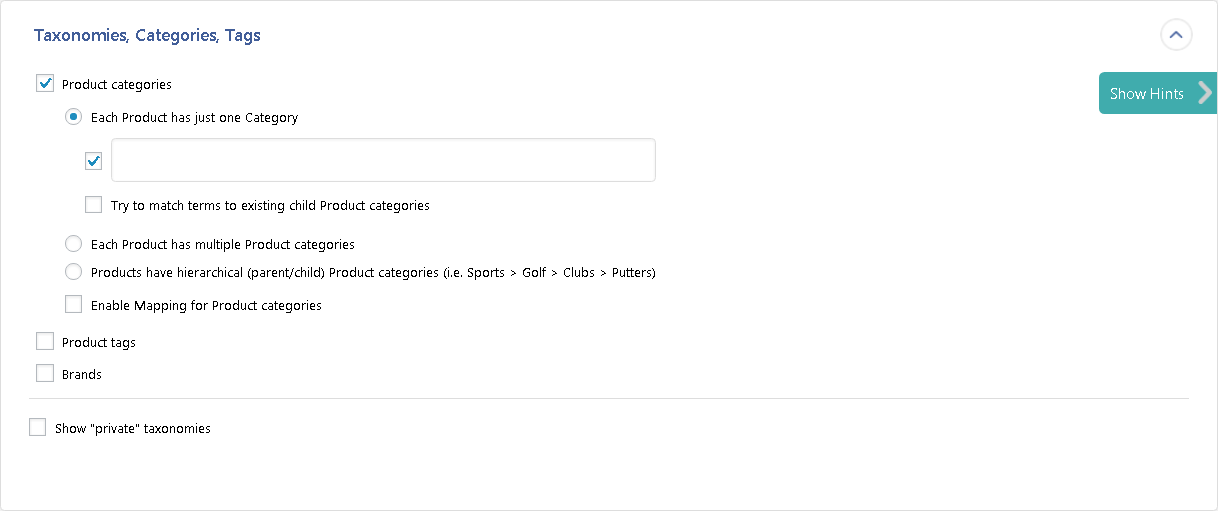
5. In this block you can import taxonomies (product categories, product tags, brands if you have installed our Premmerce WooCommerce Brands plugin) for products in several modes with flexible settings:
- each product has only one category
- each product has several categories
- each product has the hierarchy of categories if it is provided in the taxonomy
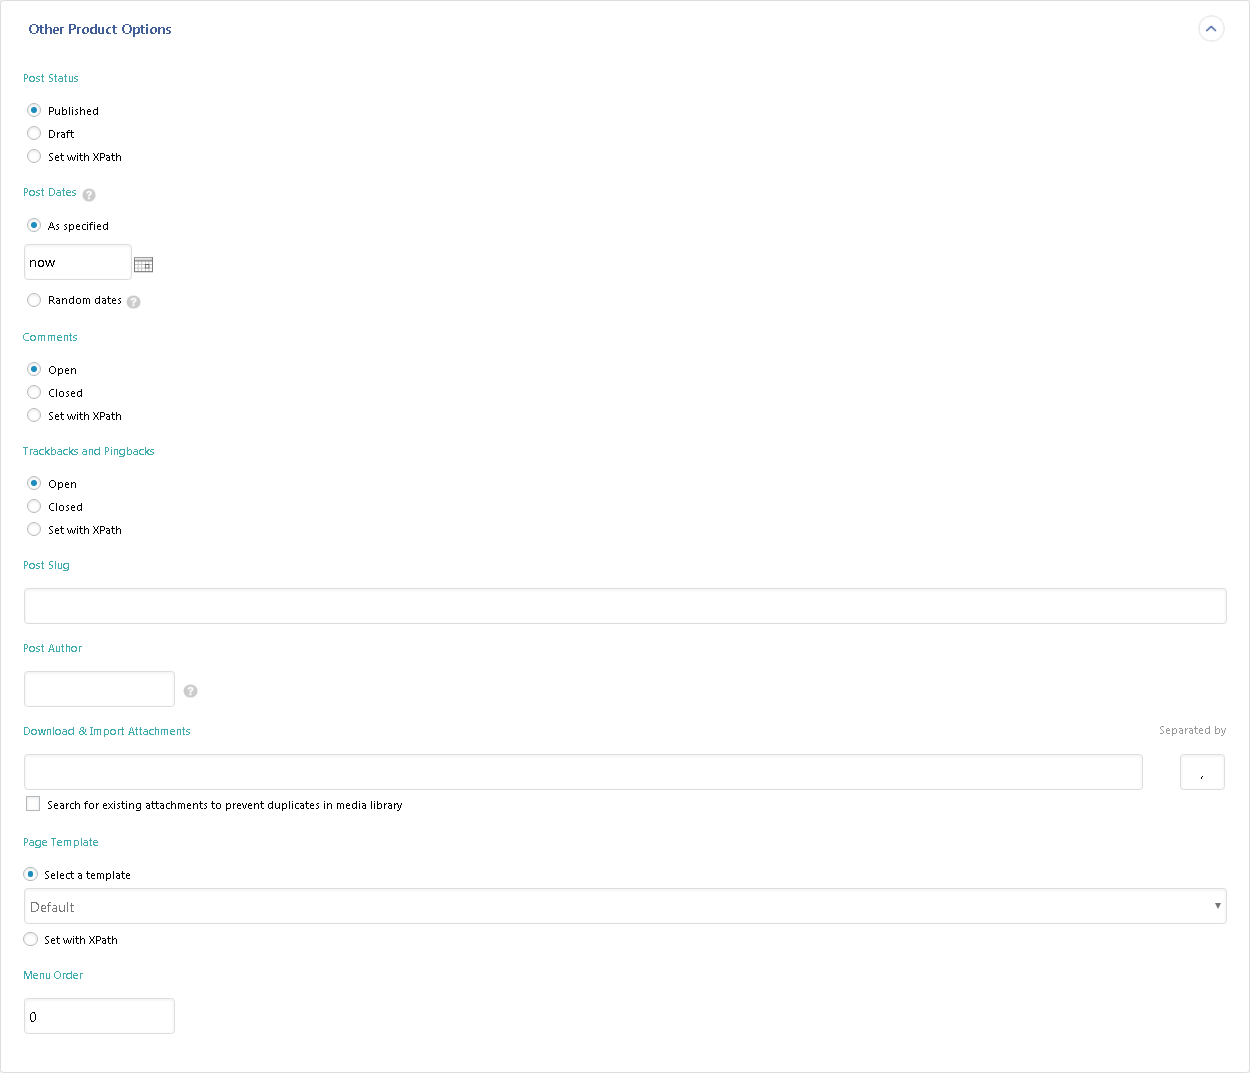
6. Here you can set the parameters of product publication:
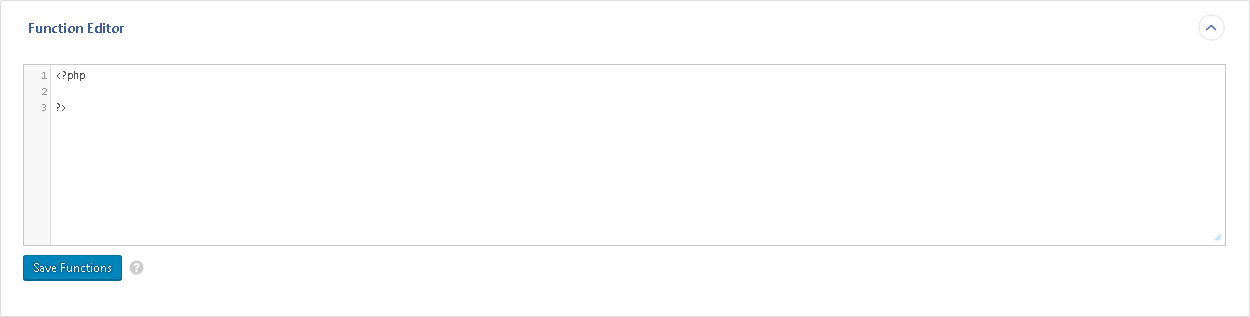
7. In the Function Editor block you can write additional scripts or functions that will be performed when importing.
8. Here you can save all import settings like a template or download the previously saved ones:

Managing Product Import
This is a page of previous imports. Here you can do the following actions:
1. To delete the import using Bulk Actions or by clicking on the Delete button under the import name.
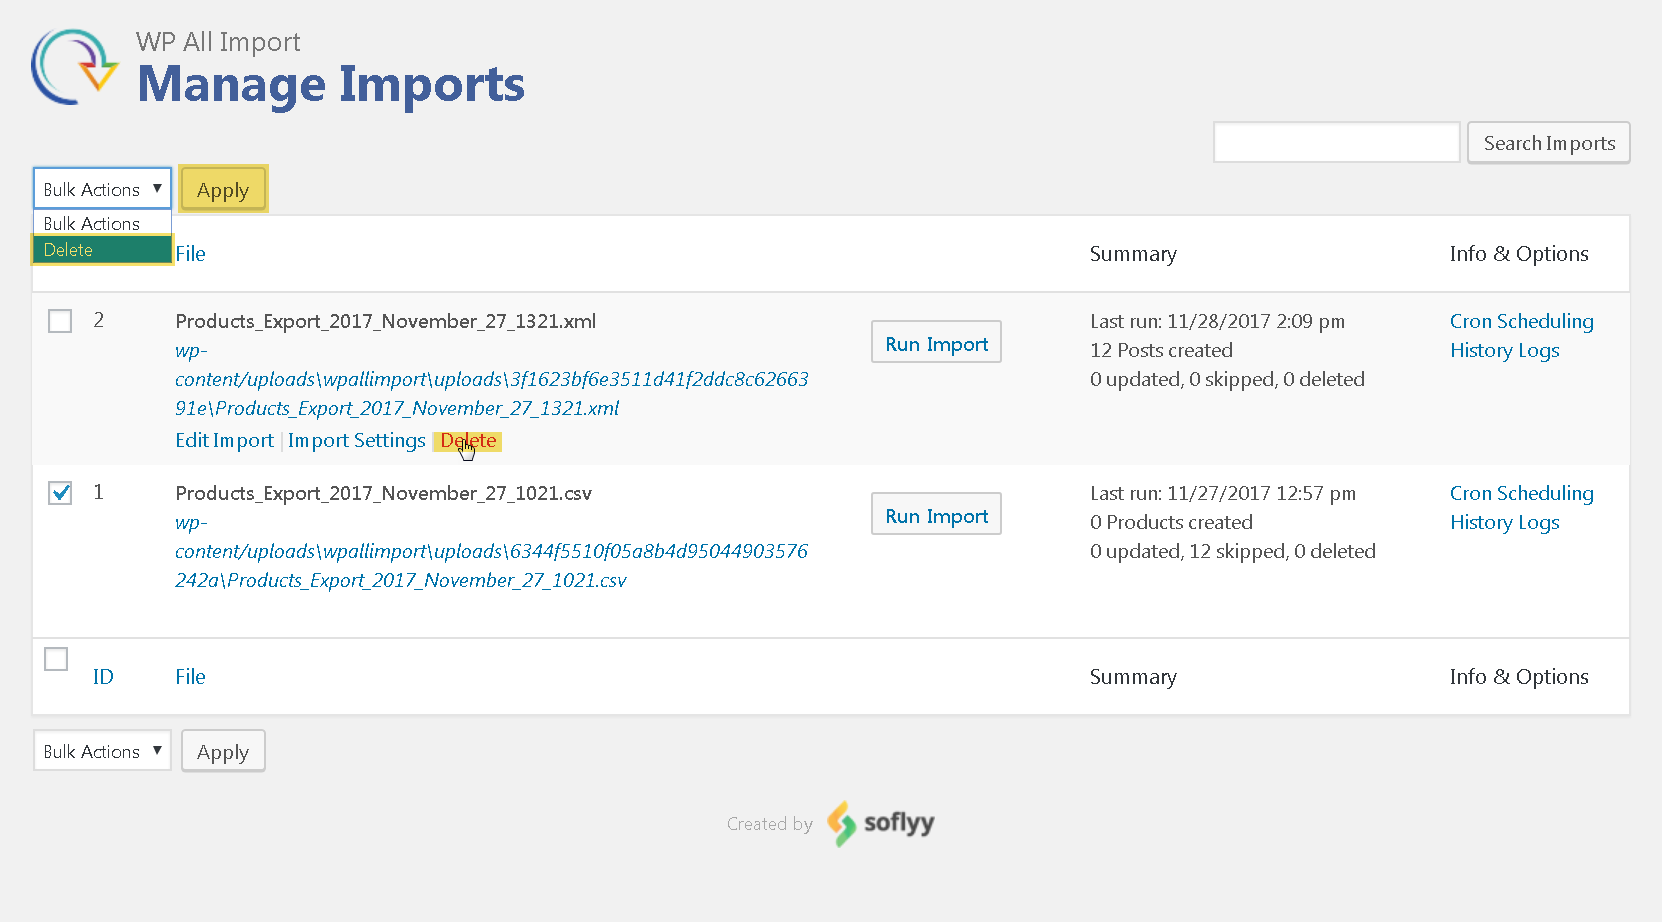
2. To download the exported file. Click on the URL under the import name.
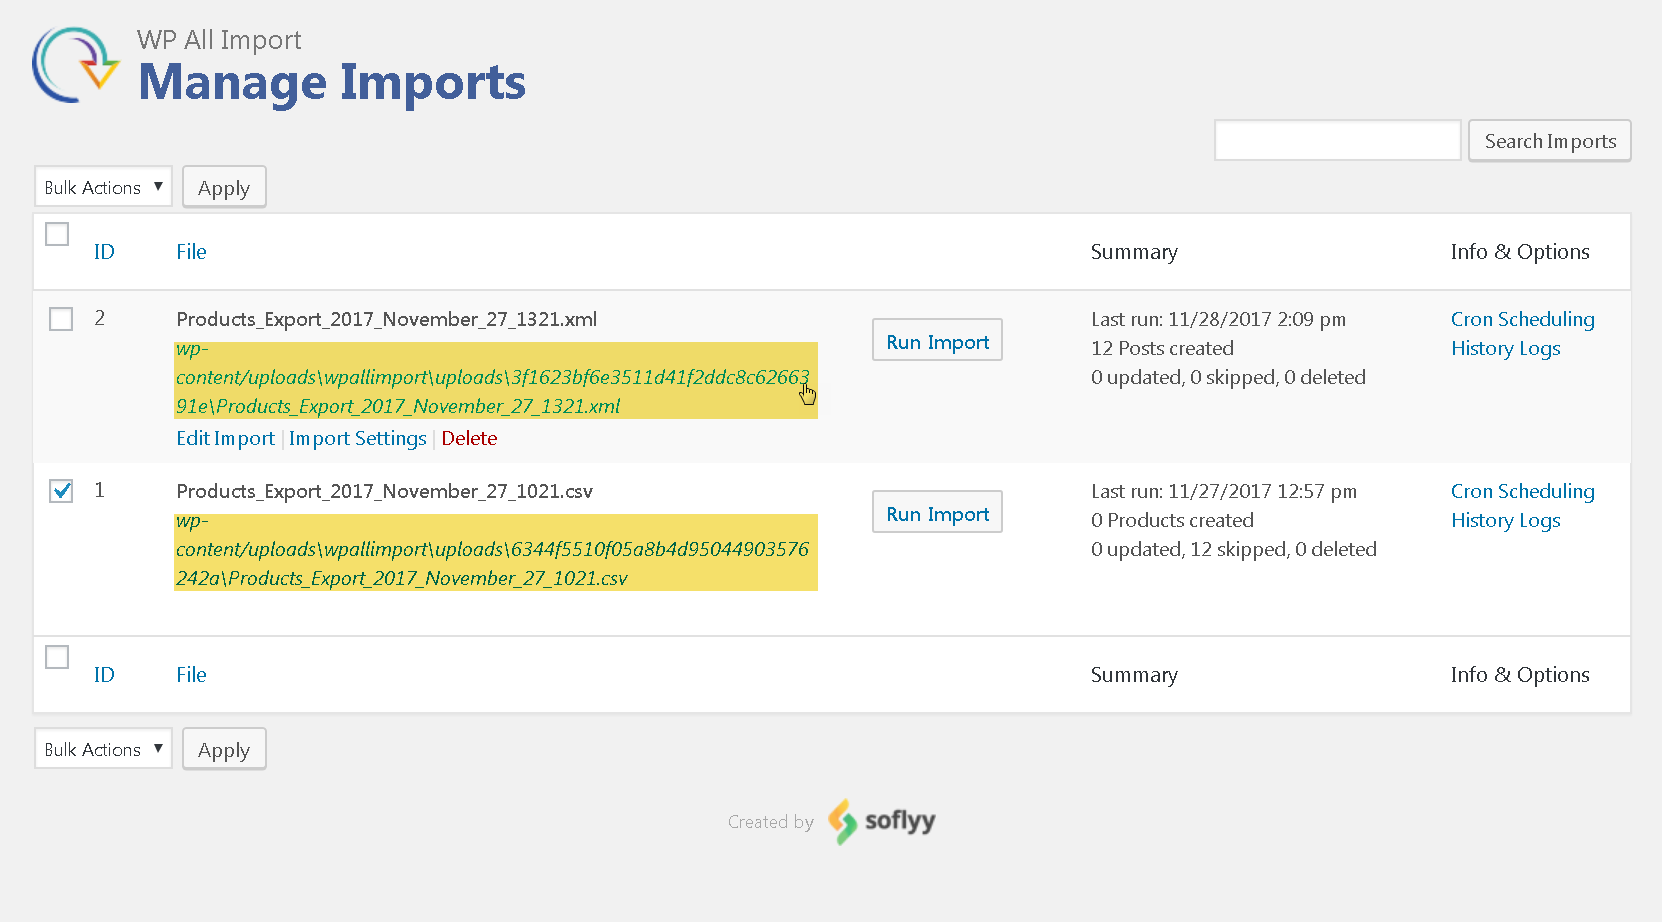
3. To change the import template. Click the ‘Edit Import’ button.
To change the import settings. Click the ‘Import Settings’ button. On this page you can change the import file.

5. Click the ‘Run Import’ button.
6. Cron Scheduling is a page of automatic importing setup.
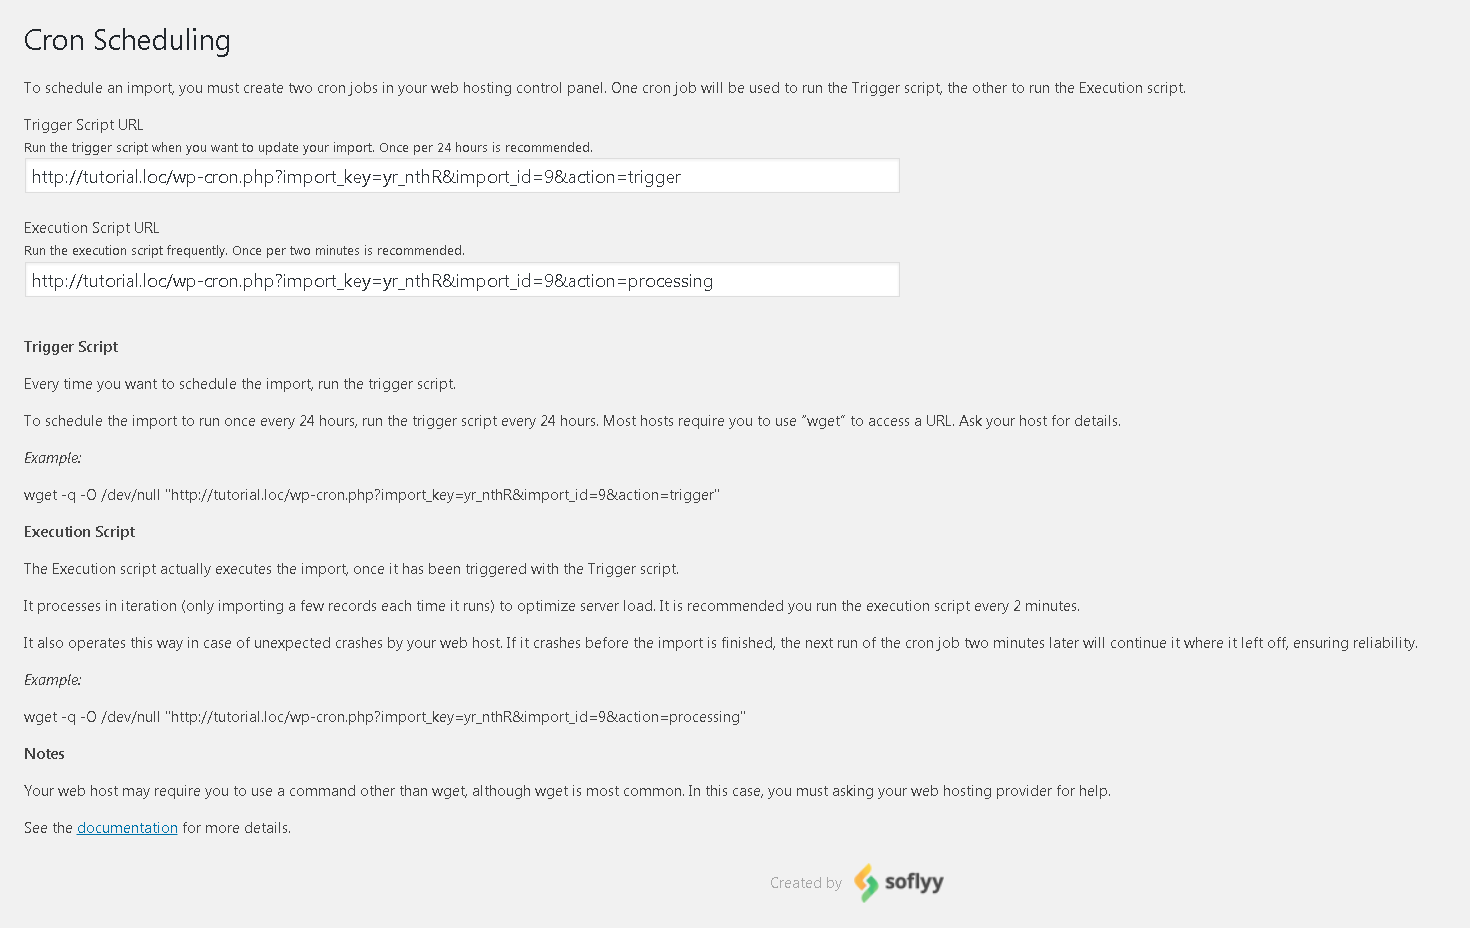
It doesn’t work if the file for the import is downloaded from the computer.
7. To view all the import logs.

Here you can view all the product importing logs.
You can see also at our Premmerce WooCommerce Plugins to get additional features for your store management and to increase SEO ranks of store
Comments

Ready to Get Started?
Join over 100,000 smart shop owners who use Premmerce plugins to power their WooCommerce stores.
Get started