How to Add Plugin to WordPress Directory – Guide and Tips

Since we developed our first plugins and decided to upload their free versions to WordPress.org to get general feedback, we’ve found out that it’s not that clear how to do it. In this article, we’re going to share our experience on how to add plugin to WordPress directory.
You can find some key information in the official guide on the plugin submission. Here are our step-by-step instructions:
Preparing for the submission
Enable WP_DEBUG in wp-config before the submission. Check the plugin for warnings, notices and errors. Fix if needed.
Annotations
There should be the annotations with the description of the plugin in the main file:
/**
* Plugin Name: Some Plugin Name
* Plugin URI: http://premmerce.com/some-plugin-name
* Description: Plugin description
* Version: 1.0
* Author: premmerce
* Author URI: http://premmerce.com
* License: GPL-2.0+
* License URI: http://www.gnu.org/licenses/gpl-2.0.txt
* Text Domain: premmerce-url-manager
* Domain Path: /languages
*/
Preparing readme.txt file
There should be a readme.txt file in the plugin’s root.
Here is the readme standard, here is the validator.
Before creating your own redme.txt file, we recommend that you download a few plugins from the repository. Pick the top popular plugins and look through their readme.txt files’ structure.
Adding screenshots to your plugin
For example – our plugin WooCommerce Permalink Manager have following screenshots:
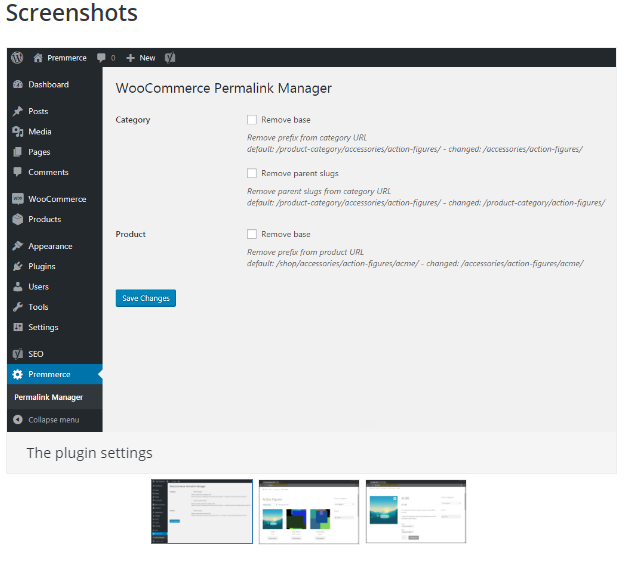
Note that the number of the screenshots and their names should be added through the readme.txt file:
== Screenshots ==
- The settings of plugin
- Category page with changed url
- Product page with changed url
The actual screenshots can be added after the approval of the module, when you get access to SVN.
Adding FAQ
We recommend you to add at least a few questions to your FAQ to make the plugin description more comprehensive. Similarly, it can be done through the readme.txt file.
Uploading the plugin
Check if there is no plugin with the same name as yours here. Then you can add plugin to WordPress directory.
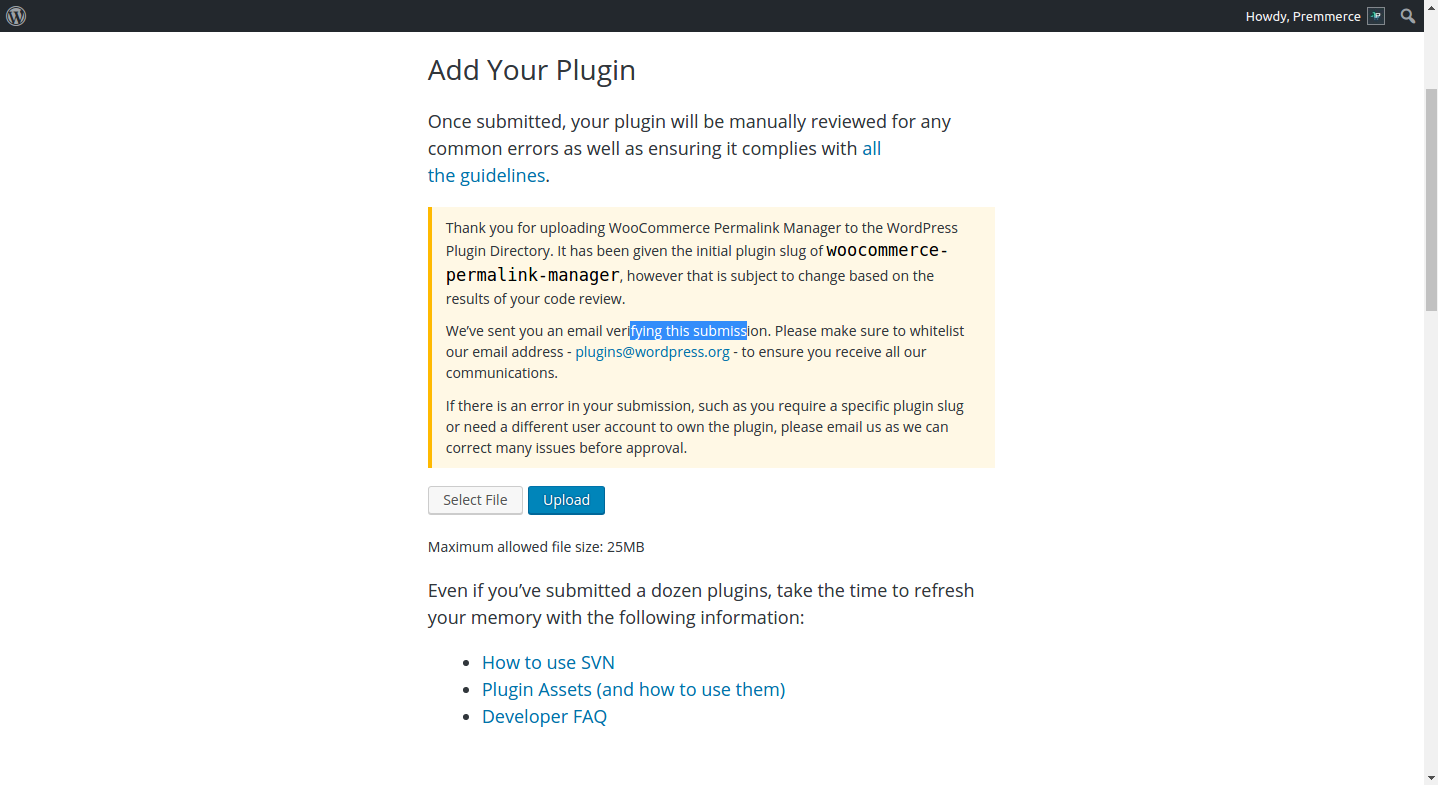
Create zip archive with the files and follow the adding plugin link. Add your archive to the form suggested.

Submit your plugin and you’ll see the following message:
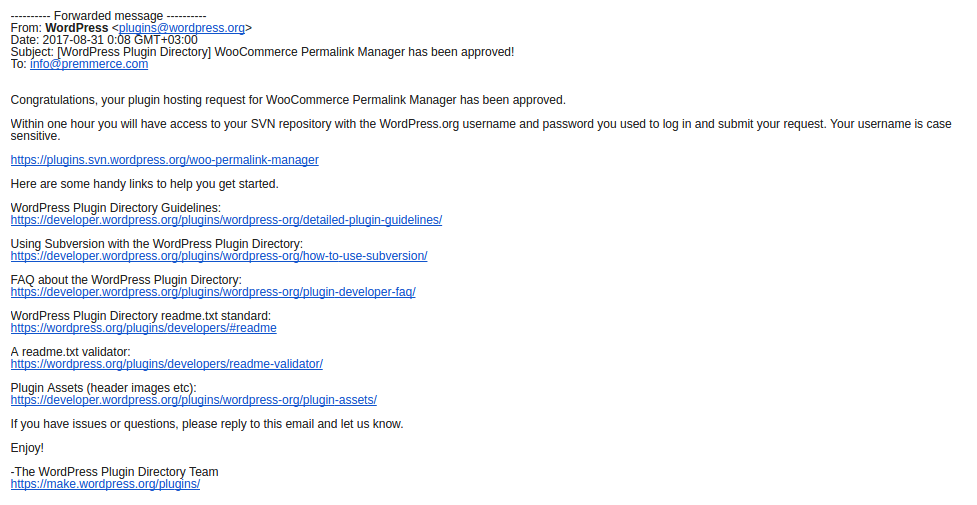
You’ll also get an email:

Wait until the WordPress team reviews and approves your plugin. In our case, it took around 12 hours. Our first two plugins were added on the first try without any remarks.
Working with SVN
After the approval of your plugin, you get an email with the link to the SVN repository created for your plugin.
Next use the following algorithm:
Install Subversion:
sudo apt-get install subversion
Create the working copy of the repository:
svn co https://plugins.svn.wordpress.org/some-plugin-name

You’ll have the following file structure in the created folder:
- /assets/ – headers, icons and screenshots in JPG or PNG format.
- banner-772×250.(jpg|png) – Normal Banner.
- banner-1544×500.(jpg|png) – High-DPI (Retina).
- banner-772×250-rtl.(jpg|png) – RTL normal Banner.
- banner-1544×500-rtl.(jpg|png) – RTL High-DPI (Retina).
- icon-128×128.(png|jpg) – Plugin icons are 128 pixels square.
- icon-256×256.(png|jpg) – HiDPI (retina) icons are supported at 256 pixels square.
- screenshot-1.png – The screenshots according to the readme.txt file.
- /branches/ – branches.
- /tags/ – releases.
- /trunk/ – development.

Add plugin code to the trunk folder.
Add the trunk folder:
svn add trunk/*
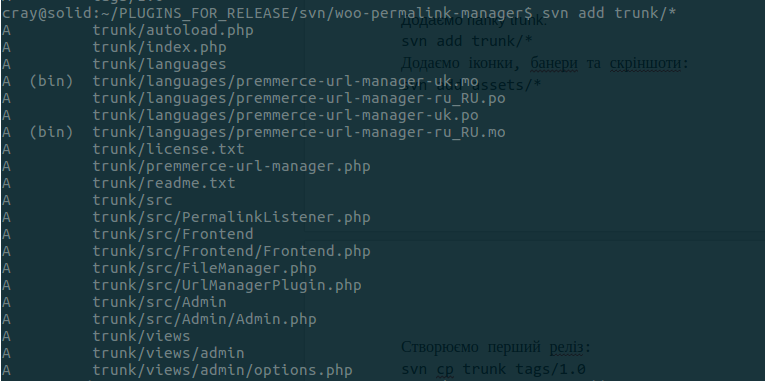
Add the icons, banners and screenshots:
svn add assets/*

Create the first release:
svn cp trunk tags/1.0
![]()
Move the changes from the working copy to the repository:
svn ci -m 'Initial release'
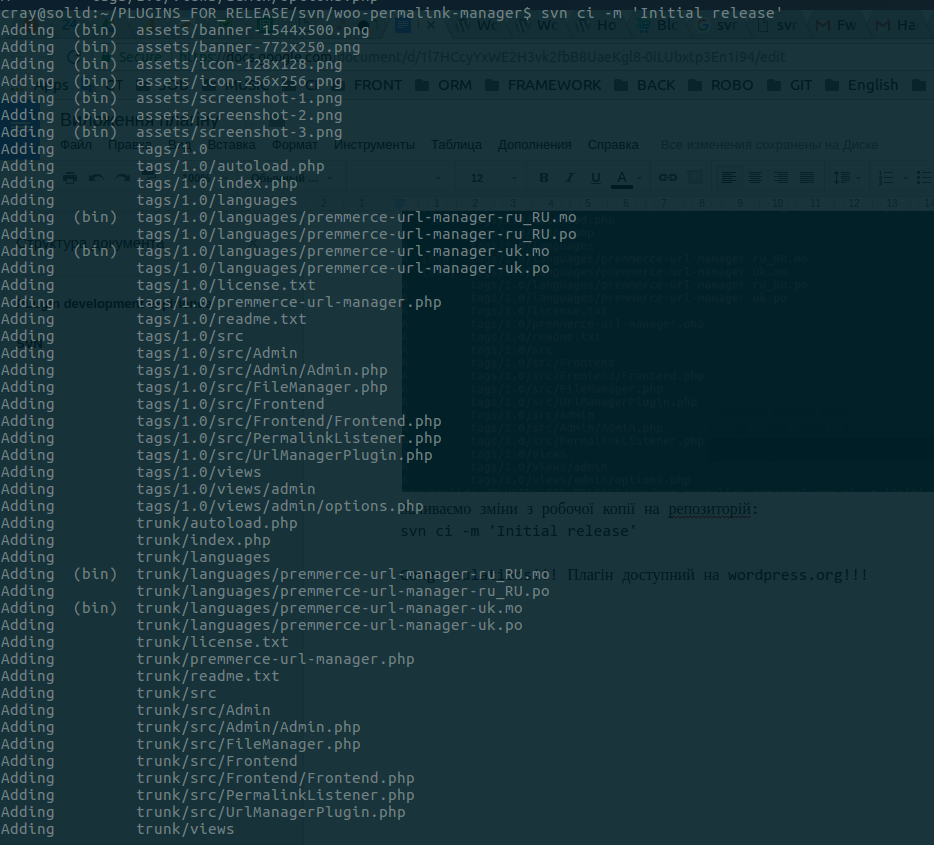
Congratulations! Your plugin is available on WordPress.org!
These are the main points about adding the plugins to the official WordPress directory we found important to cover. If you have some other questions, feel free to ask. We will gladly answer them by expanding this article.
Comments

Ready to Get Started?
Join over 100,000 smart shop owners who use Premmerce plugins to power their WooCommerce stores.
Get started